-
Monster Jam Birthday Party Ideas (Easy Monster Truck Party for Kids)

If you’re searching for Monster Jam themed birthday party ideas or planning a monster truck themed birthday party for kids, this guide has everything you need to pull it off without stress.
From easy decorations and food ideas to fun games and simple setup tips, this Monster Jam party theme is perfect for busy moms who still want something fun and memorable.
When my son turned four, there was no question — we were going all in on a Monster Jam birthday party.

You don’t need a huge venue or expensive entertainment.
With a few creative decorations, themed snacks, and some fun monster truck details, you can turn your home into a mini Monster Jam arena that kids will go crazy for.

Here’s exactly how I set up our Monster Jam themed birthday party, plus easy ideas you can copy for your own celebration.
Monster Jam Party Decorations
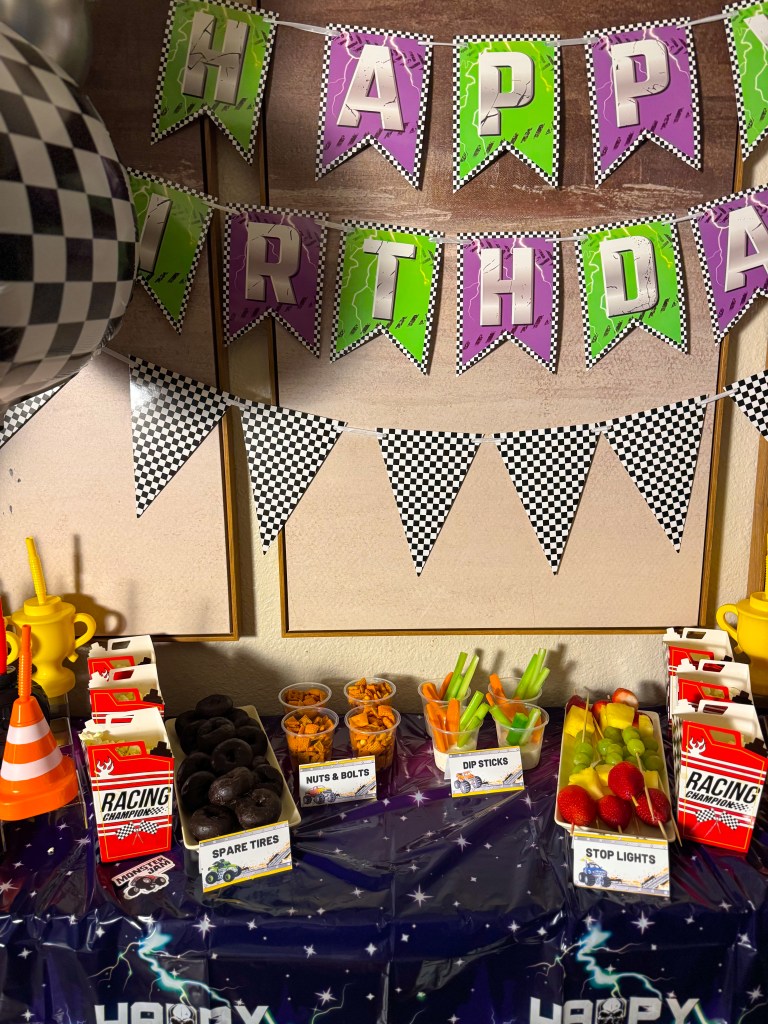
For our party setup, I focused on the classic Monster Jam colors:
- Neon green
- Purple
- Black
- Checkered racing flags
These colors instantly give that high-energy racing vibe.

What I Used
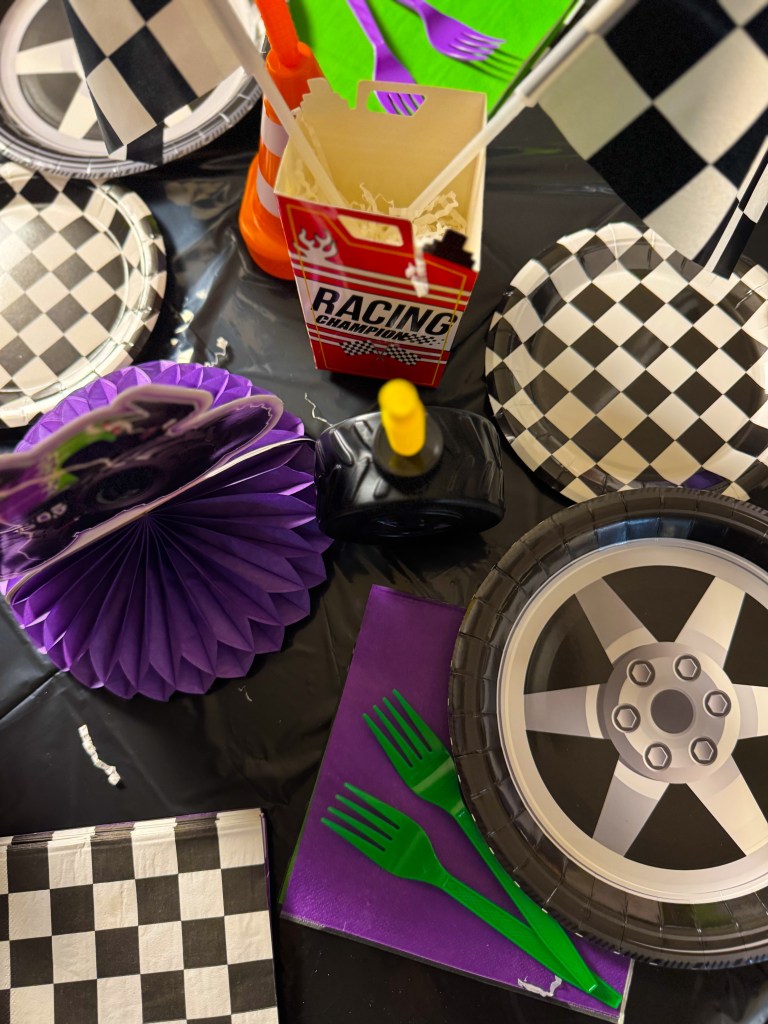
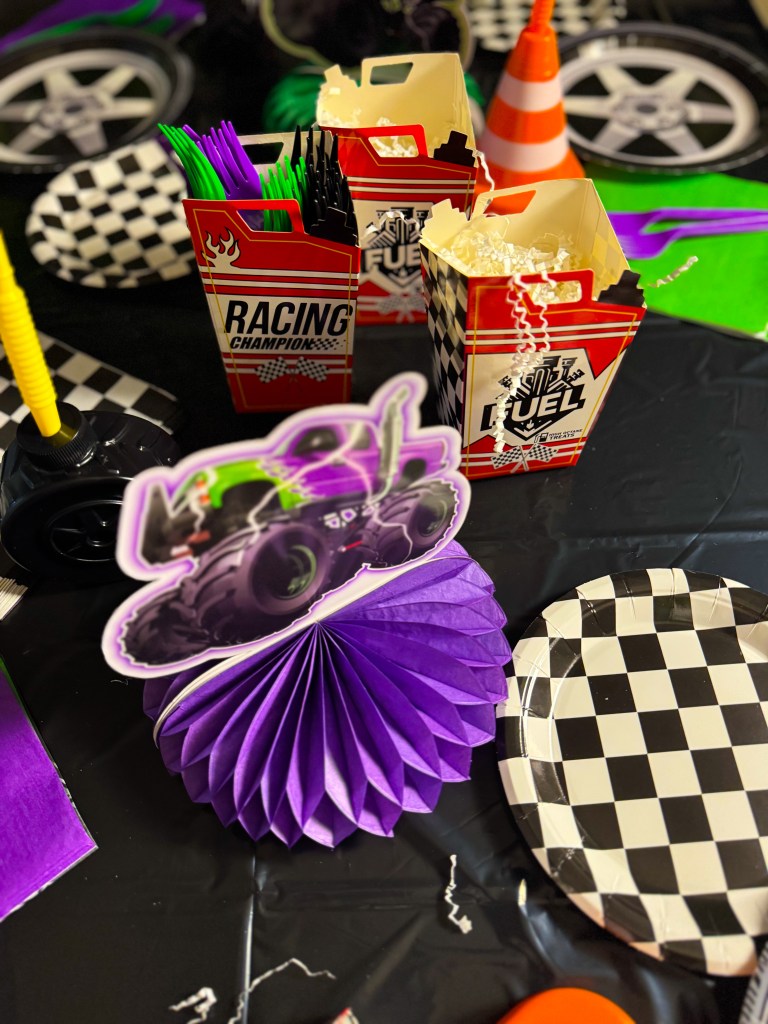
- Monster Jam tablecloth
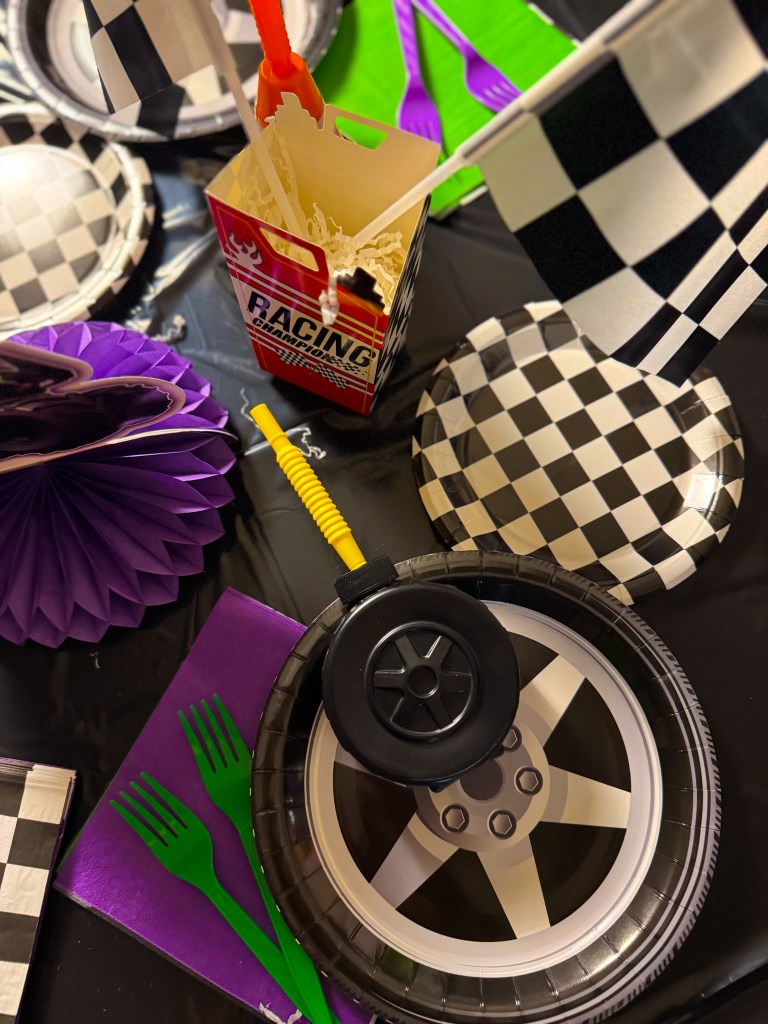
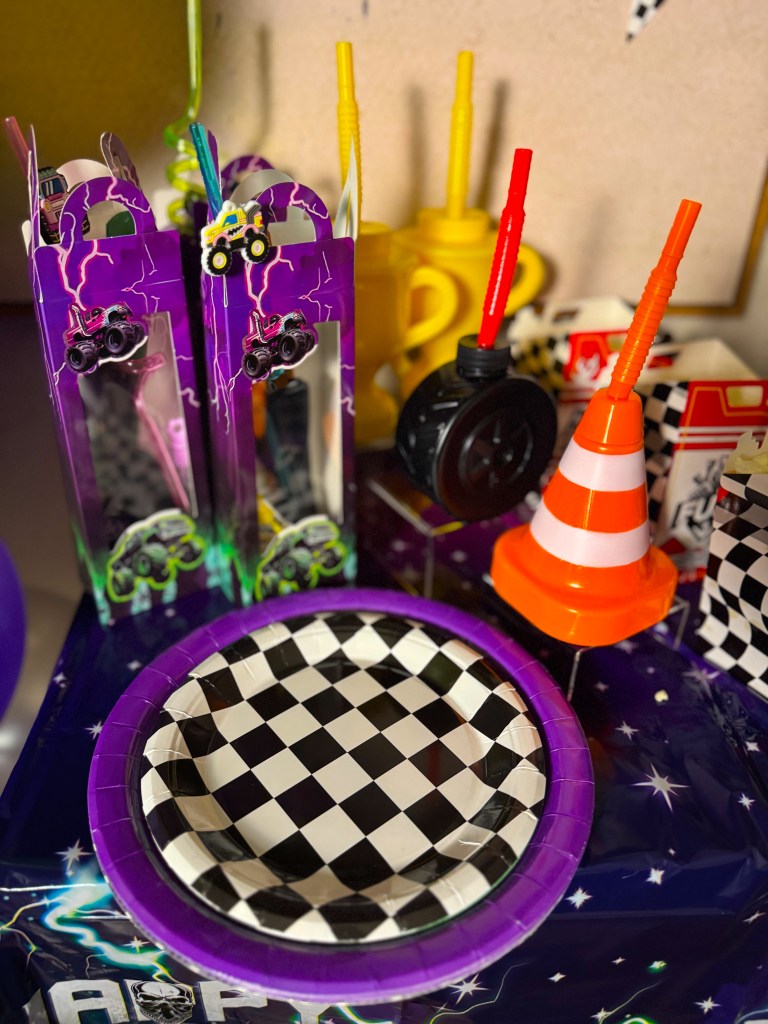
- Checkered racing plates
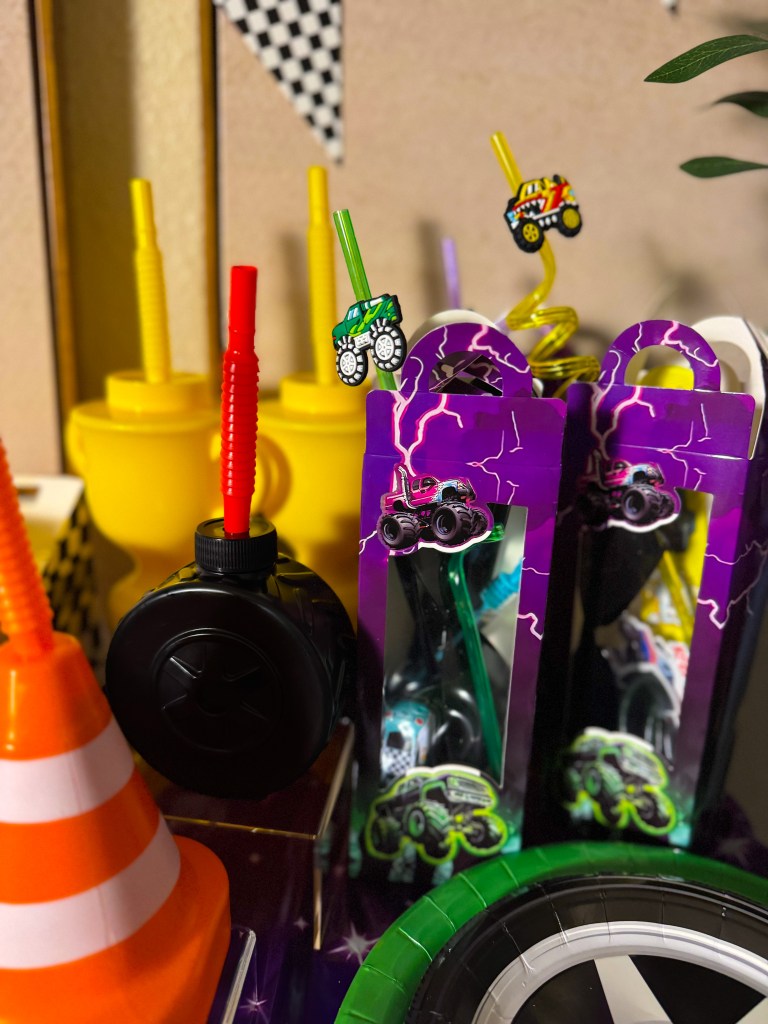
- Wheel-shaped plates
- Checkered flags
- Traffic cones
- Green and purple balloons
- Monster truck decorations
The checkered racing flags instantly made the setup look like a finish line, and the traffic cones were such a fun touch that the kids loved. All of which came in one complete set, get it here.

Monster Jam Party Table Setup
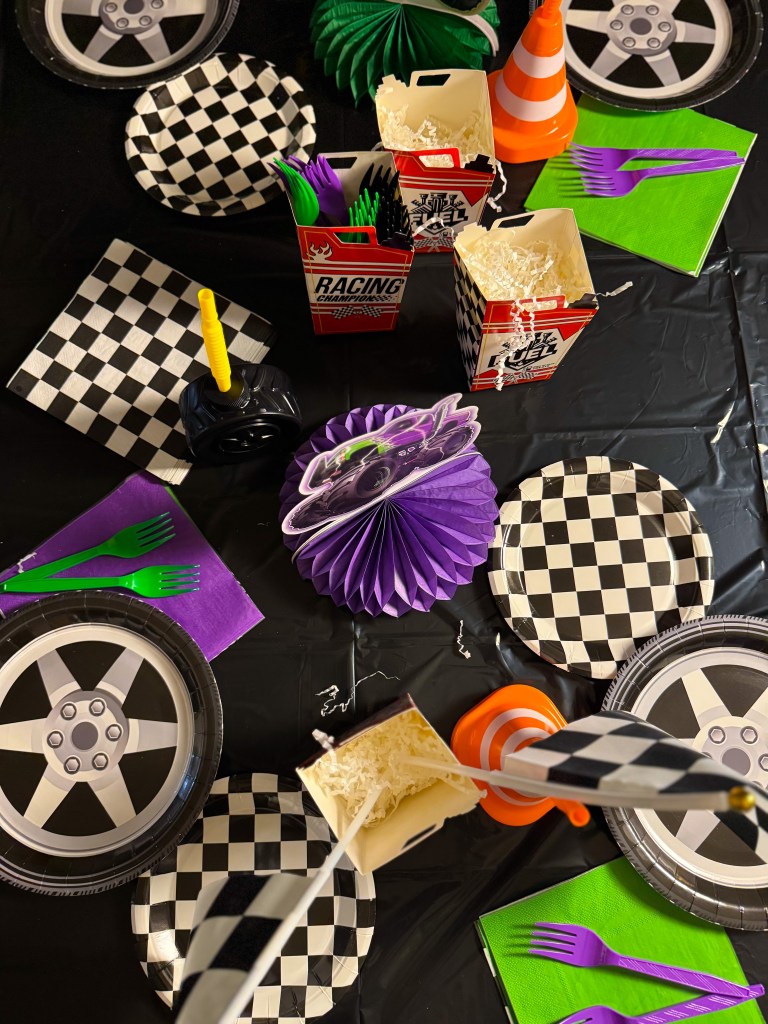
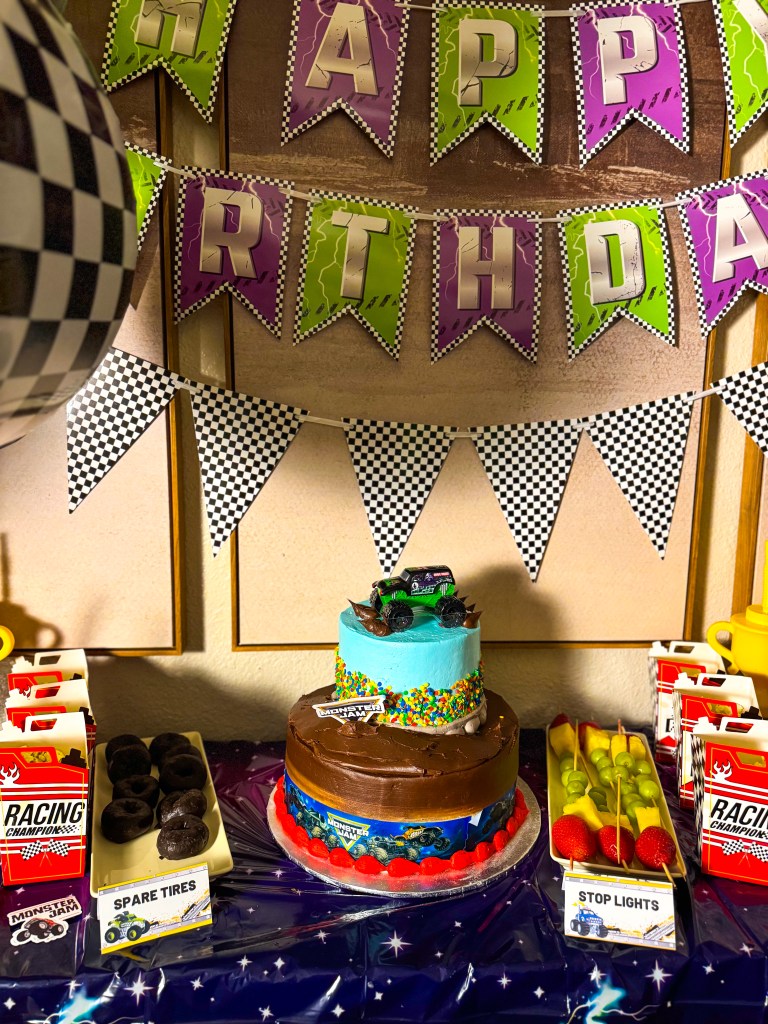
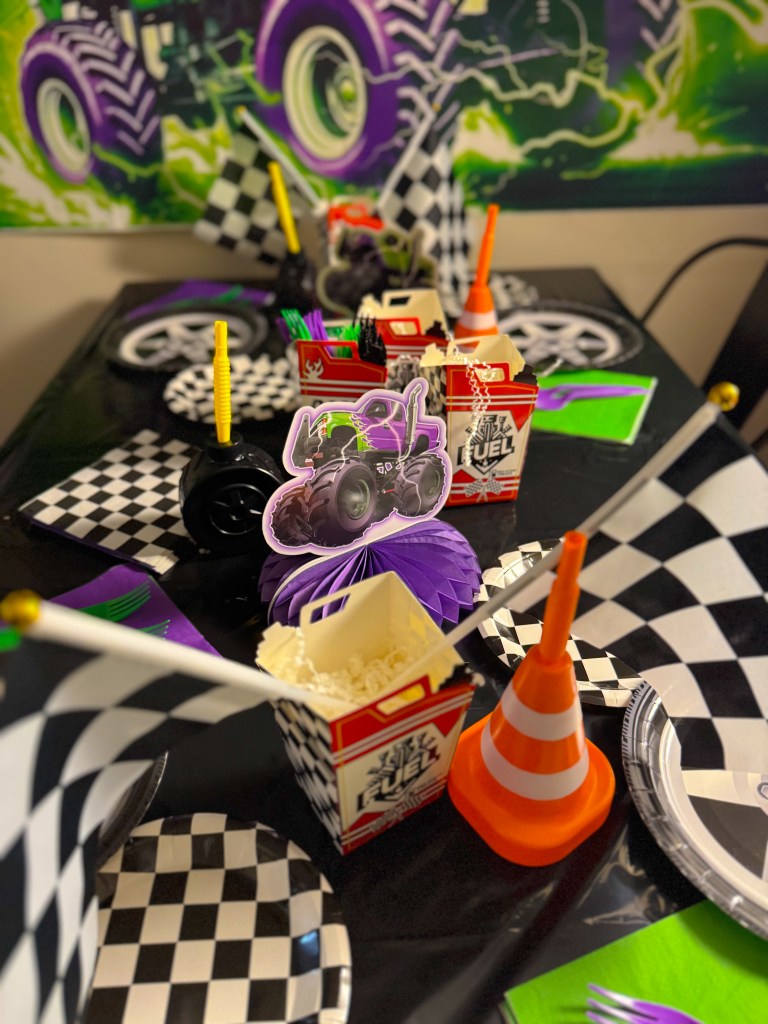
The main table was designed to look like a monster truck pit stop station.
I added:
- Racing flag decorations
- Tire plates
- Monster truck themed treat boxes
- Traffic cones as centerpieces, which also served as cups
Little details like these make the table feel like part of the Monster Jam arena.
Kids immediately recognized the theme the second they walked in.



Monster Truck Party Food Ideas
One of the easiest ways to make a themed party feel special is by renaming the food.
It takes the same snacks kids already love and turns them into something fun.
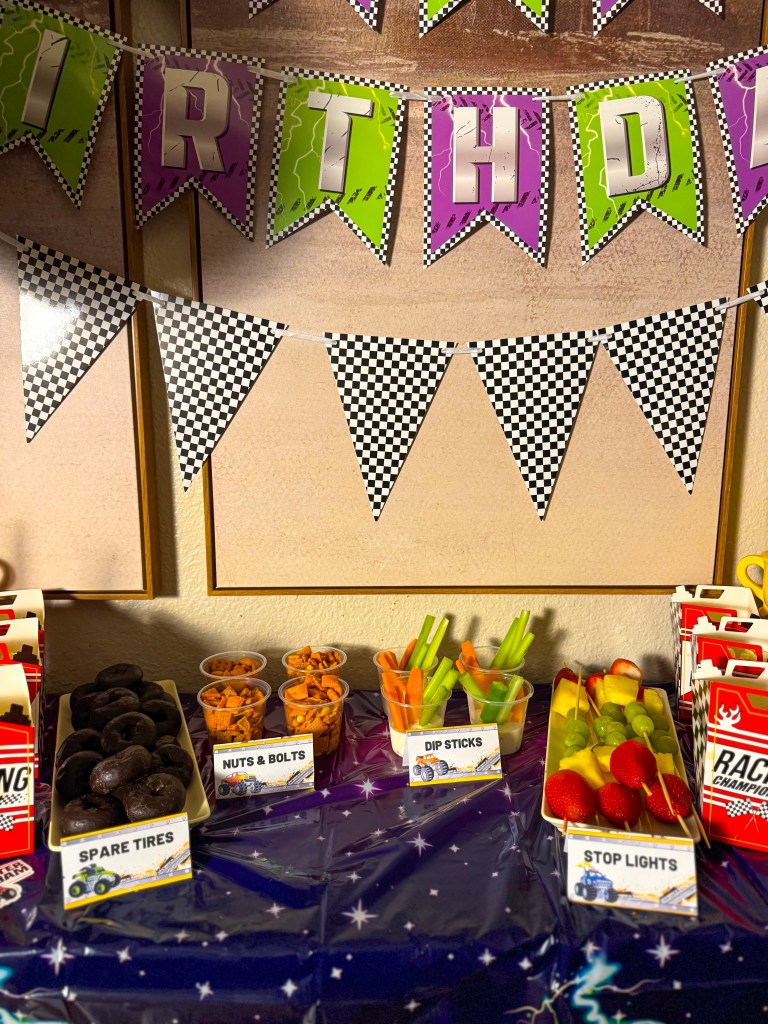
Here are the themed foods we used.
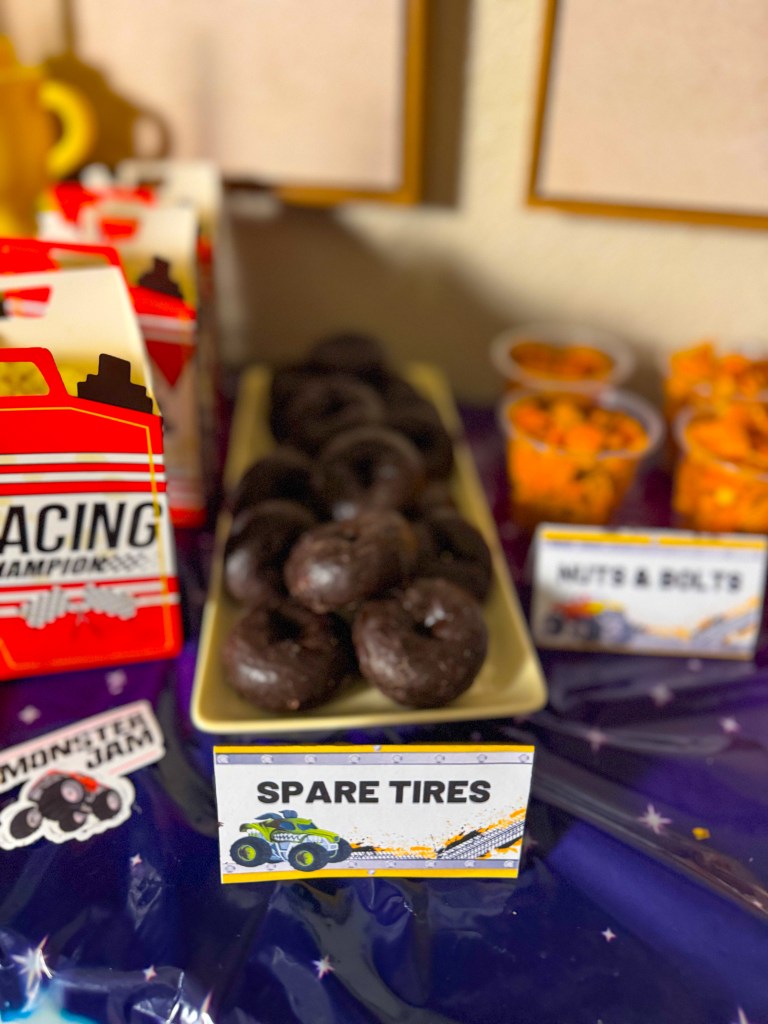
Spare Tires (Chocolate Donuts)
Chocolate donuts were the perfect “spare tires.”
They look exactly like tires, so they fit the theme without any extra work.
Just place them on a tray and add a small label. I actually downloaded these labels and edited them myself. Check them out here.
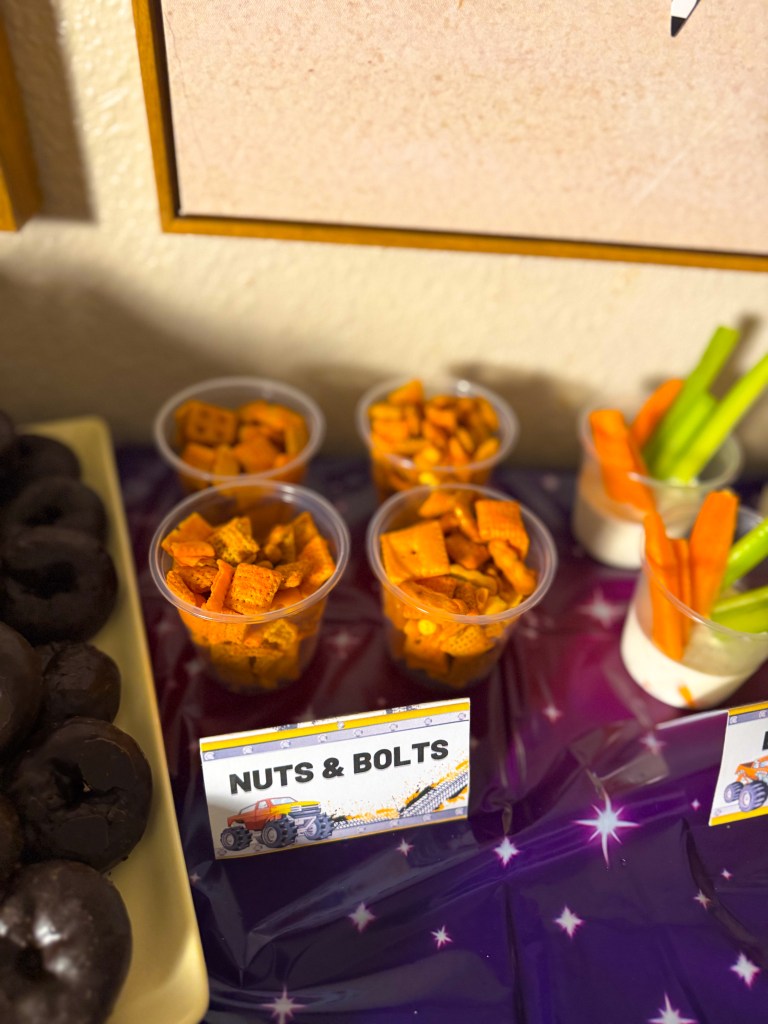
Nuts & Bolts Snack Mix
For “nuts and bolts,” I used a snack mix with crackers and crunchy snacks.
It’s simple, but the name makes it feel like part of a mechanic’s toolbox.
Kids loved grabbing their own little cup. I used these snack cups for the perfect serving amount.
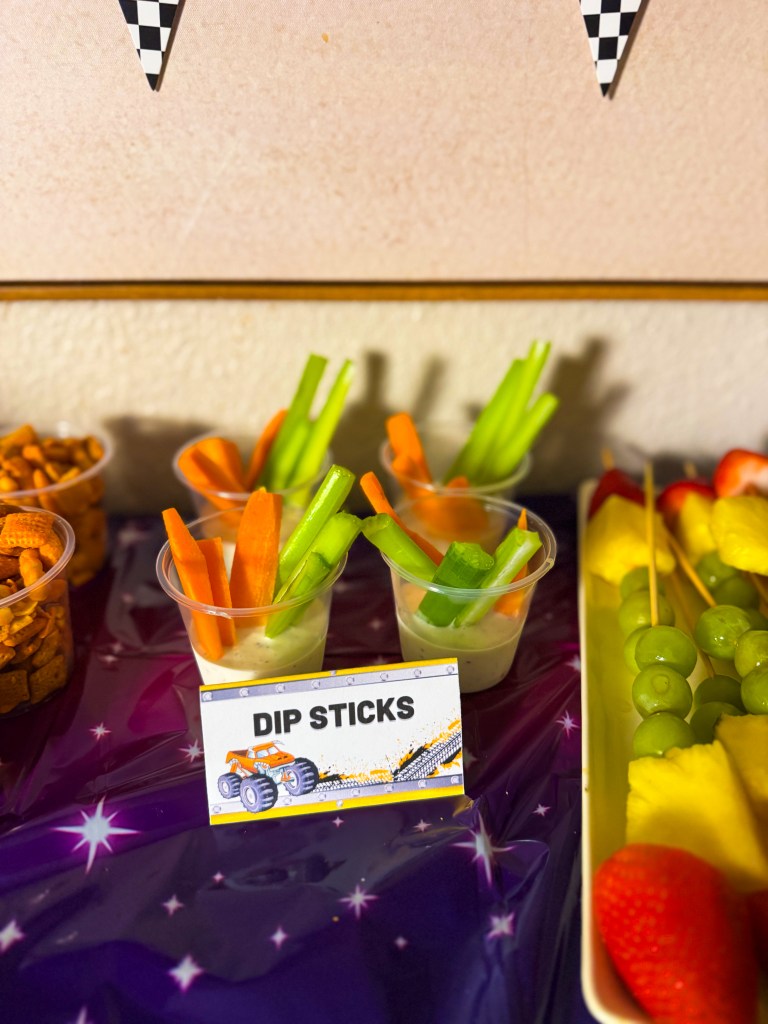
Dip Sticks (Veggies & Ranch)
To balance out all the sweets, I added veggie cups with ranch dressing.
Each cup had:
- Carrot sticks
- Celery
- Ranch dip
The label: Dip Sticks
Even picky eaters ended up grabbing these because they looked fun.
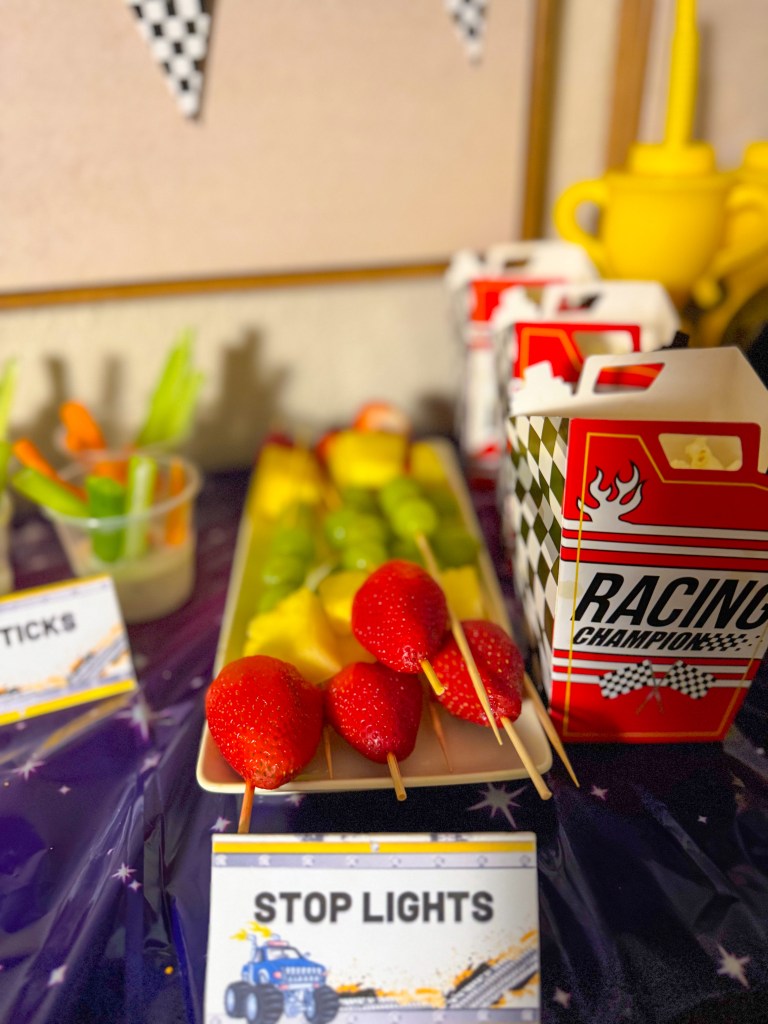
Stop Lights (Fruit Skewers)
These were such a hit.
I made fruit skewers using:
- Strawberries
- Pineapple
- Green grapes
The colors look just like a traffic light, so the name Stop Lights was perfect.
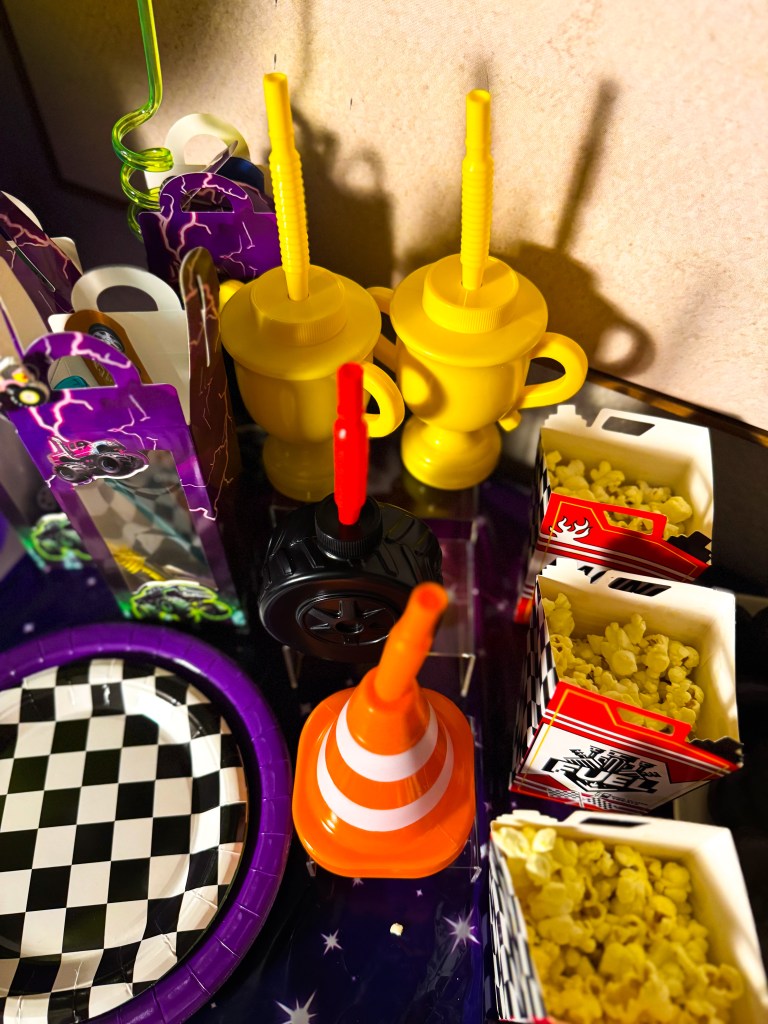
Racing Fuel Snack Boxes
These little boxes were labeled Fuel and filled with popcorn.
They doubled as both decor and snacks, which is one of my favorite hosting tricks.
Monster Jam Party Favor Ideas
For party favors, I kept things simple but themed.
Each guest got a Monster Jam favor box filled with:
- A fun monster truck straw
- A toy monster truck
- Candy
These little boxes matched the decorations perfectly and made the kids feel like they were taking home their own Monster Jam prize pack.



Monster Jam Balloon Setup
The balloon arch added a lot of excitement to the party space.
We used:
- Neon green balloons
- Purple balloons
- Silver balloons
- Checkered racing balloons
The giant tire balloon might have been my favorite detail.
It tied the whole theme together.




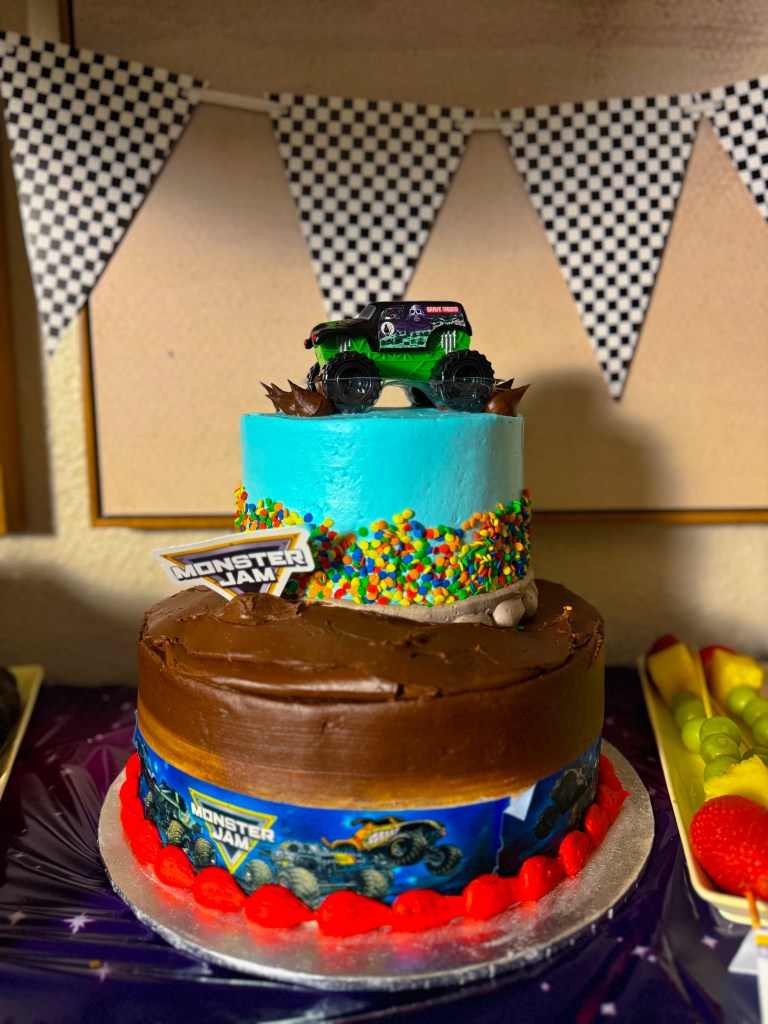
Monster Jam Birthday Cake
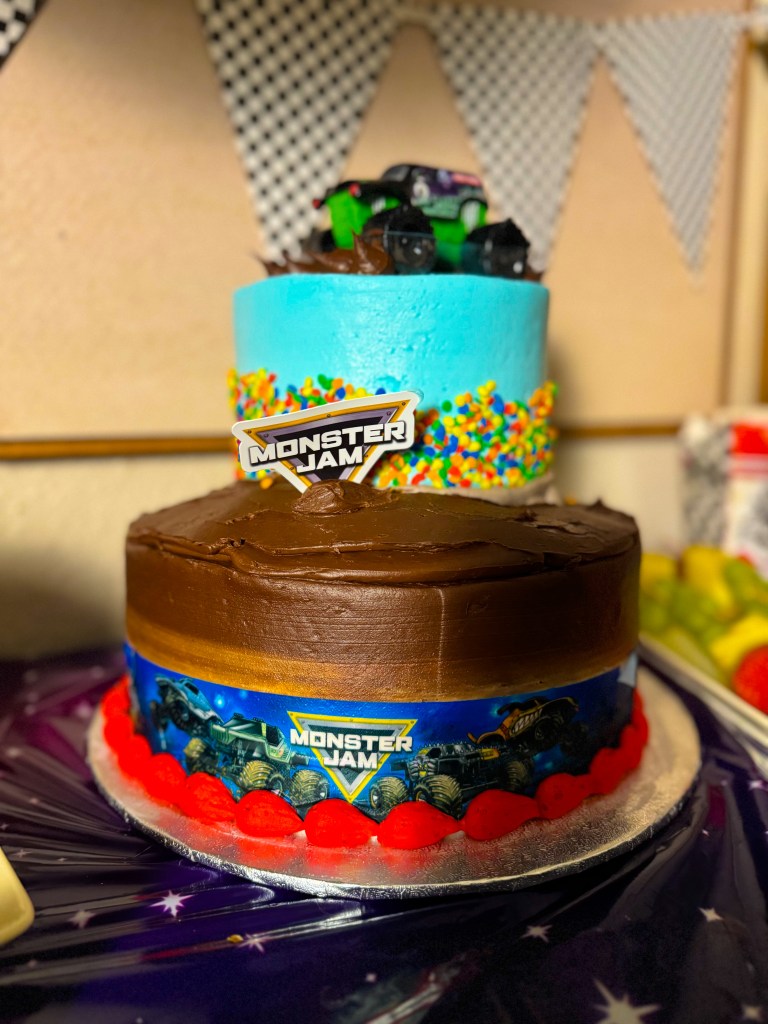
The cake was designed to look like a monster truck arena.
The top featured a monster truck driving over chocolate “dirt,” which made it look like the truck was doing a stunt.
The bright sprinkles around the top layer gave it that fun Monster Jam energy.
And of course, the kids were obsessed.


Why a Monster Jam Birthday Party is Perfect for Kids
This theme works so well for birthdays because:
- Kids already love monster trucks
- Decorations are easy to find
- Snacks are simple to theme
- It works great indoors or outdoors
You can keep it simple or go all out, and it still looks amazing.
Easy Monster Jam Party Activity Ideas
If you want to add a few activities, here are some fun ideas:
Monster Truck Racing Track
Create a mini racetrack with toy trucks.Build-A-Truck Station
Kids decorate their own cardboard monster truck.Monster Truck Obstacle Course
Use cones, ramps, and boxes for a fun challenge.




Final Thoughts
Throwing a Monster Jam birthday party turned out to be one of the most fun celebrations we’ve had.
It was colorful, easy to set up, and the kids were completely obsessed with the theme.
If your child loves monster trucks, this party theme is guaranteed to be a hit.
And the best part? Most of these ideas are simple enough to recreate without spending a fortune.

PIN THESE FOR LATER…


-
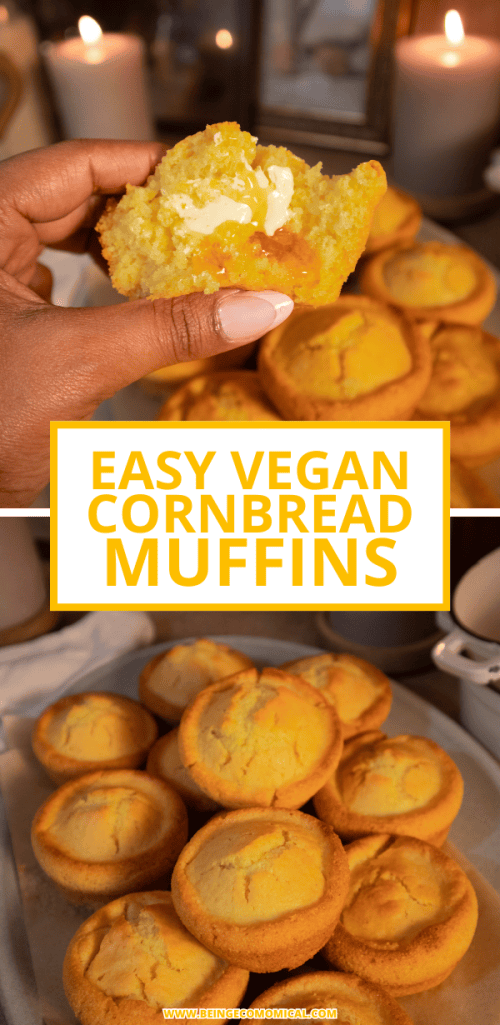
Easy Vegan Cornbread Muffins

If you need a simple, crowd-pleasing side dish that goes with almost everything, these vegan cornbread muffins are it.
They’re soft, slightly sweet, perfectly moist, and made with basic pantry ingredients — no eggs, no dairy, no complicated substitutes. Just one bowl, one pan, and done.

I first made these to go with a big pot of vegetarian chili, and now they’ve become a staple in our house—these soft and fluffy vegan cornbread muffins pair perfectly with cozy comfort food dinners.
These are the kind of muffins that turn any simple meal into comfort food—especially when paired with a warm soup or cozy casserole. You can browse my comforting soup recipes and easy casserole ideas for more meals like this.
If you’re planning out dinners for the week, these muffins make an easy side for meals from my chicken dinner roundup or simple chicken breast recipes.
We also love serving these with seafood dishes like salmon patties, honey garlic salmon, or even southern fried catfish. Add a side of mashed potatoes or Mexican street corn, and you’ve got a full comfort food dinner the whole family will love.
If you’re hosting, these muffins go great alongside appetizers like stuffed jalapeño peppers or even as part of a full dinner spread.
These are also perfect for holiday meals—whether you’re planning Thanksgiving side dishes, Christmas dinner ideas, or cozy fall dinner ideas.
And don’t count them out in warmer months—they’re just as good with meals from my summer dinner ideas list.
If you love baking from scratch, you’ll also want to try recipes from my fall baking recipes or desserts like my homemade vegan sweet potato pie.
For more homemade favorites, pair these with snacks like my vegan soft pretzels or sides like vegan macaroni salad.
Related Posts:
Why You’ll Love These Vegan Cornbread Muffins
✔ Soft and moist (not dry or crumbly)
✔ Slightly sweet, kid-friendly flavor
✔ Made with simple pantry ingredients
✔ One bowl = easy cleanup
✔ No eggs or dairy needed
✔ Perfect side dish for chili, soups, and holiday meals
Ingredients You’ll Need
- 1¼ cups all-purpose flour
- 1 cup yellow cornmeal
- ⅔ cup granulated sugar
- 1 teaspoon salt
- 1 tablespoon baking powder
- 1¼ cups unsweetened plant milk (almond milk works great)
- ⅓ cup neutral oil (canola or vegetable oil)
How to Make Vegan Cornbread Muffins
Preheat oven to 375–400°F. Line a muffin tin or grease lightly.
Mix dry ingredients
In a large bowl, whisk together flour, cornmeal, sugar, salt, and baking powder.Add wet ingredients
Pour in the plant milk and oil. Stir until just combined. Do not overmix.Fill muffin cups
Fill about ¾ full.Bake
Bake for 15–20 minutes, or until a toothpick inserted in the center comes out clean.Cool slightly before serving
They’re amazing warm.Pro Tip for Bakery-Style Muffin Tops
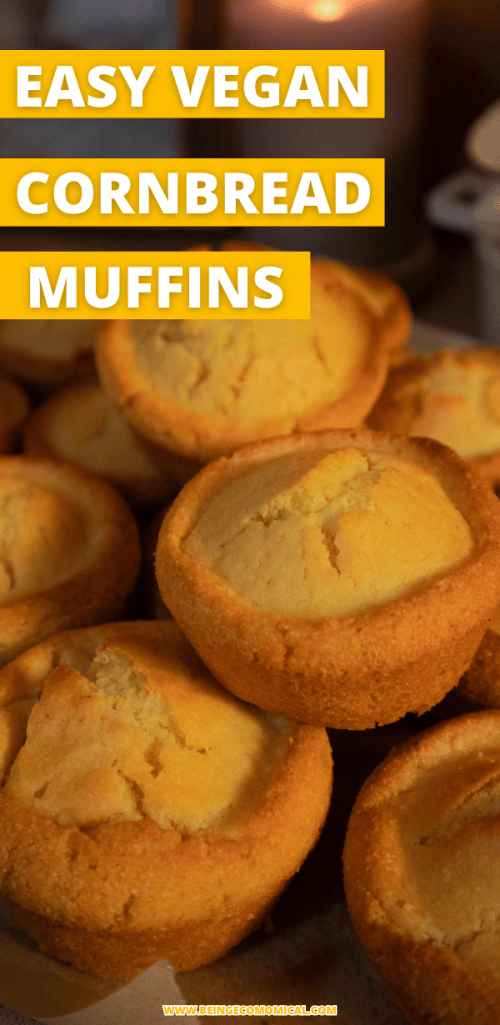
Start baking at 400°F for the first 5 minutes, then reduce to 375°F for the remaining time.
This helps create those beautiful domed tops that look amazing in photos and even better on the table.


What to Serve with Cornbread Muffins
These go with almost anything, but our favorites are:
- Chili (especially vegetarian chili)
- Vegetable soup
- Pasta dishes
- BBQ-style meals
- Holiday dinners
- Simple weeknight meals
- Hearty soups and chilis
- Seafood dishes like salmon and catfish
- Comfort dinners and casseroles
- Holiday spreads and seasonal meals
Honestly, sometimes we just eat them warm with a little vegan butter and call it a snack.

Optional Add-Ins
Want to customize them? Try:Savory options
- Corn kernels
- Diced jalapeños
- Green chiles
- Vegan shredded cheese
Sweet options
Vegan honey substitute
Maple drizzle
Cinnamon sugar tops

Storage Tips
Room temperature:
Store in an airtight container for up to 2 days.Refrigerator:
Up to 5 days.Freezer:
Freeze for up to 3 months. Reheat in microwave or oven.
Can You Make This Recipe Oil-Free?
Oil is what keeps these muffins soft and moist. If you substitute it, the texture will likely be more dense and dry. For best results, stick with the oil.

Are These Cornbread Muffins Sweet or Savory?
They lean slightly sweet — classic crowd-pleasing cornbread flavor. If you prefer less sweetness, you can reduce the sugar slightly.

Final Thoughts
These vegan cornbread muffins are one of those recipes you’ll come back to again and again. They’re simple, dependable, and make even the most basic dinner feel cozy and complete.
If you’re feeding a busy family (or just want something easy that actually tastes good), this recipe checks every box.
Vegan Cornbread Muffins

These vegan cornbread muffins are soft, moist, slightly sweet, and made with simple pantry ingredients — no eggs or dairy needed. They’re the perfect easy side for chili, soups, pasta, or any cozy family meal.
- 1¼ cups all-purpose flour
- 1 cup yellow cornmeal
- ⅔ cup granulated sugar
- 1 teaspoon salt
- 1 tablespoon baking powder
- 1¼ cups unsweetened plant milk (almond milk works great)
- ⅓ cup neutral oil (canola or vegetable oil)
- Preheat oven to 375–400°F. Line a muffin tin with paper liners or lightly grease.
Mix dry ingredients
- In a large bowl, whisk together flour, cornmeal, sugar, salt, and baking powder.
Add wet ingredients
- Pour in the plant milk and oil. Stir until just combined. Do not overmix.
Fill muffin cups
- Divide batter evenly, filling each cup about ¾ full.
Bake
- Bake for 15–20 minutes, or until a toothpick inserted in the center comes out clean.
Cool slightly
- Let muffins cool for a few minutes before serving. Best enjoyed warm.
-
For bakery-style domed tops, bake at 400°F for the first 5 minutes, then reduce to 375°F for the remaining time.
-
Muffins will be slightly sweet. Reduce sugar slightly if you prefer a more savory cornbread.
-
Do not overmix the batter — this keeps the texture soft and tender.
Optional Add-Ins
Savory
-
Corn kernels
-
Diced jalapeños
-
Green chiles
-
Vegan shredded cheese
Sweet
-
Maple drizzle
-
Cinnamon sugar topping
-
Vegan honey substitute
Storage
Room temperature:
Store in an airtight container for up to 2 days.Refrigerator:
Up to 5 days.Freezer:
Freeze for up to 3 months. Reheat in microwave or oven until warm.Pin these for later…



-
Vegan Mushroom Chili (Hearty, Meaty Texture, One-Pot Comfort Food)

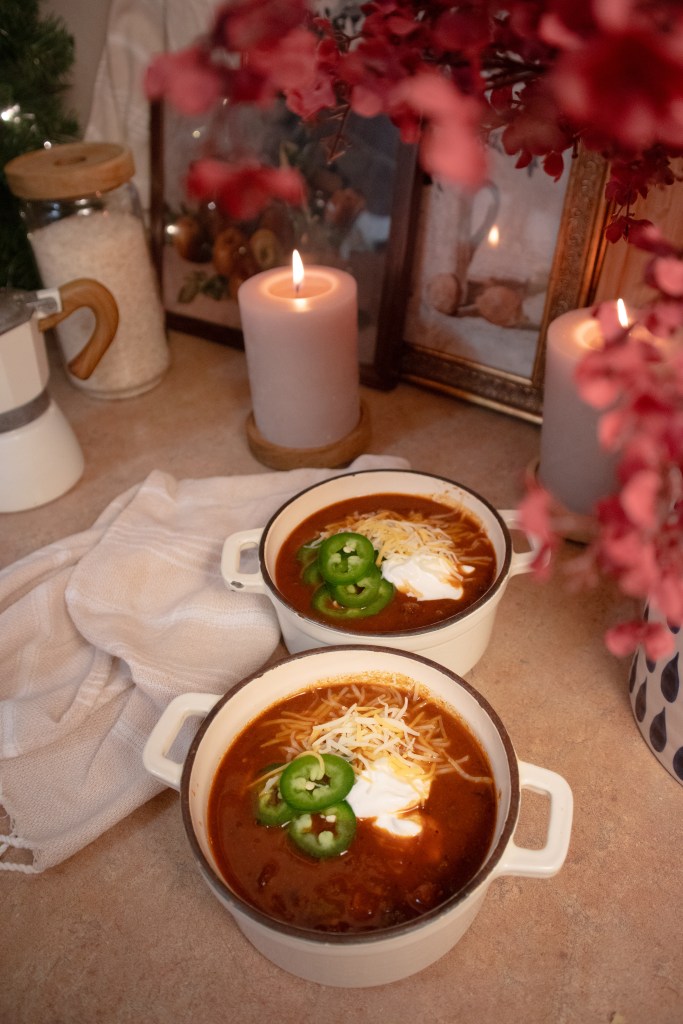
If you love thick, hearty chili but don’t eat beef, this mushroom chili will completely surprise you. It’s rich, deeply savory, and incredibly satisfying — with a texture that truly mimics traditional ground-beef chili.
The secret? Properly cooked mushrooms.

Instead of tossing mushrooms into the pot and hoping for the best, I cook them first until all the moisture evaporates. This concentrates their flavor and gives them a firm, “meaty” bite instead of a soft or watery texture.
Whether you’re vegetarian, pescatarian, stretching your grocery budget, or just want a cozy meatless meal, this chili delivers serious comfort in a bowl.
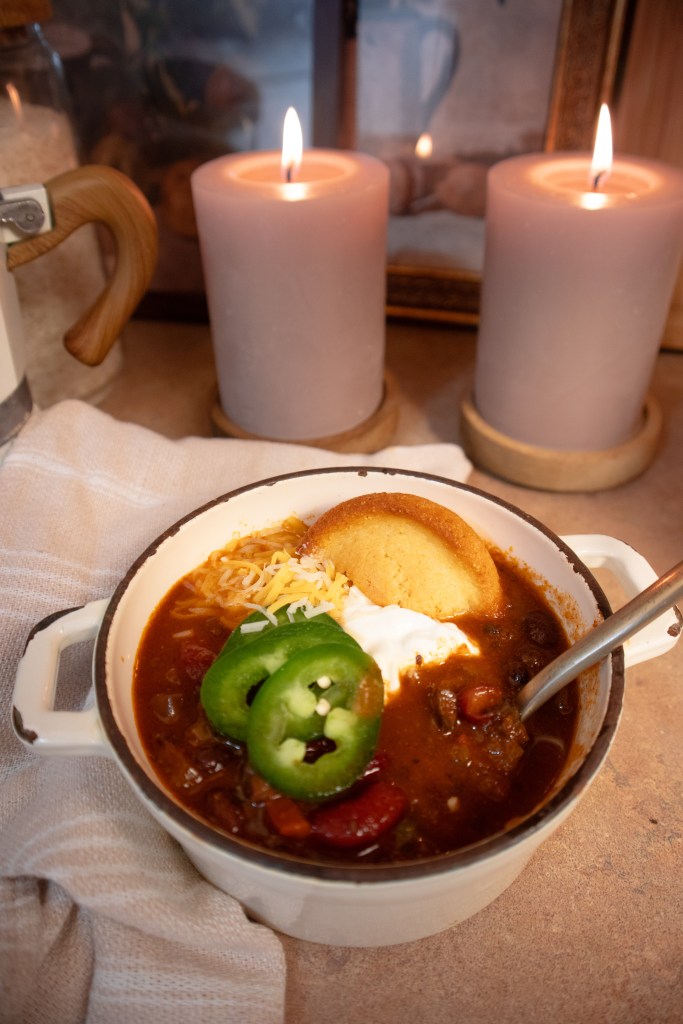
We love serving this with a side of my soft and fluffy vegan cornbread muffins, creamy vegan mashed potatoes, and a simple garden salad to make it a full, comforting meal.
Why This Mushroom Chili Actually Tastes Like “Real” Chili
Mushrooms are naturally packed with umami, the savory flavor that makes meat so satisfying. But if they aren’t cooked properly, they release water and turn mushy.
Cooking them first transforms them into a hearty base that absorbs spices beautifully — just like ground beef.
How to Prep Mushrooms for a Ground-Beef Texture
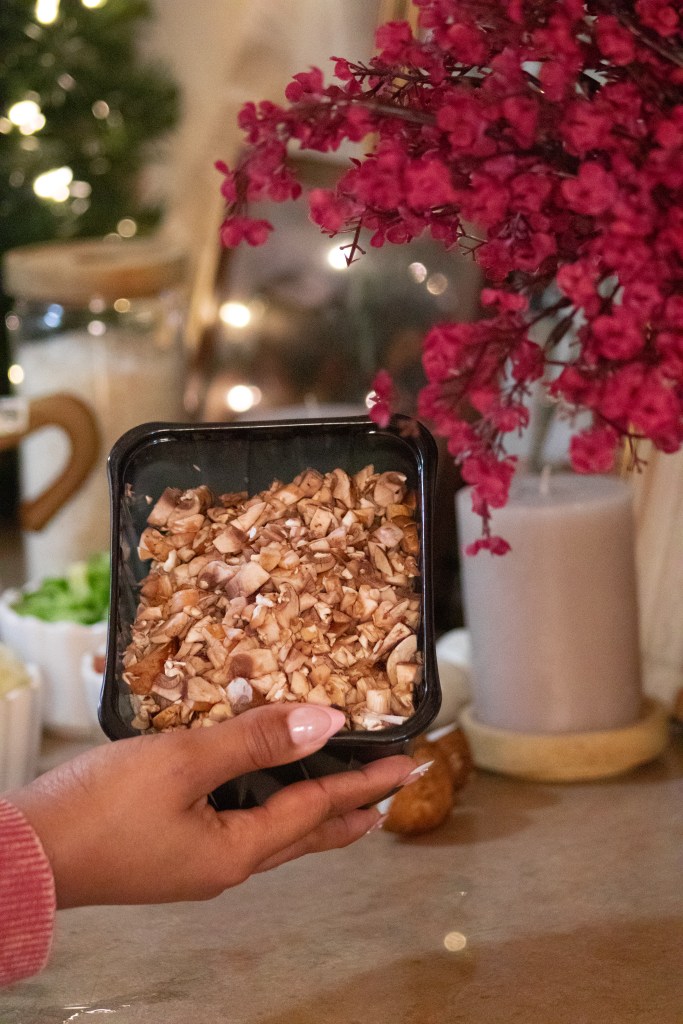
For this recipe, I use 2 pounds of mushrooms, finely chopped by hand into small pieces to mimic ground beef.
You can use a food processor, but I personally prefer chopping by hand because it creates a more consistent texture. Food processors often leave a mix of very tiny pieces and larger chunks.
I also like using a large heavy-bottomed pot or Dutch oven for chili because it distributes heat evenly and prevents scorching as it simmers.
Once cooked, the mushrooms shrink significantly — about half their volume — leaving you with roughly one pound of dense, flavorful “meat.”
Ingredients
2 tablespoons olive oil
2 pounds mushrooms, finely chopped
1 large onion, diced
3 cloves garlic, minced
1 green bell pepper, diced
3–4 Roma tomatoes, diced
1 can (15 oz) red kidney beans, drained and rinsed
1 can (15 oz) black beans, drained and rinsed
2 cups vegetable broth
2 tablespoons tomato paste
2 tablespoons chili powder
1 teaspoon cumin
1 teaspoon paprika
1/2 teaspoon oregano
1/2 teaspoon salt (or to taste)
1/4 teaspoon black pepper
Optional: pinch of cayenne for heat
Instructions
Cook the Mushrooms First
Heat olive oil in a large pot or Dutch oven over medium-high heat.
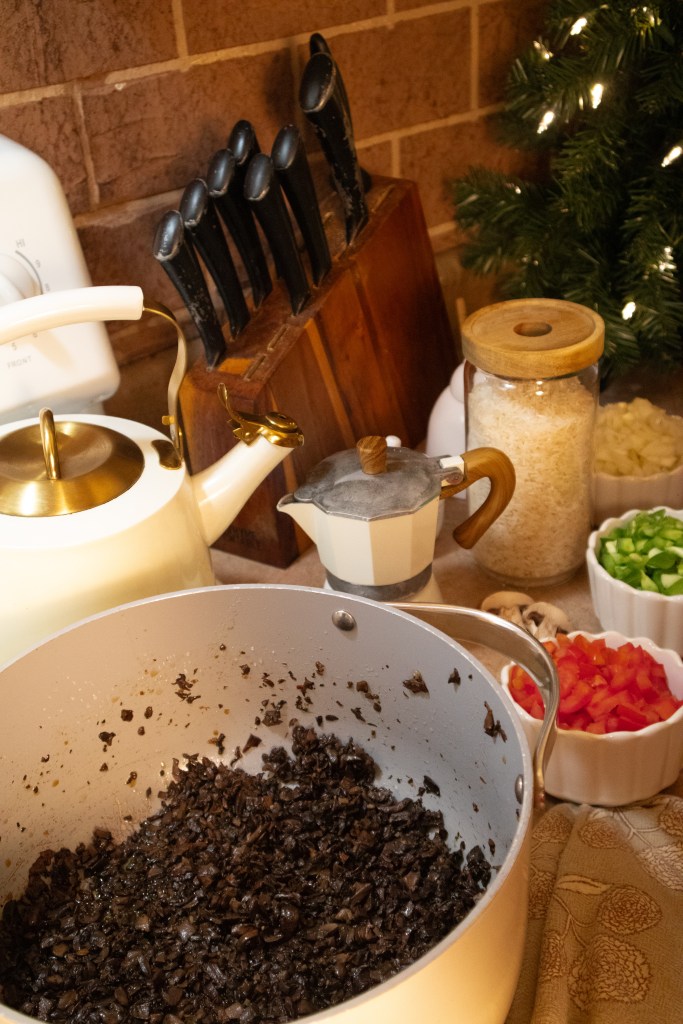
Add the chopped mushrooms and cook, stirring occasionally, until they release their moisture and the liquid cooks off completely. This can take 10–15 minutes.
The mushrooms will shrink dramatically and begin to brown slightly.
This step is crucial for achieving a firm, hearty texture instead of a mushy chili.
Add Aromatics and Vegetables
Add the diced onion and green bell pepper to the pot. Cook until softened, about 5 minutes.
Stir in the garlic and cook for another 30 seconds until fragrant.
Build the Chili Base
Add:
- Diced Roma tomatoes
- Tomato paste
- Chili powder
- Cumin
- Paprika
- Oregano
- Salt and pepper
Stir well to coat everything in the spices.
Add Beans and Broth
Pour in the vegetable broth and add both beans.
Bring the chili to a gentle boil, then reduce heat and simmer uncovered for 20–30 minutes, stirring occasionally.
As it simmers, the flavors deepen and the chili thickens. Stir occasionally with a heat-safe ladle or spoon to keep the chili from sticking to the bottom.

Taste & Adjust
Add more salt, chili powder, or cayenne if desired. Chili is very forgiving — adjust it to your family’s preference.
Storage & Make-Ahead Tips
This chili tastes even better the next day.
- Refrigerator: Up to 4 days
- Freezer: Up to 3 months
- Reheating: Add a splash of broth if needed
Perfect for meal prep or busy weeks.
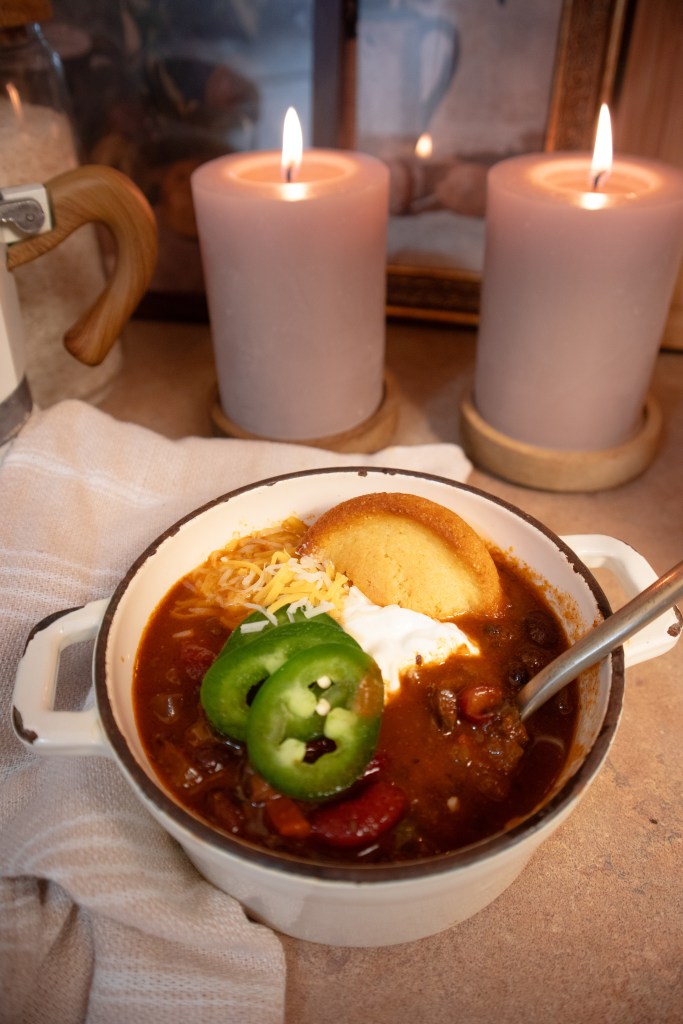
Topping Ideas
- Sliced avocado
- Fresh cilantro
- Dairy-free sour cream
- Shredded cheese (or vegan cheese)
- Crushed tortilla chips
- Green onions
Final Thoughts
This mushroom chili proves you don’t need meat to enjoy a thick, satisfying bowl of comfort food. It’s cozy, budget-friendly, and filling enough to keep everyone happy.
If you’re looking for a hearty plant-based dinner that still feels like classic chili, this recipe deserves a permanent spot in your rotation.
Vegan Mushroom Chili (Hearty, Meaty & Meatless)

This hearty vegan mushroom chili is thick, rich, and incredibly satisfying, with a “meaty” texture created from finely chopped mushrooms. A cozy one-pot comfort meal perfect for cold nights, meal prep, or a budget-friendly family dinner.
- 2 tablespoons olive oil
- 2 pounds mushrooms (finely chopped)
- 1 large onion (diced)
- 3 cloves garlic (minced)
- 1 green bell pepper (diced)
- 3 –4 Roma tomatoes (diced)
- 1 can (15 oz red kidney beans, drained and rinsed)
- 1 can (15 oz black beans, drained and rinsed)
- 2 cups vegetable broth
- 2 tablespoons tomato paste
- 2 tablespoons chili powder
- 1 teaspoon ground cumin
- 1 teaspoon paprika
- ½ teaspoon dried oregano
- ½ teaspoon salt (or to taste)
- ¼ teaspoon black pepper
- Optional: pinch of cayenne pepper for heat
Cook the Mushrooms First
- Heat olive oil in a large pot or Dutch oven over medium-high heat.
- Add the finely chopped mushrooms and cook, stirring occasionally, until they release their moisture and the liquid cooks off completely, about 10–15 minutes.
- The mushrooms will shrink significantly and begin to brown slightly. This step creates a firm, hearty texture instead of a watery chili.
Add Aromatics and Vegetables
- Add the diced onion and green bell pepper to the pot. Cook until softened, about 5 minutes.
- Stir in the minced garlic and cook for 30 seconds until fragrant.
Build the Chili Base
Add:
- Diced Roma tomatoes
- Tomato paste
- Chili powder
- Cumin
- Paprika
- Oregano
- Salt and pepper
- Stir well to coat everything evenly in the spices.
Add Beans and Broth
- Pour in the vegetable broth and add the kidney beans and black beans.
- Bring to a gentle boil, then reduce heat and simmer uncovered for 20–30 minutes, stirring occasionally, until thickened.
Taste and Adjust
- Taste and adjust seasoning as needed. Add more salt, chili powder, or cayenne to suit your preference.
-
Finely chopping the mushrooms creates a texture similar to ground beef.
-
Cooking the mushrooms first prevents a watery or mushy chili.
-
The chili thickens as it sits and tastes even better the next day.
Optional Toppings
-
Sliced jalapeños
-
Shredded cheese or vegan cheese
-
Sour cream or dairy-free alternative
-
Avocado slices
-
Fresh cilantro
-
Cornbread
Storage
Refrigerate leftovers in an airtight container for up to 4 days.
Freeze for up to 3 months. Reheat on the stovetop or microwave, adding a splash of broth if needed.More Recipes To Try:
If you loved this recipe, here are a few more easy and comforting meals to try next:
- Guinness vegetarian shepherd’s pie – a cozy, filling dinner idea
- Honey garlic salmon – a quick and flavorful weeknight meal
- Southern fried catfish – a classic comfort food favorite
- Mexican street corn – bold, flavorful, and perfect for pairing
Looking for more meal ideas? Browse my full collection of easy dinner recipes for busy nights:
- 75+ Easy Frugal Meatless Dinner Ideas
- 35+ Easy Chicken Dinners For Busy Weeknights
- 35 Cozy and Comforting Soup Recipes
Pin these for later…
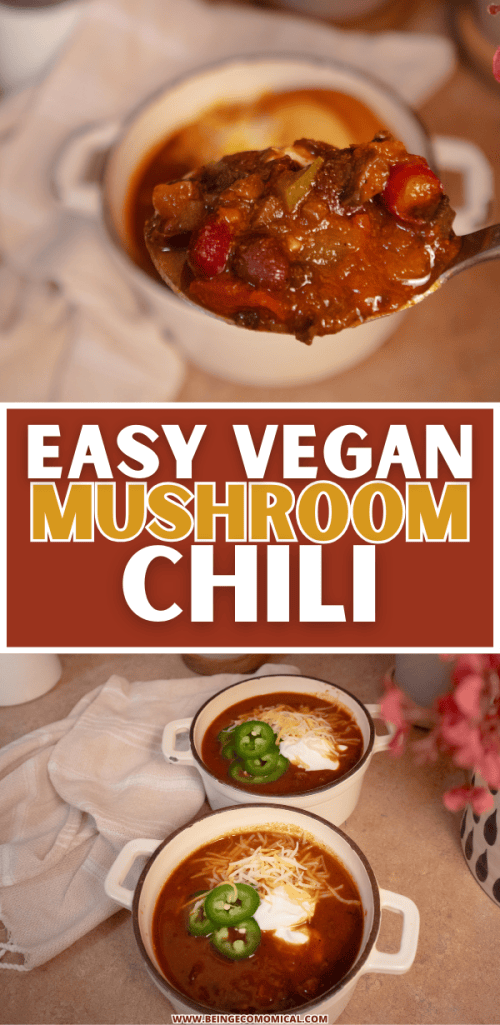


-
Easy Heart Shaped Pop Tarts (Strawberry Hand Pies for Valentine’s Day)

These easy heart shaped pop tarts are made with store-bought pie crust and strawberry preserves for the perfect flaky Valentine’s Day treat.
If you’ve been searching for strawberry hand pies, a cute Valentine’s Day breakfast idea, or an easy dessert using refrigerated pie crust, this recipe is simple, festive, and completely mom-approved.

Made with packaged pie crust, thickened strawberry preserves, and topped with a soft pink icing, these homemade pop tarts look bakery-worthy but come together in under 40 minutes.
They’re perfect for classroom parties, sweet after-school surprises, or a cozy Valentine’s morning at home.
If you’re building a full Valentine’s dessert board, my Vegan Red Velvet Chocolate Chip Cookies, Vegan Heart-Shaped Churros and Vegan Strawberry Donuts make the perfect festive pairing.

If you love easy seasonal baking without complicated ingredients, these strawberry heart pop tarts are about to become your new favorite shortcut dessert.
Why You’ll Love These Heart Shaped Pop Tarts
Made with store-bought pie crust (no dough from scratch)
Uses simple strawberry preserves
Thickened filling prevents leaking
Easy pink glaze with powdered sugar
Sprinkles optional for a festive touch
Kid-friendly and beginner-friendly
Ingredients
For the Pop Tarts:
- 2 refrigerated pie crusts (store-bought)
- ¾ cup strawberry preserves
- 1 tablespoon cornstarch
- 1 tablespoon water
For the Icing:
- 1 cup powdered sugar
- 1–2 tablespoons almond milk (or milk of choice)
- Small drop red food coloring (optional, for pink)
- Valentine’s Day sprinkles (optional)
How to Make Heart Shaped Pop Tarts
1. Preheat
Preheat oven to 375°F. Line a baking sheet with parchment paper.
2. Make the Filling
In a small bowl, mix strawberry preserves, cornstarch, and water until smooth.
This creates a thicker filling so your homemade pop tarts don’t leak while baking.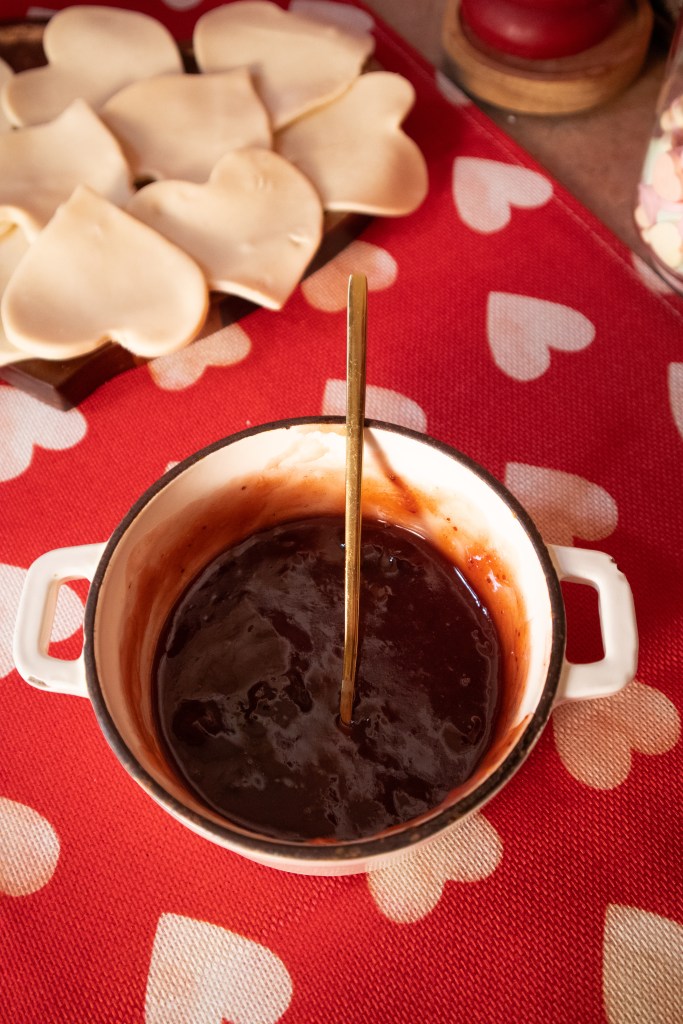
3. Cut the Hearts
Roll out pie crust if needed.
Use a heart-shaped cookie cutter to cut an even number of hearts.Place half of the hearts on your baking sheet.

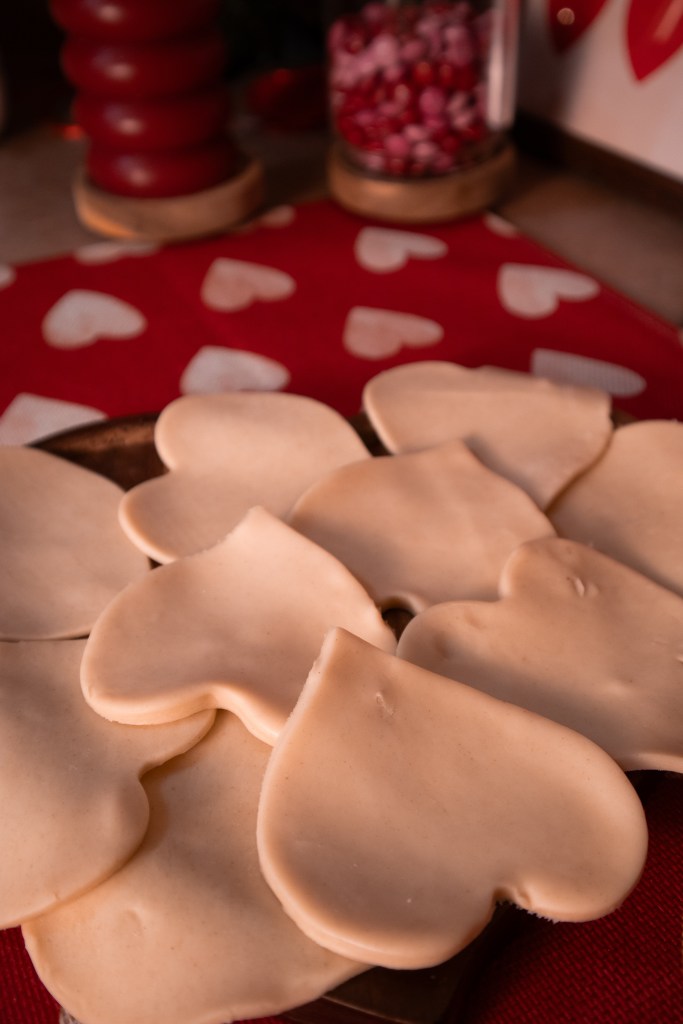
4. Fill
Add about 1 tablespoon of the strawberry mixture to the center of each bottom heart, leaving a border around the edges.


5. Seal
Place a second heart on top.
Press edges together gently, then seal with a fork.
Poke small holes in the top for steam to escape.

6. Bake
Bake for 15–18 minutes, or until lightly golden.
Allow to cool completely before adding icing.



7. Make the Pink Icing
Whisk together powdered sugar and almond milk until smooth.
Add a tiny drop of red food coloring for a soft Valentine pink.Adjust milk slightly for desired thickness. It should be spreadable but not runny.



8. Decorate
Spread icing over cooled pop tarts.
Top with Valentine’s sprinkles if desired.Let icing set before serving.




Frequently Asked Questions
Can I use store-bought pie crust for homemade pop tarts?
Yes! Refrigerated pie crust makes these heart shaped pop tarts quick, flaky, and beginner-friendly.
How do I keep the filling from leaking out?
Mixing strawberry preserves with cornstarch creates a thicker filling that stays inside while baking.
Can I make these ahead of time?
Yes. Store in an airtight container at room temperature for up to 3 days.
Can I use a different flavor?
Absolutely. Raspberry, cherry, or even blueberry preserves work beautifully.

Storage Tips
Store cooled pop tarts in an airtight container at room temperature.
For a slightly crisp texture the next day, warm them briefly in the oven.These easy heart shaped pop tarts are perfect if you’re looking for:
- Valentine’s Day breakfast ideas
- Strawberry hand pie recipes
- Easy desserts with store bought pie crust
- Homemade pop tarts without yeast
- Cute Valentine’s Day desserts for kids

💘 More Valentine’s Day Dessert Ideas
If you’re planning a full Valentine’s spread, pair these heart shaped pop tarts with:
🍪 Vegan Red Velvet Chocolate Chip Cookies
Soft, bakery-style red velvet cookies loaded with dairy-free chocolate chunks. Perfect for Valentine’s Day dessert trays or classroom parties.
👉 Grab the full recipe for my Vegan Red Velvet Chocolate Chip Cookies here.
🍓 Vegan Strawberry Donuts
Baked strawberry donuts topped with a sweet glaze and festive sprinkles — an easy Valentine’s Day breakfast idea that feels extra special.
👉 See how I make these Vegan Strawberry Donuts here.
Easy Heart Shaped Pop Tarts (Strawberry Hand Pies)

Flaky heart shaped pop tarts made with pie crust and strawberry preserves, topped with pink icing for an easy Valentine’s Day breakfast or dessert.
For the Pop Tarts:
- 2 refrigerated pie crusts (store-bought)
- ¾ cup strawberry preserves
- 1 tablespoon cornstarch
- 1 tablespoon water
For the Icing:
- 1 cup powdered sugar
- 1 –2 tablespoons almond milk (or milk of choice)
- Small drop red food coloring (optional)
- Valentine’s Day sprinkles (optional)
- Preheat oven to 375°F. Line a baking sheet with parchment paper.
- Make the filling: In a small bowl, mix strawberry preserves, cornstarch, and water until smooth. This helps thicken the filling and prevents leaking.
- Cut the hearts: Roll out pie crust if needed. Use a heart-shaped cookie cutter to cut an even number of hearts.
- Fill: Place half the hearts on the baking sheet. Add about 1 tablespoon of filling to the center of each, leaving a small border.
- Seal: Place a second heart on top. Press edges together gently and seal with a fork. Poke small holes in the top for steam to escape.
- Bake for 15–18 minutes or until lightly golden. Let cool completely.
- Make icing: Whisk powdered sugar and almond milk until smooth. Add a tiny drop of red food coloring for pink (optional).
- Decorate: Spread icing over cooled pop tarts and add sprinkles if desired. Let icing set before serving.
-
Store in an airtight container at room temperature for up to 3 days.
-
Swap strawberry preserves for raspberry, cherry, or blueberry.
-
Milk choice is flexible — almond, dairy, oat, etc.
-
Sprinkles are optional for a festive touch.
More Recipes To Try:
If you loved these vegan heart shaped pop tarts, here are a few more fun and easy treats to try next:
- Heart Shaped Churros – crispy, sweet, and perfect for special occasions
- Vegan Red Velvet Chocolate Chunk Cookies – soft, rich, and bakery-style
- Strawberry Glazed Donuts – light, fluffy, and full of fresh flavor
- Homemade Vegan Sweet Potato Pie – a cozy classic dessert
- 25+ Fall Baking Recipes – warm, comforting treats for any season
- Valentine’s Day Dessert Ideas – festive sweets everyone will love
-
Vegan Heart-Shaped Churros

Crispy Outside, Chewy Inside – Just Like Traditional Churros
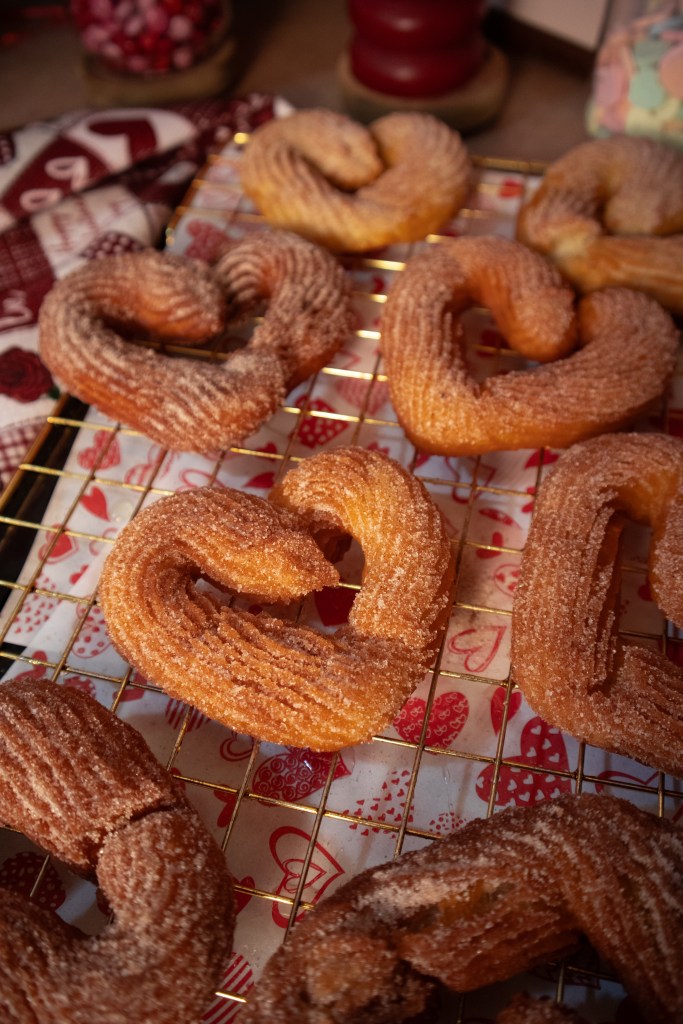
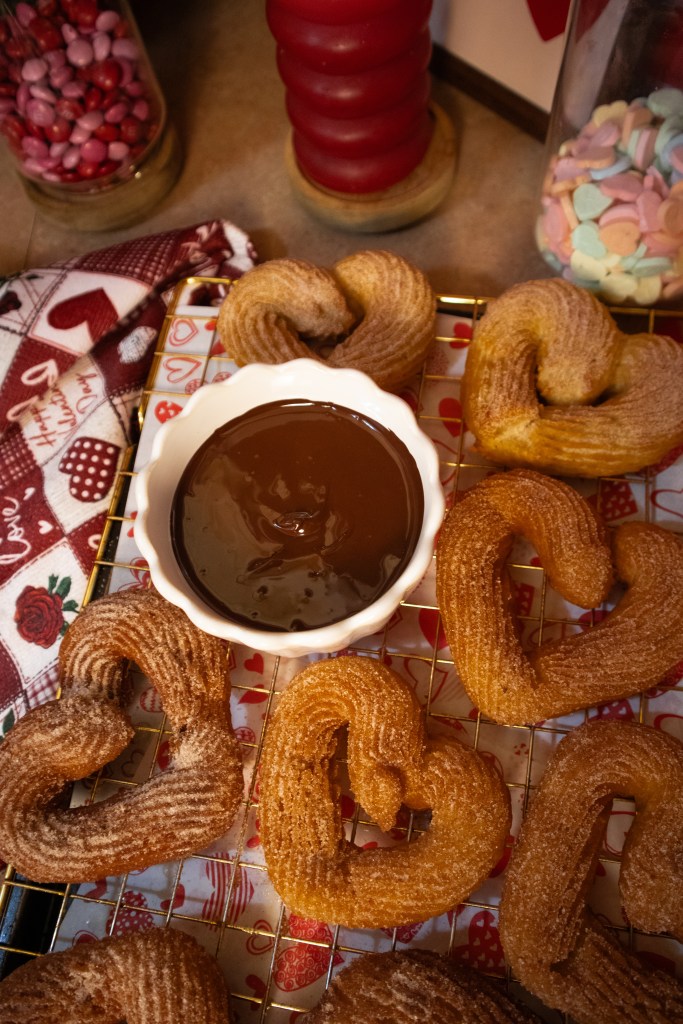
These vegan heart-shaped churros are everything you want in a classic churro: golden and crispy on the outside, soft and chewy on the inside, and rich with buttery flavor.
The secret? More vegan butter and oil than most recipes call for—and yes, that’s intentional.

If you’ve ever made churros that felt dry, bready, or stiff, this is the fix. Traditional churros rely on fat for structure, flavor, and texture, and vegan churros are no different. This dough is rich, pipeable, and fries up beautifully every time.
Perfect for Valentine’s Day, special occasions, or anytime you want a bakery-style vegan dessert at home.
If you love fun, homemade treats like these heart shaped churros, you’ll definitely want to try a few more of my favorite sweet recipes.
My vegan heart shaped pop tarts, vegan red velvet chocolate chunk cookies, and strawberry glazed donuts are all perfect for special occasions or when you’re craving something sweet.

Why Extra Butter & Oil Matter (Don’t Skip This)
Most churro recipes play it safe with fat—but churros aren’t supposed to be light.
They’re supposed to be luxurious.The added vegan butter gives:
- That classic churro flavor
- A tender, chewy interior
The added oil helps:
- Create a crisp, crackly exterior
- Prevent dry or stiff dough
If your churros have ever been dry, the dough didn’t have enough fat. This recipe fixes that.
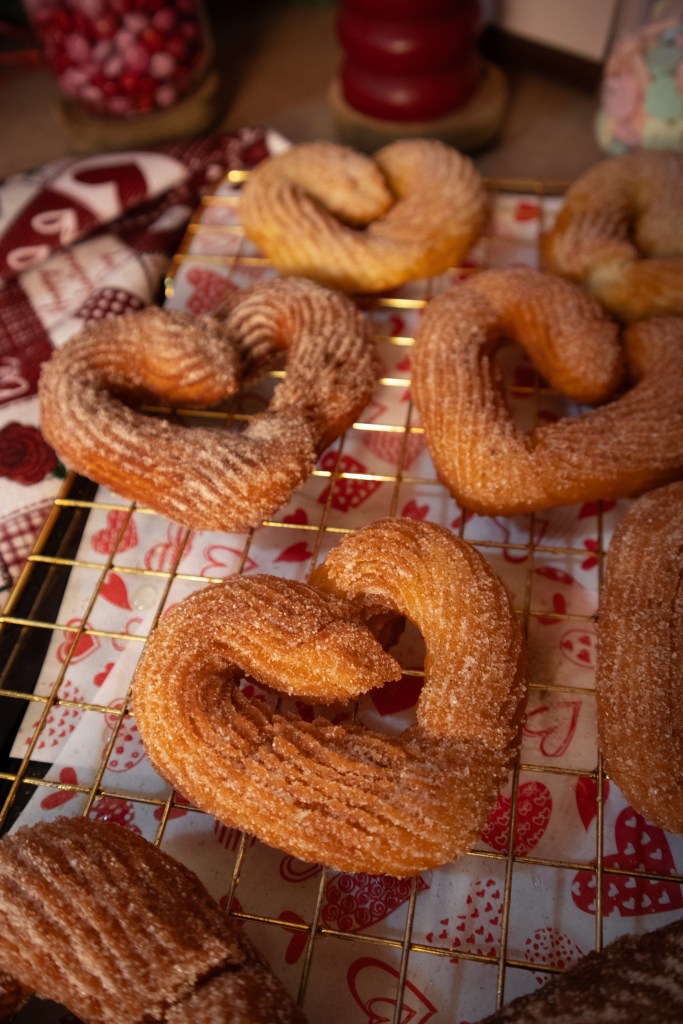
Ingredients
For the Churro Dough
- 1 cup water
- 4 tbsp vegan butter (use a good-quality stick butter)
- 2 tbsp neutral oil (avocado, vegetable, or canola)
- 1 tbsp sugar
- ¼ tsp salt
- 1 cup all-purpose flour
For Frying
- Neutral oil of choice (avocado, vegetable, or canola)
Cinnamon Sugar
1½ tsp cinnamon
½ cup sugar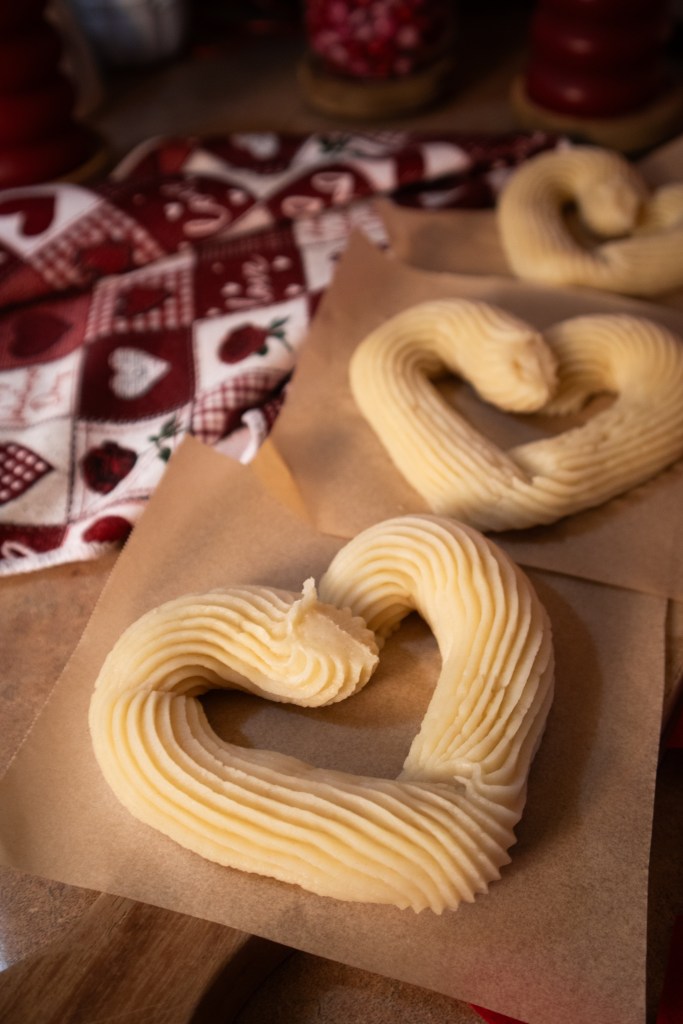

How to Make Vegan Heart-Shaped Churros
1. Make the Dough Base
In a medium saucepan over medium heat, combine:
- Water
- Vegan butter
- Oil
- Sugar
- Salt
Heat until the butter is fully melted and the mixture just begins to simmer.
2. Add the Flour
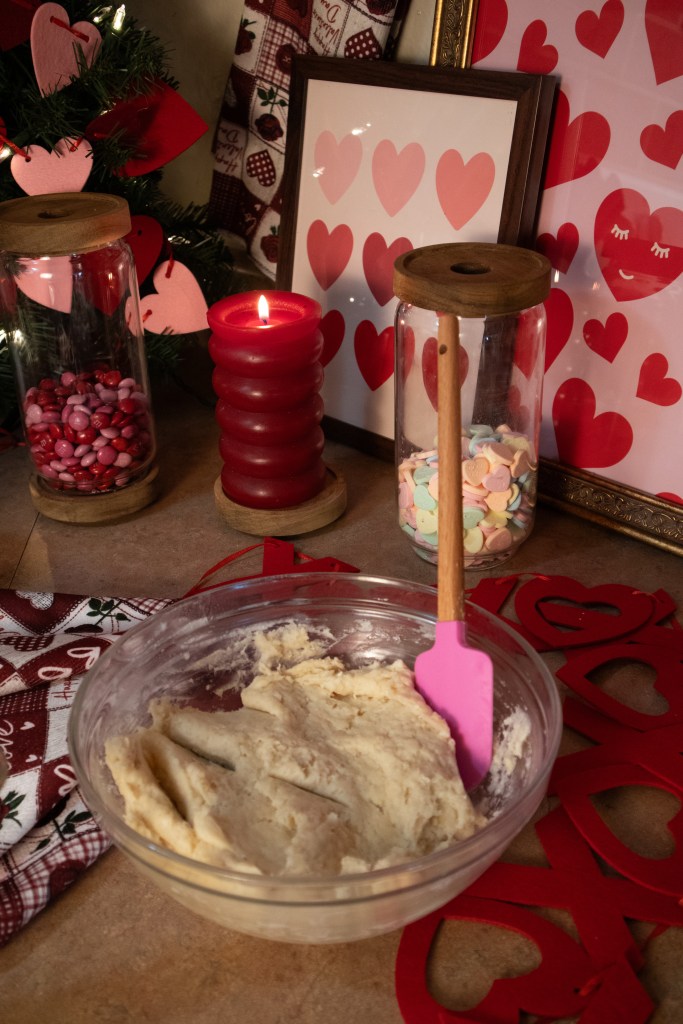
Reduce heat to low. Add the flour all at once and stir vigorously with a wooden spoon.
The dough should:
- Pull away from the sides of the pan
- Form a smooth, glossy ball
- Feel soft and rich—not dry
If the dough looks stiff or crumbly, add 1–2 teaspoons more oil. This dough should be supple.



3. Rest & Prep
Remove from heat and let the dough cool for 5–10 minutes.
Transfer to a piping bag fitted with a large star tip.4. Shape the Hearts
Pipe heart shapes onto parchment paper. Don’t worry about perfection—rustic is part of the charm.
5. Fry
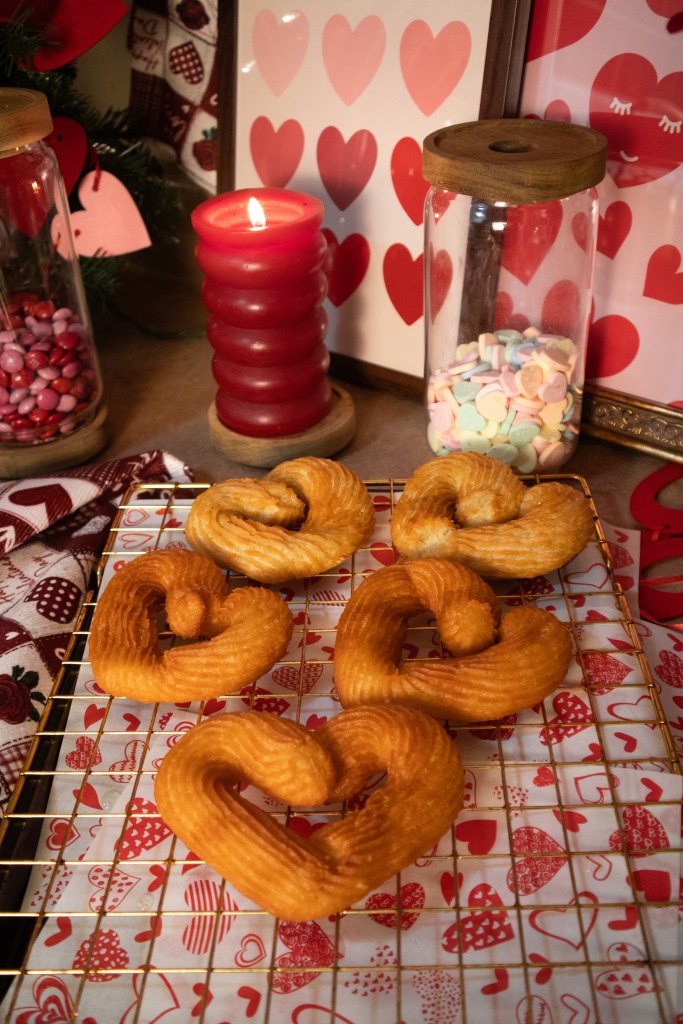
Heat oil to 350°F (175°C). Carefully place churros into the hot oil.
Fry 2–3 minutes per side until:
- Deep golden brown
- Crisp on the outside
Remove and drain briefly on paper towels.
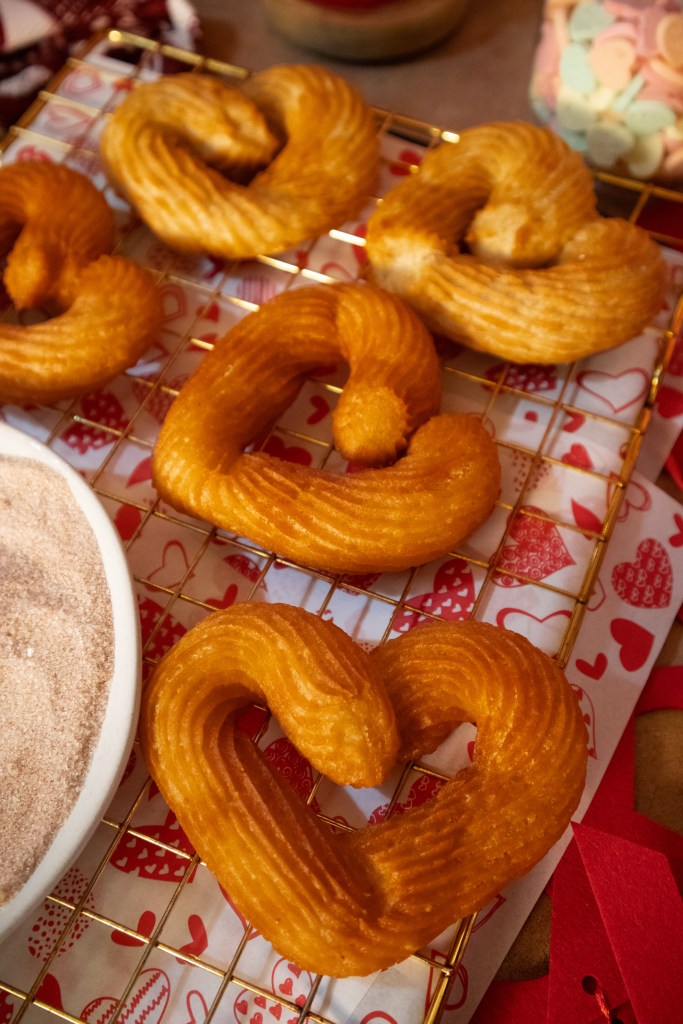
6. Coat in Cinnamon Sugar
While still warm, roll churros in cinnamon sugar until fully coated.
Tips for Perfect Vegan Churros
- Do not reduce the butter or oil — this is what creates the chewy interior
- Dough should be soft and pipeable, not stiff
- Fry in small batches to keep oil temperature steady
- Best enjoyed fresh, warm, and crispy
Oil Choices (Use What You Love)
You can use:
- Avocado oil (neutral, high heat)
- Vegetable oil
- Canola oil
All work beautifully—choose what fits your kitchen.
Serving Ideas
Dip in vegan chocolate sauce
Serve with dairy-free dulce de leche
Dust with powdered sugar for extra drama

Storage Notes
Churros are best eaten the same day, but leftovers can be reheated in an air fryer at 350°F for 2–3 minutes to re-crisp.
Vegan Heart-Shaped Churros

These vegan heart-shaped churros are rich, buttery, and perfectly crisp on the outside with a soft, chewy center—just like traditional churros. The secret is using more vegan butter and oil than most recipes, which creates authentic texture and flavor. Perfect for Valentine’s Day or any special occasion.
Churro Dough
- 1 cup water
- 4 tbsp vegan butter (stick-style recommended)
- 2 tbsp neutral oil (avocado, vegetable, or canola)
- 1 tbsp granulated sugar
- ¼ tsp salt
- 1 cup all-purpose flour
For Frying
- Neutral oil of choice (avocado, vegetable, or canola)
Cinnamon Sugar
- ½ cup granulated sugar
- 1½ tsp ground cinnamon
Heat the base
- In a medium saucepan over medium heat, combine water, vegan butter, oil, sugar, and salt. Heat until the butter is fully melted and the mixture just begins to simmer.
Add the flour
- Reduce heat to low. Add the flour all at once and stir vigorously with a wooden spoon until the dough pulls away from the sides and forms a smooth, glossy ball.
Check dough texture (important!)
- The dough should be soft, rich, and pipeable—not dry. If it feels stiff, stir in 1–2 teaspoons additional oil.
Cool and pipe
- Remove from heat and let the dough cool for 5–10 minutes. Transfer to a piping bag fitted with a large star tip. Pipe heart shapes onto parchment paper.
Fry
- Heat oil to 350°F (175°C). Fry churros in batches for 2–3 minutes per side, until deep golden brown and crisp.
Coat
- Remove churros and drain briefly on paper towels. While warm, roll in cinnamon sugar until fully coated.
Notes
-
Do not reduce the butter or oil—this is essential for chewy, authentic churros
-
Dough should be glossy and soft, not crumbly
-
Best enjoyed fresh and warm
-
Reheat leftovers in an air fryer at 350°F for 2–3 minutes
More Recipes To Try:
If you loved these heart shaped churros, here are a few more fun and easy treats to try next:
- Vegan Heart Shaped Pop Tarts – flaky, fruity, and perfect for special occasions
- Vegan Red Velvet Chocolate Chunk Cookies – soft, rich, and bakery-style
- Strawberry Glazed Donuts – light, fluffy, and sweet
- Homemade Vegan Sweet Potato Pie – a cozy dessert favorite
Looking for even more sweet ideas? Browse my Valentine’s Day Treats, Fall Baking Recipe Ideas, and Sweet Summer Dessert Ideas for inspiration all year long.
-
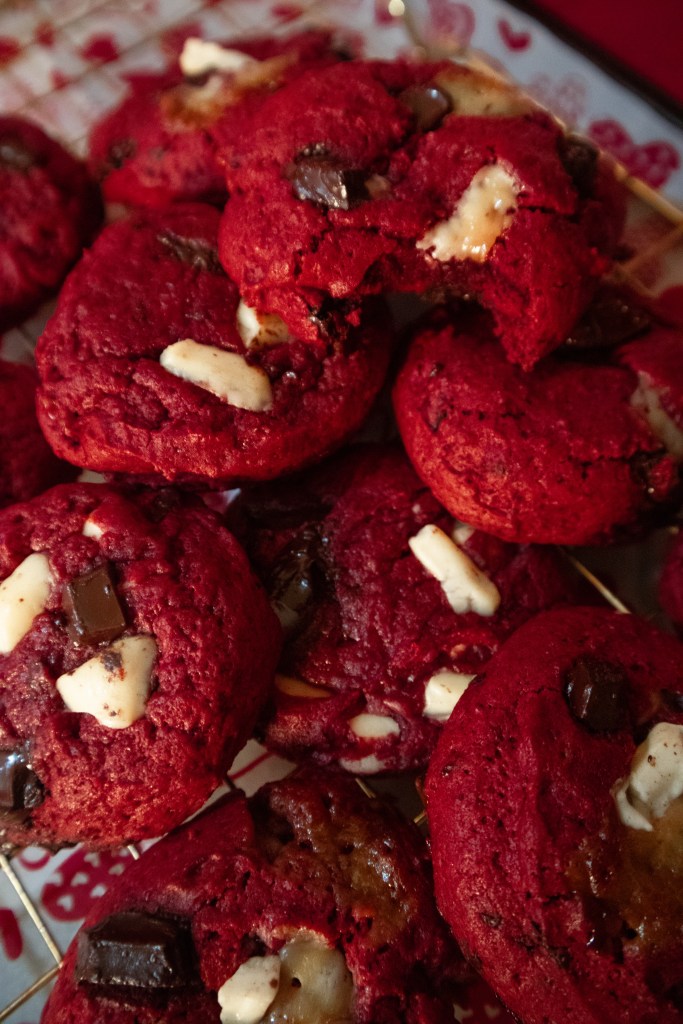
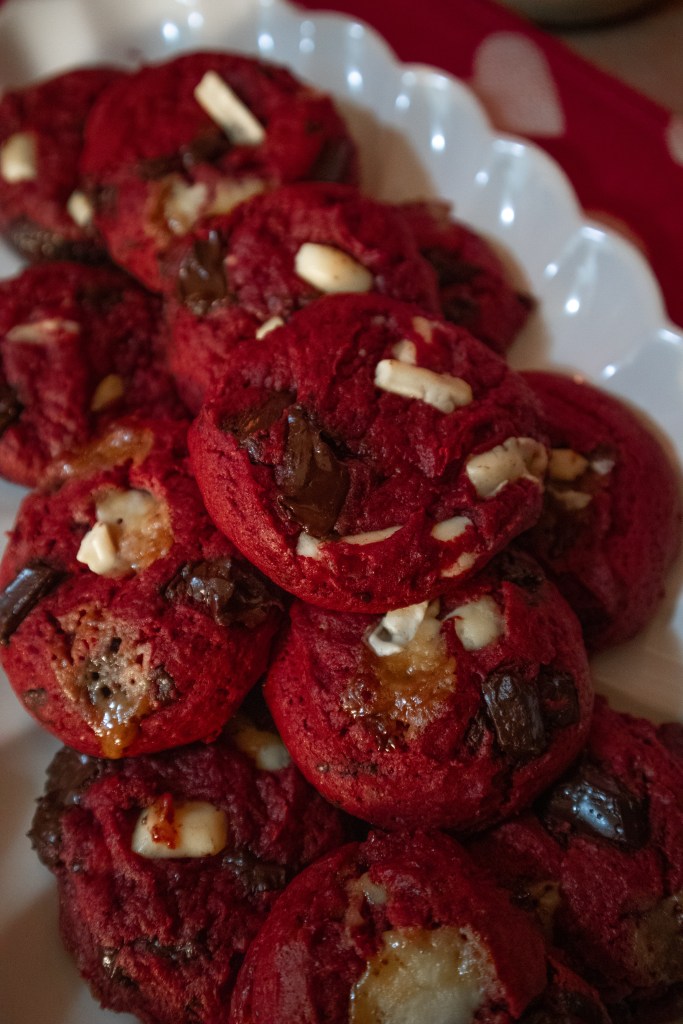
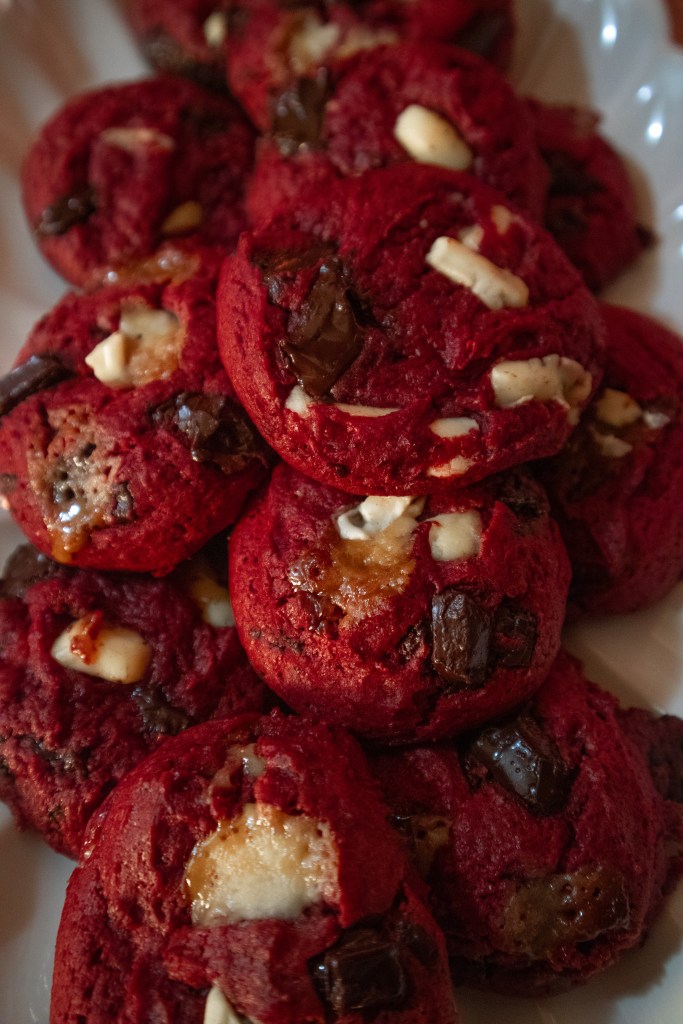
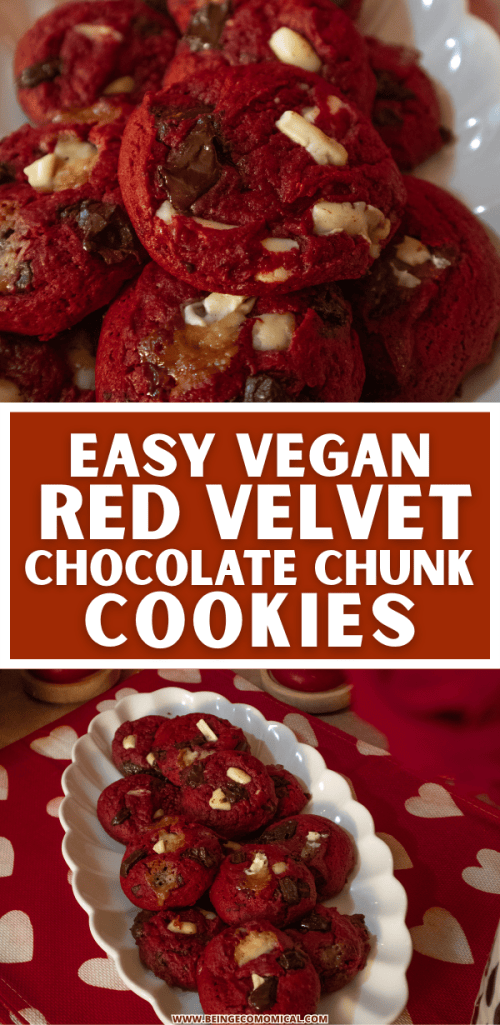
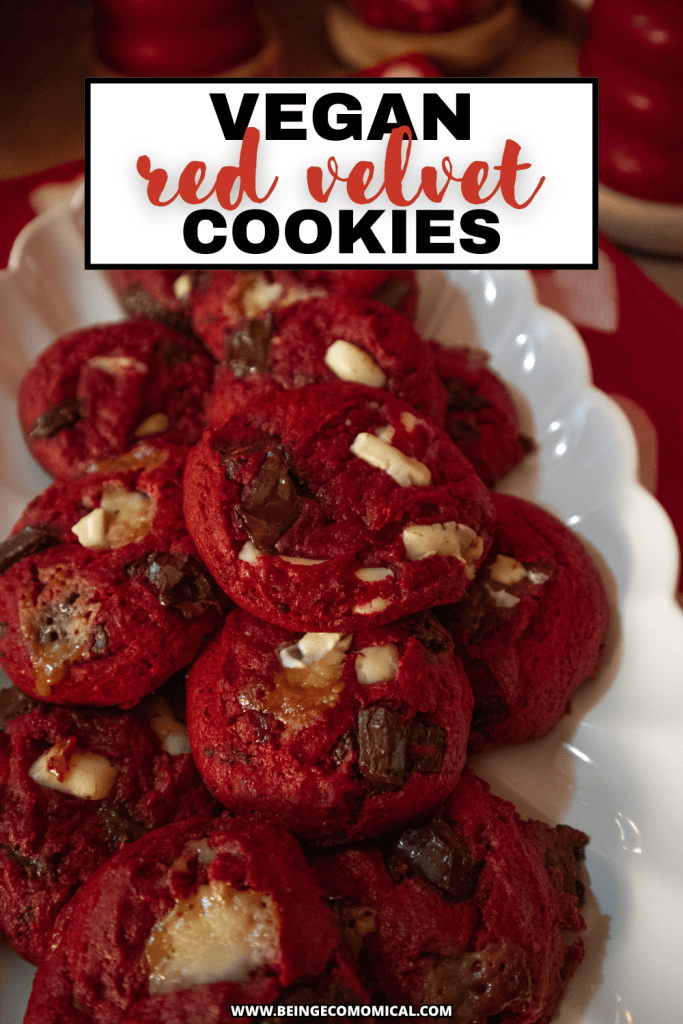
Vegan Red Velvet Chocolate Chunk Cookies

Soft, chewy red velvet cookies with melty dark and white chocolate pools—no eggs, no dairy, just bakery-style perfection.
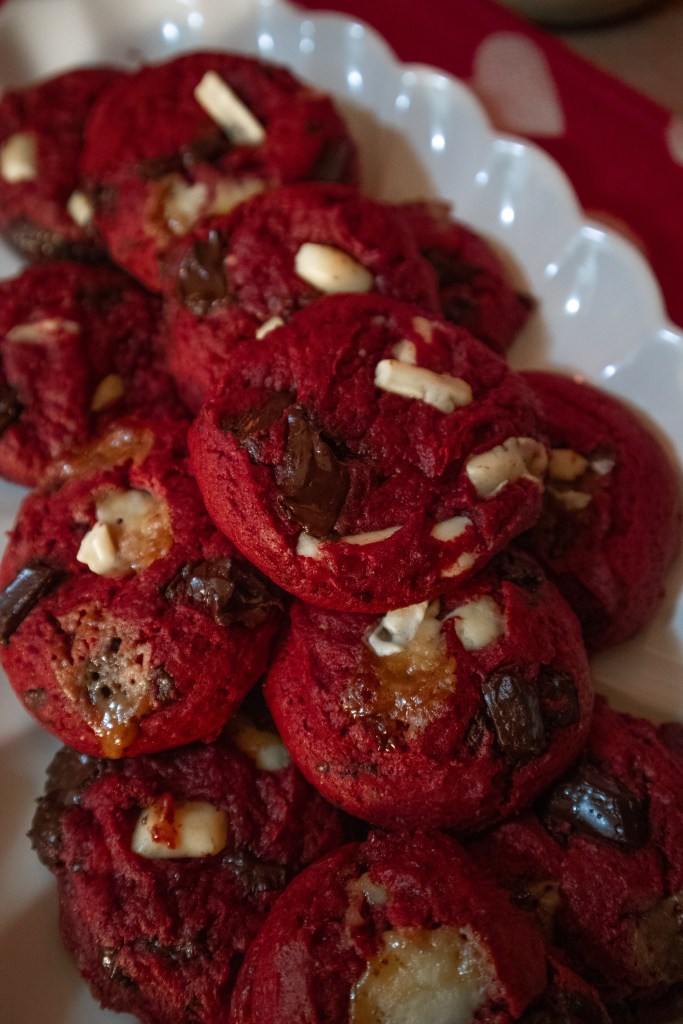
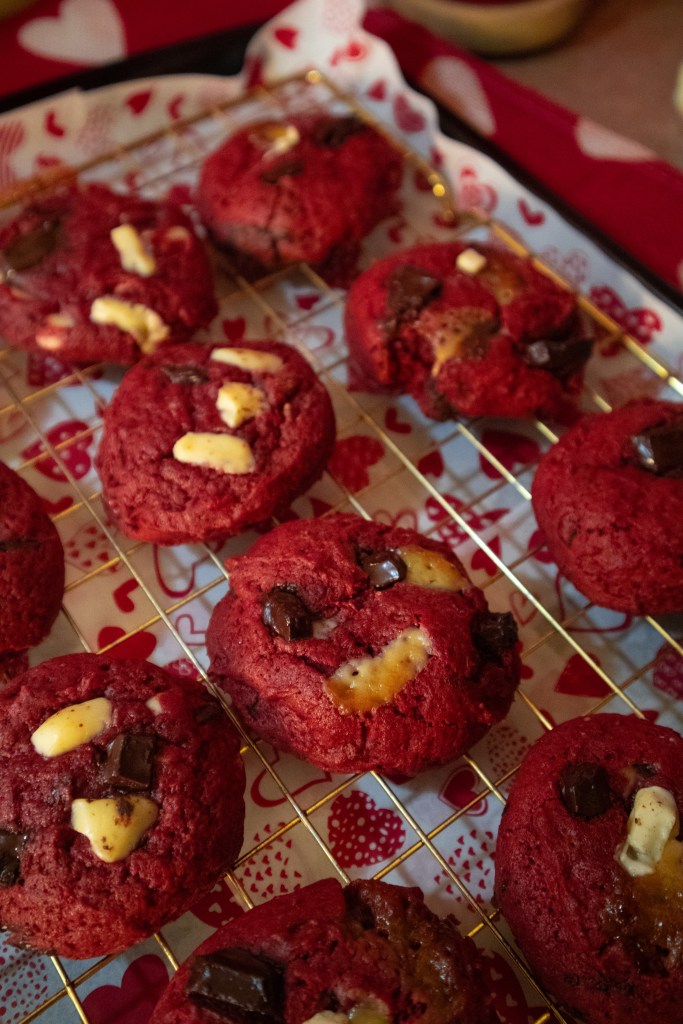
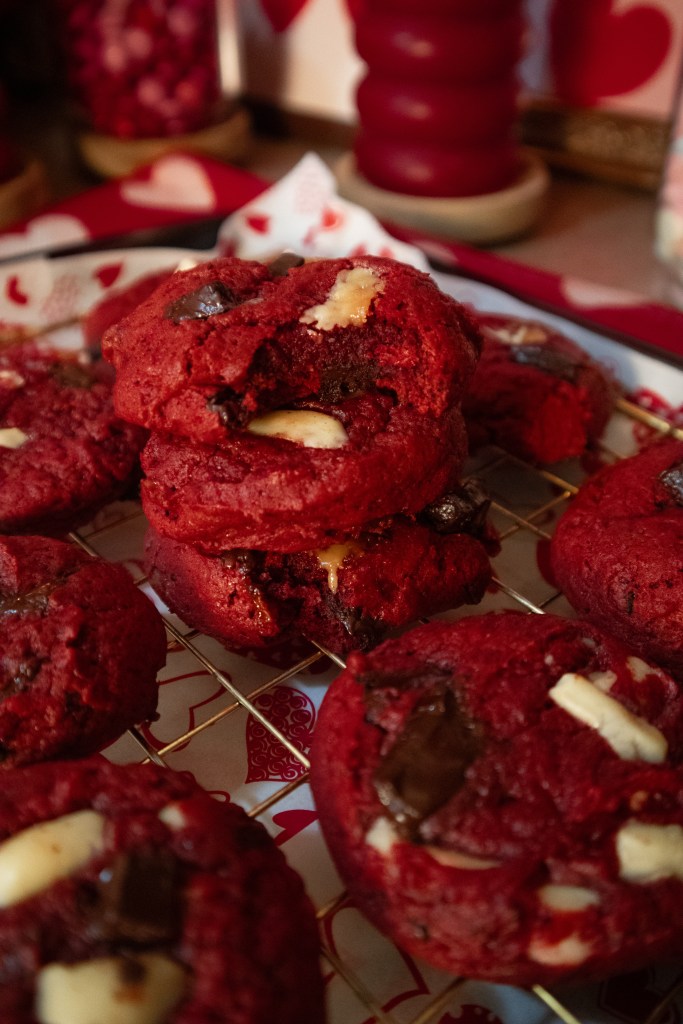
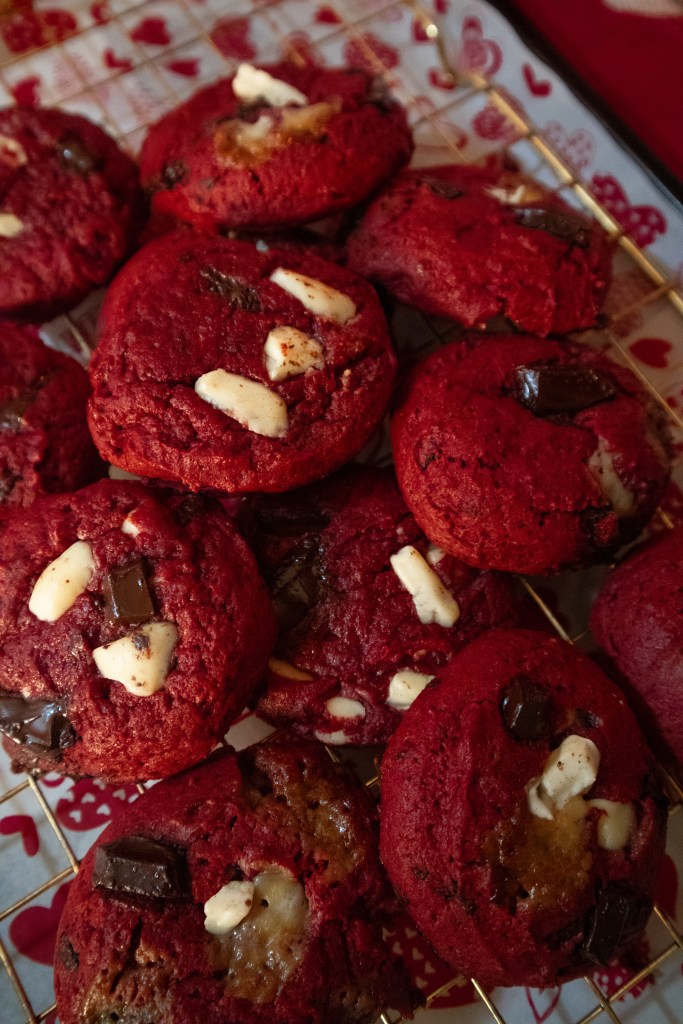
These vegan red velvet chocolate chunk cookies are rich, soft, and absolutely stunning. Instead of chocolate chips, this recipe uses chopped vegan chocolate bars, which melt into those dreamy puddles you see in bakery display cases (aka: the kind of cookies people stop scrolling for).
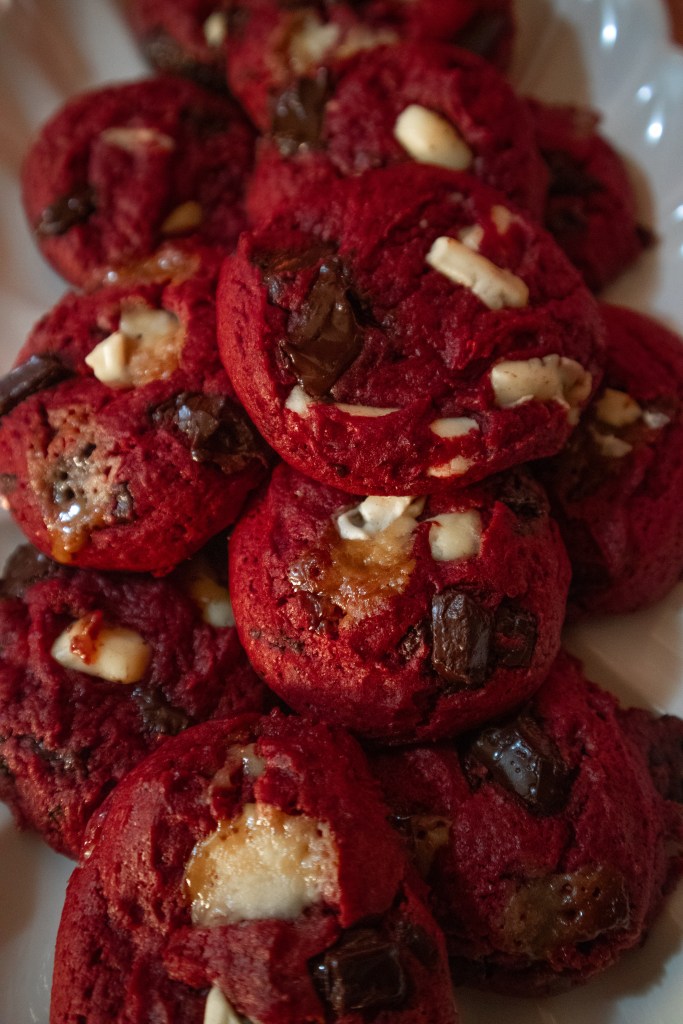
They’re lightly chocolatey, perfectly sweet, and have that classic red velvet flavor—without eggs or dairy.
Whether you’re baking for Valentine’s Day, the holidays, or just because you’re in your soft life baking era, these cookies deliver every time.
If you love soft, bakery-style cookies like these vegan red velvet chocolate chunk cookies, you’ll definitely want to try a few more of my favorite sweet treats.
My vegan heart shaped pop tarts, heart shaped churros, and strawberry glazed donuts are all perfect for special occasions or when you’re craving something homemade.
Why You’ll Love These Vegan Red Velvet Cookies
Soft and chewy with gooey chocolate pools
Made with chopped vegan chocolate bars (not chips!)
Bakery-style look and texture
No chilling required
Simple pantry ingredients
Fully vegan and dairy-free
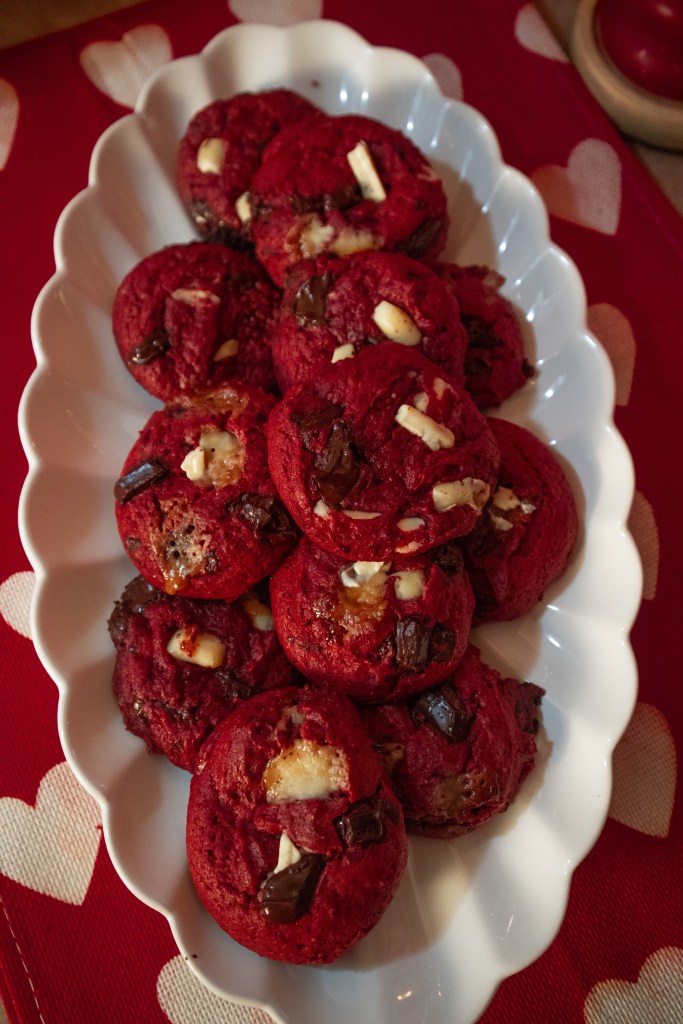
Ingredients for Vegan Red Velvet Chocolate Chunk Cookies
Dry Ingredients
2 ¼ cups all-purpose flour
2 tablespoons unsweetened cocoa powder
1 teaspoon baking soda
½ teaspoon salt
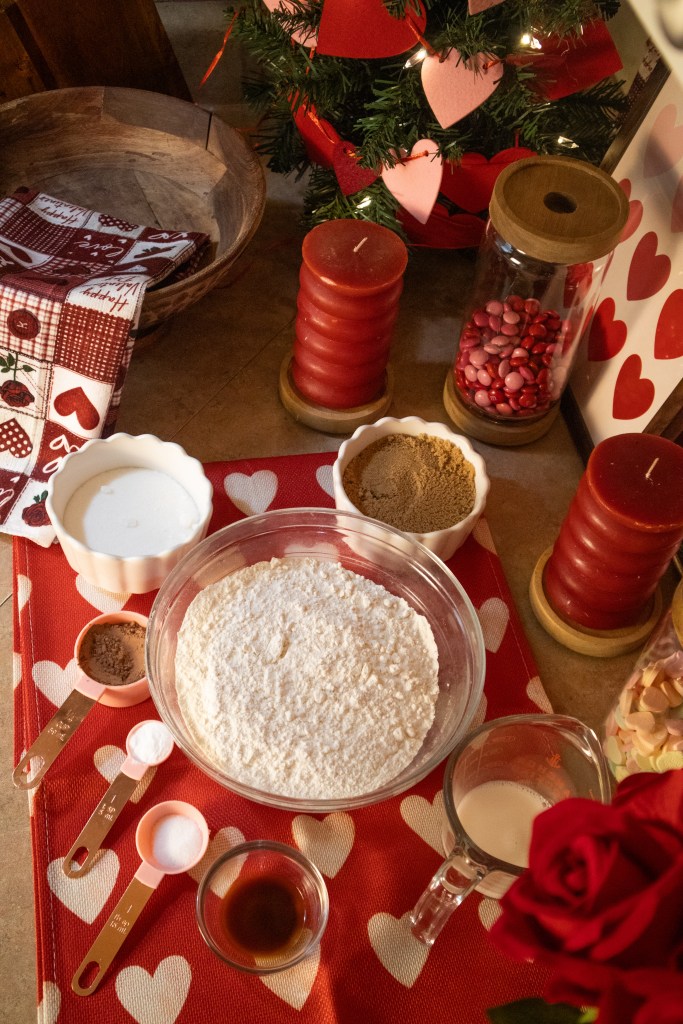
Wet Ingredients
¾ cup vegan butter, softened
¾ cup brown sugar
¼ cup granulated sugar
⅓ cup unsweetened plant milk (almond, oat, or soy)
1 tablespoon apple cider vinegar
1 tablespoon vanilla extract
1 tablespoon red vegan food coloring
Chocolate
1 vegan dark chocolate bar, chopped
1 vegan white chocolate bar, chopped
(Roughly 5–6 oz total chocolate works perfectly)

How to Make Vegan Red Velvet Chocolate Chunk Cookies
Step 1: Preheat & Prep
Preheat your oven to 350°F (175°C) and line two baking sheets with parchment paper.
Step 2: Mix the Dry Ingredients
In a medium bowl, whisk together the flour, cocoa powder, baking soda, and salt. Set aside.


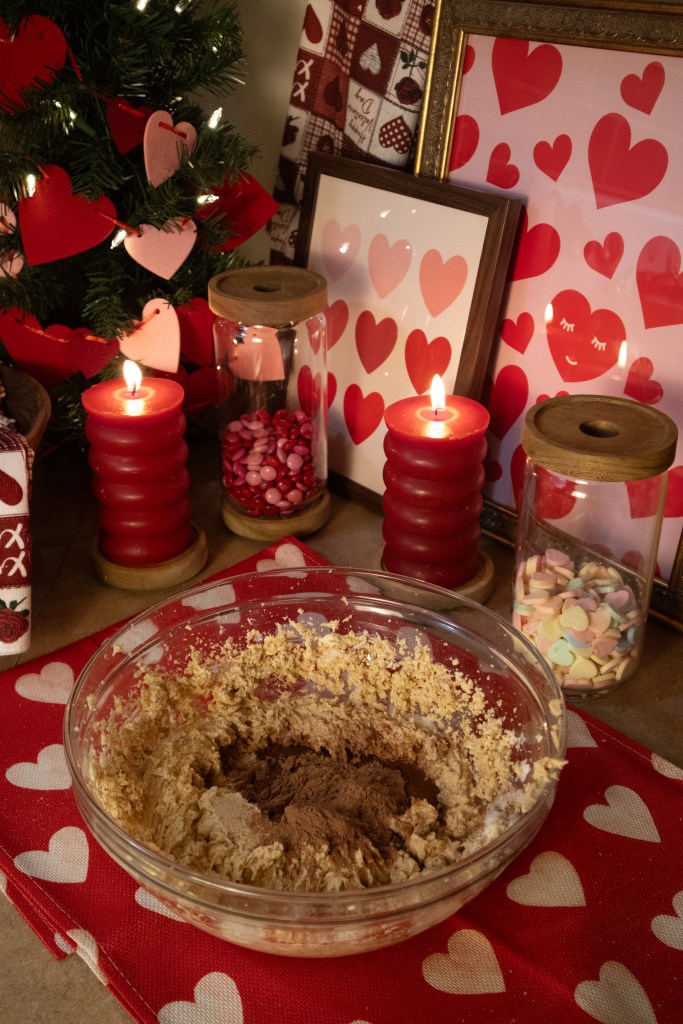
Step 3: Cream the Butter & Sugars
In a large mixing bowl, beat the vegan butter, brown sugar, and granulated sugar until light and fluffy (about 2–3 minutes).
Step 4: Add the Wet Ingredients
Mix in the plant milk, apple cider vinegar, vanilla extract, and red food coloring until smooth and evenly combined.
Step 5: Combine
Gradually add the dry ingredients to the wet ingredients, mixing just until a soft dough forms. Do not overmix.
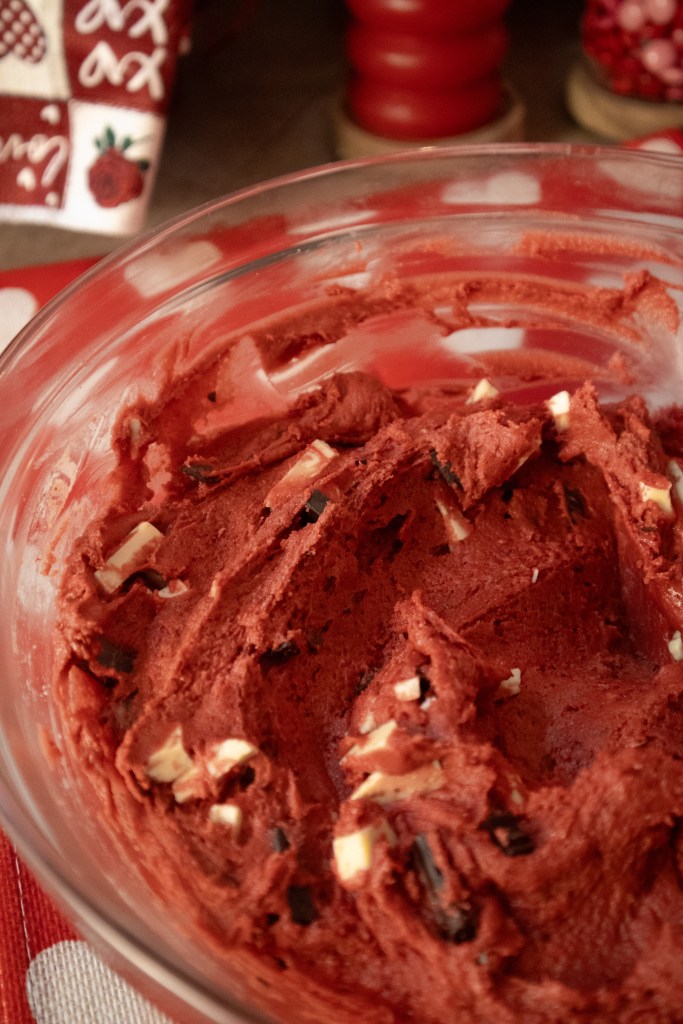
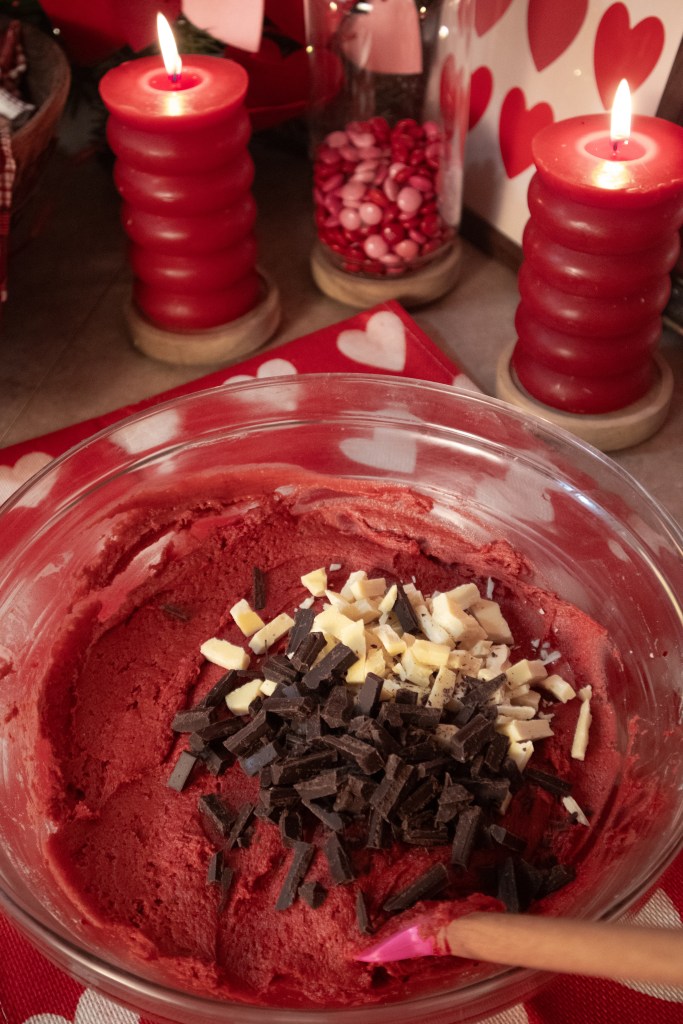
Step 6: Fold in the Chocolate Chunks
Gently fold in the chopped vegan dark chocolate and white chocolate bars, reserving a few chunks to press on top.
Step 7: Scoop & Bake
Scoop about 2 tablespoons of dough per cookie and place them 2 inches apart on the prepared baking sheets. Press a few extra chocolate chunks into the tops.
Bake for 10–12 minutes, until the edges are set and the centers look slightly underbaked.



Step 8: Cool
Let cookies cool on the baking sheet for 5 minutes before transferring to a wire rack. They’ll firm up while staying soft inside.
Tips for Bakery-Style Vegan Cookies
Chocolate bars > chips for melty pools and visual impact
Slightly underbake for soft, chewy centers
Use gel vegan food coloring for a deeper red
Press extra chocolate chunks on top immediately after baking

Variations & Substitutions
Extra Chocolatey: Add 1 more tablespoon cocoa powder
Oil-Free Option: Swap vegan butter for softened coconut oil (cookies will spread more)
Gluten-Free: Use a 1:1 gluten-free baking flour
All Dark Chocolate: Skip white chocolate for a richer cookie
Storage & Freezing
Store cookies in an airtight container at room temperature for up to 4 days
Freeze baked cookies for up to 2 months
Freeze cookie dough balls and bake from frozen (add 1–2 minutes)
Vegan Red Velvet Chocolate Chunk Cookies

These vegan red velvet chocolate chunk cookies are soft, chewy, and bakery-style, made with cocoa and melty dark and white vegan chocolate bars for rich chocolate pools. They’re easy to make with simple ingredients and perfect for holidays or anytime you want an indulgent vegan treat.
Dry Ingredients
- 2 ¼ cups all-purpose flour
- 2 tablespoons unsweetened cocoa powder
- 1 teaspoon baking soda
- ½ teaspoon salt
Wet Ingredients
- ¾ cup vegan butter (softened)
- ¾ cup brown sugar
- ¼ cup granulated sugar
- ⅓ cup unsweetened plant milk (almond, oat, or soy)
- 1 tablespoon apple cider vinegar
- 1 tablespoon vanilla extract
- 1 tablespoon red vegan food coloring
Chocolate
- 1 vegan dark chocolate bar (chopped)
- 1 vegan white chocolate bar (chopped)
- about 5–6 oz total
Instructions
- Preheat oven to 350°F (175°C) and line two baking sheets with parchment paper.
- In a medium bowl, whisk together flour, cocoa powder, baking soda, and salt. Set aside.
- In a large bowl, cream vegan butter, brown sugar, and granulated sugar until light and fluffy.
- Add plant milk, apple cider vinegar, vanilla extract, and red food coloring. Mix until smooth.
- Gradually add dry ingredients to wet ingredients and mix just until combined.
- Fold in chopped vegan dark and white chocolate bars, reserving a few pieces for topping.
- Scoop about 2 tablespoons of dough per cookie and place 2 inches apart on baking sheets. Press extra chocolate chunks on top.
- Bake for 10–12 minutes, until edges are set and centers look slightly soft.
- Let cool on baking sheet for 5 minutes before transferring to a wire rack.
Notes
-
For best results, slightly underbake for soft, chewy centers.
-
Chocolate bars melt into pools better than chips and give a bakery-style finish.
-
Cookies will firm up as they cool while staying soft inside.
More Recipes To Try:
If you loved these vegan red velvet chocolate chunk cookies, here are a few more sweet and cozy recipes to try next:
- Vegan Heart Shaped Pop Tarts – flaky, fruity, and perfect for special occasions
- Heart Shaped Churros – crispy, sweet, and fun to make
- Strawberry Glazed Donuts – light, fluffy, and full of flavor
- Homemade Vegan Sweet Potato Pie – rich, smooth, and comforting
- Fall Baking Recipe Ideas – cozy desserts for cooler days
- Summer Cookie Recipes – easy, fun cookies perfect for warm weather
Looking for even more sweet ideas? Browse my Valentine’s Day Treats, Summer Cookie Recipes, Fall Baking Recipe Ideas, and Sweet Summer Dessert Ideas for inspiration all year long.
Pin these for later…
-
Easy Vegan Strawberry Glazed Donuts

If there’s one dessert that instantly feels like spring, it’s strawberry donuts — and these vegan strawberry glazed donuts are exactly that kind of treat.

Soft, lightly sweet, baked (not fried), and topped with a beautifully pink strawberry glaze, they’re simple, fresh, and completely plant-based.
These donuts are made with real strawberries, no eggs, no dairy, and no complicated steps.
They’re perfect for weekend baking, brunch spreads, or when you want something sweet that still feels light and homemade.

If you love light, fluffy treats like these strawberry glazed donuts, you’ll definitely want to try a few more of my favorite homemade desserts.
My vegan red velvet chocolate chunk cookies, vegan heart shaped pop tarts, and heart shaped churros are all perfect for when you’re craving something sweet and fun.
Why You’ll Love These Vegan Strawberry Donuts
Baked, not fried
100% vegan and dairy-free
Made with real strawberries
Light, fluffy texture
Naturally pink glaze (with an optional color boost)
Perfect for spring, summer, or Valentine’s Day treats
These donuts are perfect for spring and summer, but you can enjoy them year-round whenever you’re craving something sweet and fruity.

Ingredients You’ll Need
For the Vegan Strawberry Donuts
1 cup fresh strawberries, chopped
1 ½ cups all-purpose flour (or gluten-free 1:1 blend)
½ cup granulated sugar
2 teaspoons baking powder
½ teaspoon baking soda
¼ teaspoon salt
½ cup unsweetened plant milk (almond, oat, or soy)
1 tablespoon vinegar (apple cider or white)
2 tablespoons applesauce
2 tablespoons neutral oil (avocado, vegetable, or canola)
1 teaspoon vanilla extract

For the Strawberry Glaze
1 cup fresh strawberries, hulled
1 ½ cups powdered sugar
1–2 tablespoons plant milk, as needed
¼ teaspoon vanilla extract
3–4 drops red vegan food coloring (optional, for a brighter pink)
The food coloring is totally optional — I just like a slightly more pigmented glaze for that classic strawberry donut look.



How to Make Vegan Strawberry Glazed Donuts
Step 1: Prep
Preheat your oven to 350°F and lightly grease a donut pan.
Step 2: Make the Strawberry Purée
Blend the fresh strawberries until smooth. Measure out 1 cup of purée for the donut batter.
Step 3: Mix Dry Ingredients
In a large bowl, whisk together the flour, sugar, baking powder, baking soda, and salt.
Step 4: Mix Wet Ingredients
In a separate bowl, combine the strawberry purée, plant milk, vinegar, applesauce, oil, and vanilla extract. Stir until smooth.
Step 5: Combine
Pour the wet ingredients into the dry ingredients and gently mix until just combined. Don’t overmix — this keeps the donuts soft.
Step 6: Bake
Fill each donut cavity about ¾ full. Bake for 10–12 minutes, or until the donuts spring back when lightly pressed.
Let cool in the pan for 5 minutes, then transfer to a wire rack to cool completely before glazing.



How to Make the Strawberry Glaze
1. Blend the strawberries until completely smooth.
2. In a bowl, whisk the strawberry purée with powdered sugar and vanilla.
3. Add plant milk one tablespoon at a time until the glaze is thick but pourable.
4. Add red vegan food coloring, if using, until you reach your desired pink color.
5. Dip the cooled donuts into the glaze and let set for 10–15 minutes.


Helpful Tips for Perfect Donuts
Use Fresh Strawberries
Fresh strawberries give the best flavor and color. If using frozen, thaw completely and drain excess liquid.
Don’t Overbake
These donuts bake quickly — overbaking will dry them out. Pull them as soon as they spring back.

Want Extra Strawberry Flavor?
Add a tablespoon of strawberry purée to the glaze or sprinkle freeze-dried strawberry powder on top.

Optional Applesauce Variation
If you want a slightly more moist donut or prefer an oil-reduced version, you can replace 1–2 tablespoons of oil with unsweetened applesauce.
This isn’t necessary for the recipe to work, but it’s a nice option if you like baking with fruit-based substitutes.

Storage & Make-Ahead Tips
Store glazed donuts in an airtight container for up to 2 days at room temperature or 4 days in the fridge
Un-glazed donuts freeze well for up to 2 months
Glaze just before serving for the freshest look and texture
Frequently Asked Questions
Are these donuts fried?
No — these are baked vegan donuts, which makes them lighter and easier to make at home.
Can I make these gluten-free?
Yes! Use a 1:1 gluten-free flour blend designed for baking.
Can I make the glaze without food coloring?
Absolutely. The strawberries naturally tint the glaze pink — the food coloring is just for a more vibrant finish.
Can I use another fruit?
Yes! This recipe works well with raspberries or mixed berries using the same method.


Final Thoughts
These vegan strawberry glazed donuts are one of those recipes that feels special but is still simple enough to make anytime. They’re soft, fruity, and just sweet enough — the kind of treat that disappears fast once you set it on the table.
If you make them, don’t be surprised if they become a repeat favorite.
Vegan Strawberry Glazed Donuts

Soft, baked vegan strawberry glazed donuts made with real strawberries and topped with a naturally pink strawberry glaze. Dairy-free, egg-free, and perfect for spring or anytime you’re craving a light, fruity treat.
For the Vegan Strawberry Donuts
- 1 cup fresh strawberries (chopped)
- 1 ½ cups all-purpose flour (or gluten-free 1:1 blend)
- ½ cup granulated sugar
- 2 teaspoons baking powder
- ½ teaspoon baking soda
- ¼ teaspoon salt
- ½ cup unsweetened plant milk (almond, oat, or soy)
- 1 tablespoon vinegar (apple cider or white)
- 2 tablespoons neutral oil (avocado, vegetable, or canola)
- 1 teaspoon vanilla extract
For the Strawberry Glaze
- 1 cup fresh strawberries (hulled)
- 1 ½ cups powdered sugar
- 2 tablespoons plant milk (as needed)
- ¼ teaspoon vanilla extract
- 3 drops red vegan food coloring (optional)
Instructions
- Preheat oven to 350°F (175°C) and lightly grease a donut pan.
- Blend the chopped strawberries until smooth. Measure out 1 cup strawberry purée.
- In a large bowl, whisk together the flour, sugar, baking powder, baking soda, and salt.
- In a separate bowl, whisk together the strawberry purée, plant milk, vinegar, oil, and vanilla extract.
- Pour the wet ingredients into the dry ingredients and gently mix until just combined.
- Fill each donut cavity about ¾ full.
- Bake for 10–12 minutes, or until donuts spring back lightly when touched.
- Let cool in the pan for 5 minutes, then transfer to a wire rack to cool completely.
To Make the Strawberry Glaze
- Blend strawberries until smooth.
- Whisk strawberry purée with powdered sugar and vanilla extract.
- Add plant milk one tablespoon at a time until glaze is thick but pourable.
- Stir in vegan food coloring, if using.
- Dip cooled donuts into glaze and allow to set for 10–15 minutes.
Notes
-
Use fresh strawberries for the best flavor and color.
-
If using frozen strawberries, thaw completely and drain excess liquid before blending.
-
Donuts must be fully cooled before glazing for the glaze to set properly.
-
Applesauce can be used as a variation to replace 1–2 tablespoons of oil for a slightly more moist donut.
Storage
-
Store glazed donuts in an airtight container at room temperature for up to 2 days
-
Refrigerate for up to 4 days
-
Freeze un-glazed donuts for up to 2 months
More Recipes To Try:
If you loved these strawberry glazed donuts, here are a few more sweet and easy recipes to try next:
- Vegan Red Velvet Chocolate Chunk Cookies – soft, rich, and bakery-style
- Vegan Heart Shaped Pop Tarts – flaky, fruity, and perfect for special occasions
- Heart Shaped Churros – crispy, sweet, and fun to make
- Homemade Vegan Sweet Potato Pie – rich, smooth, and comforting
- Summer Cookie Recipes – easy cookies perfect for warm weather
- Sweet Summer Dessert Ideas – light and refreshing treats
- Fall Baking Recipe Ideas – cozy desserts for cooler days
Pin these for later…


-
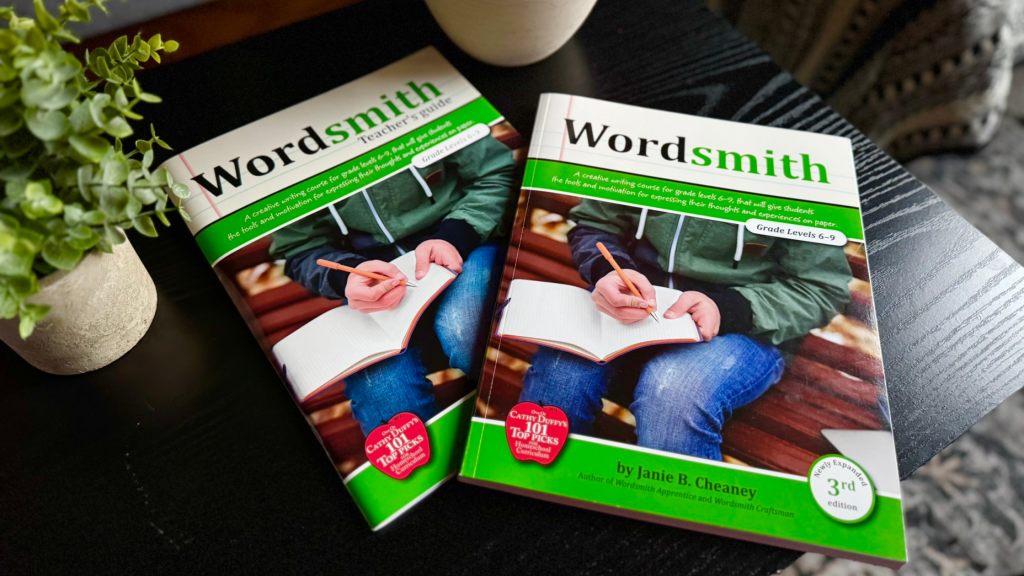
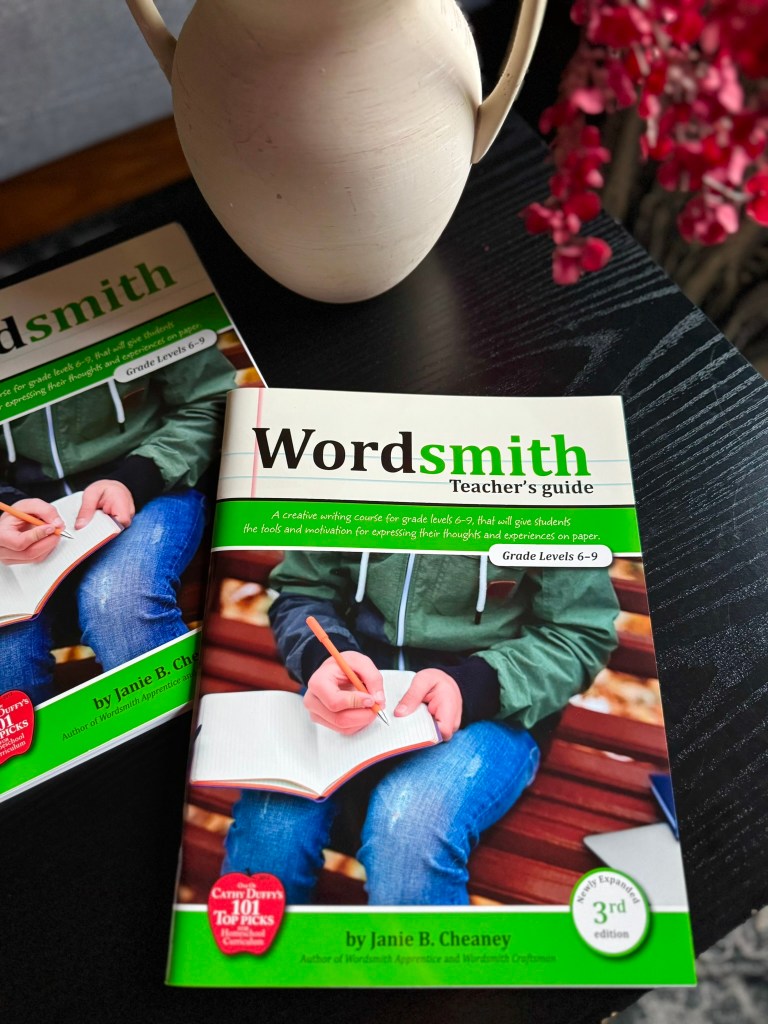
Wordsmith Bundle Review: A Straightforward Writing Program That Actually Builds Skill
Finding a writing curriculum for middle school that doesn’t feel overwhelming can be harder than it should be.
A lot of programs either lean too heavily into creative fluff or swing the other way with endless grammar drills that leave kids frustrated.
When you’re homeschooling, you want something that actually builds skill without turning writing into a daily battle.
How the Wordsmith Bundle Approaches Writing
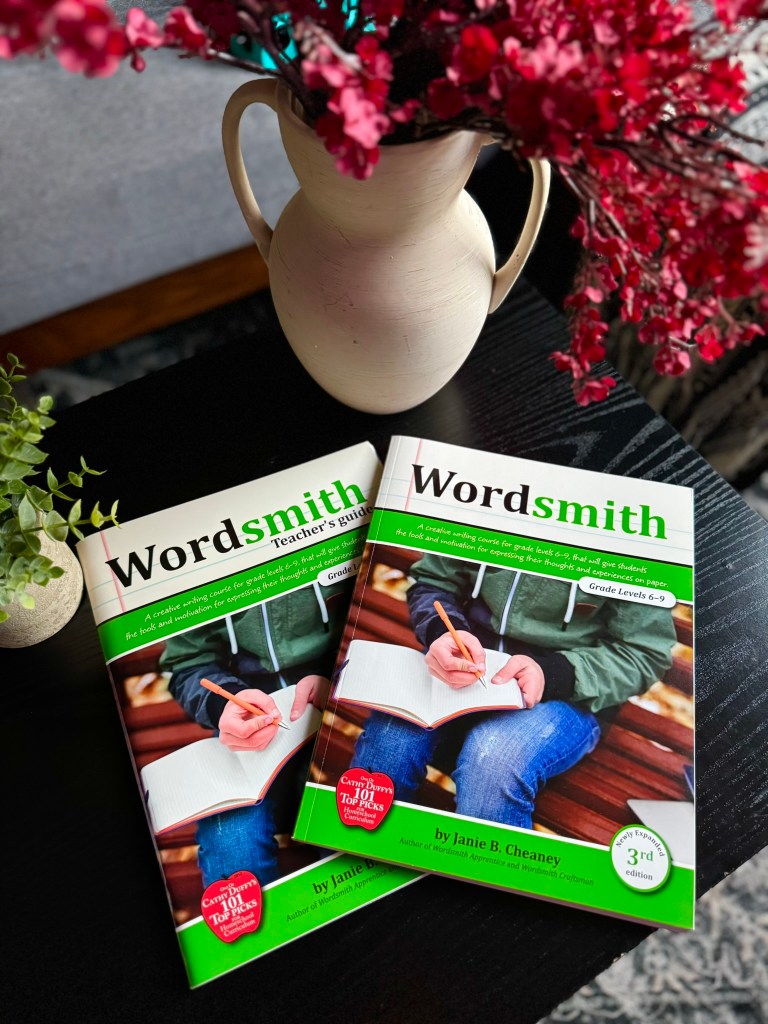
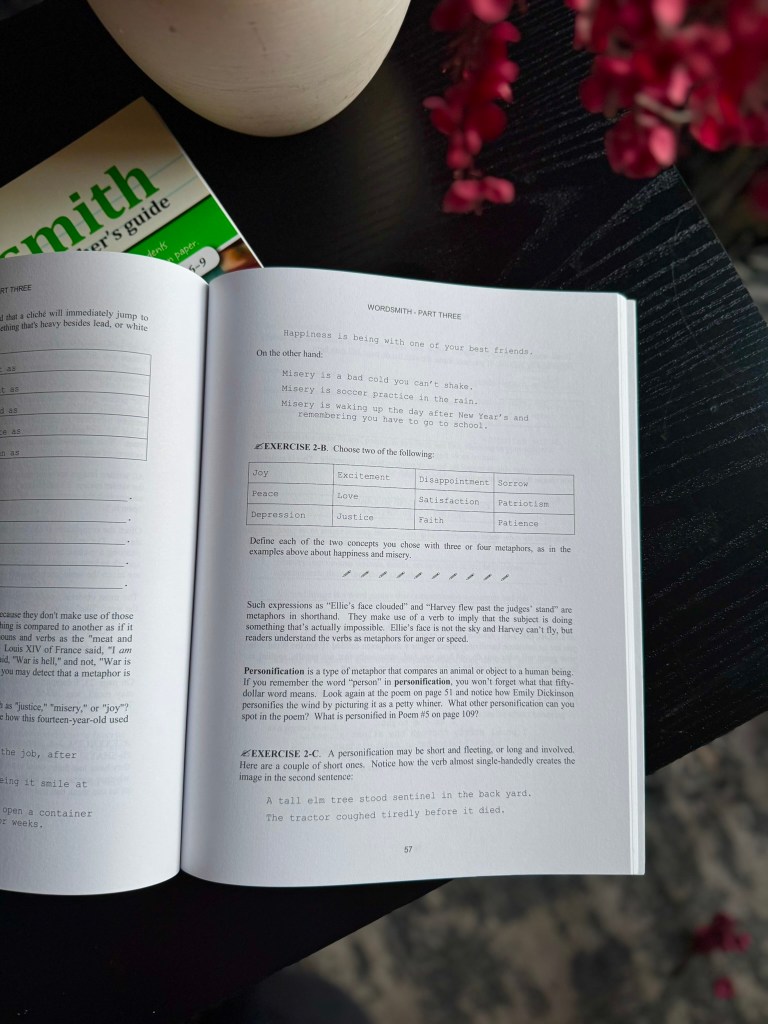
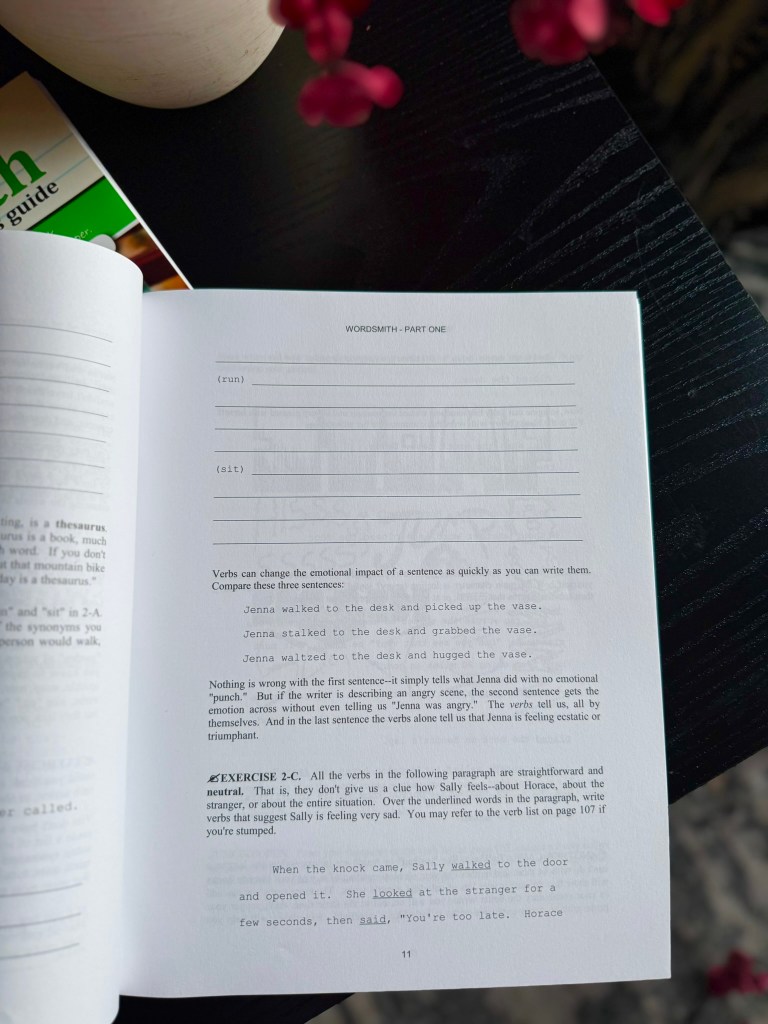
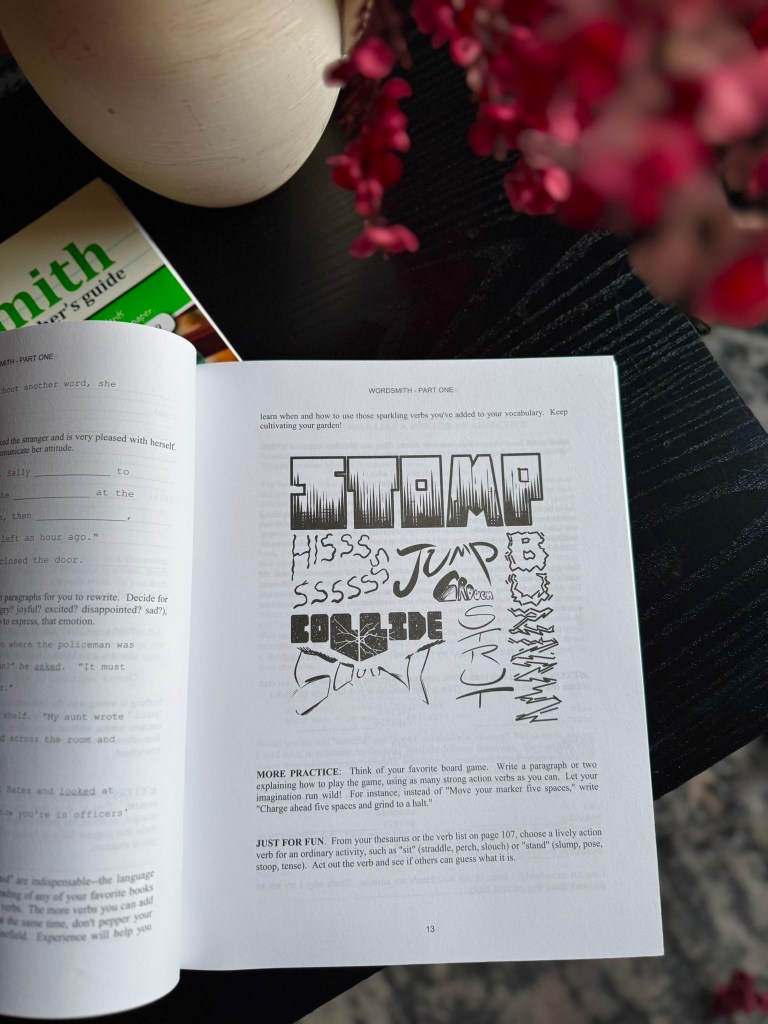
The Wordsmith Bundle is designed for grades 6–9 and focuses on helping students understand how writing actually works.
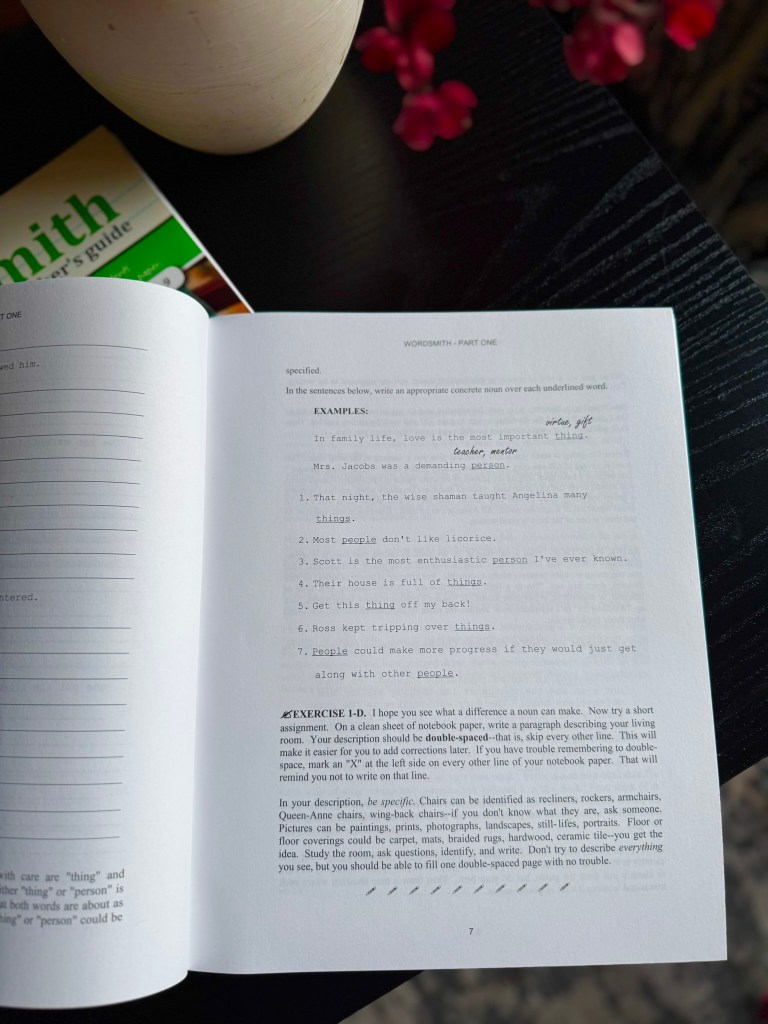
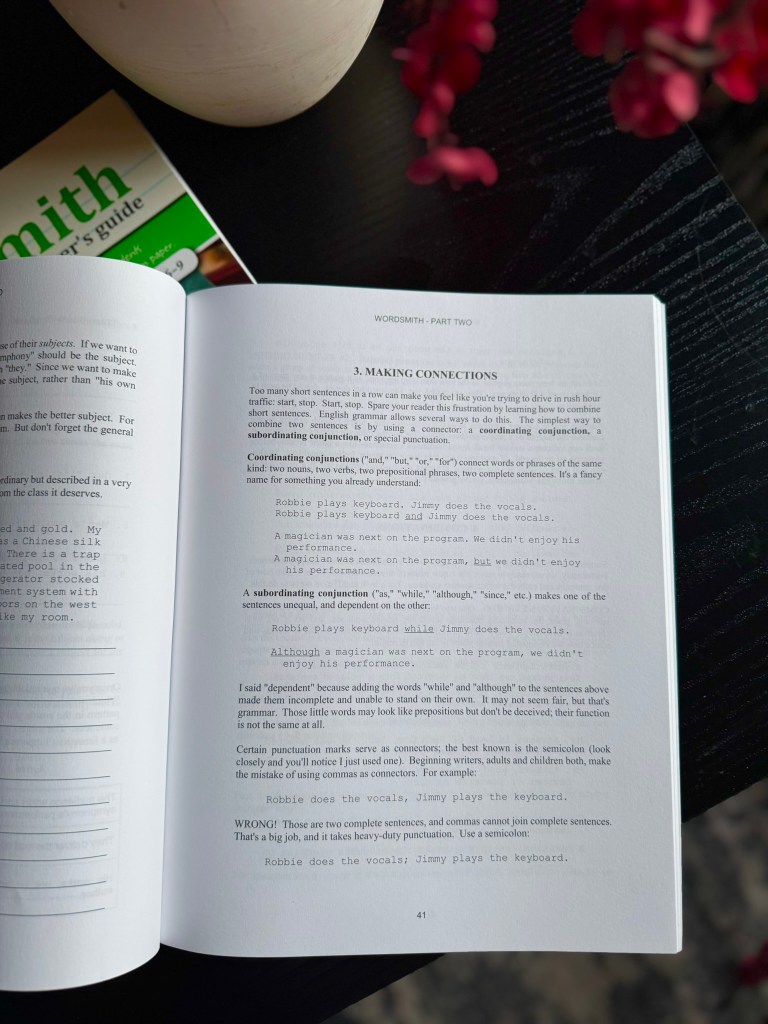
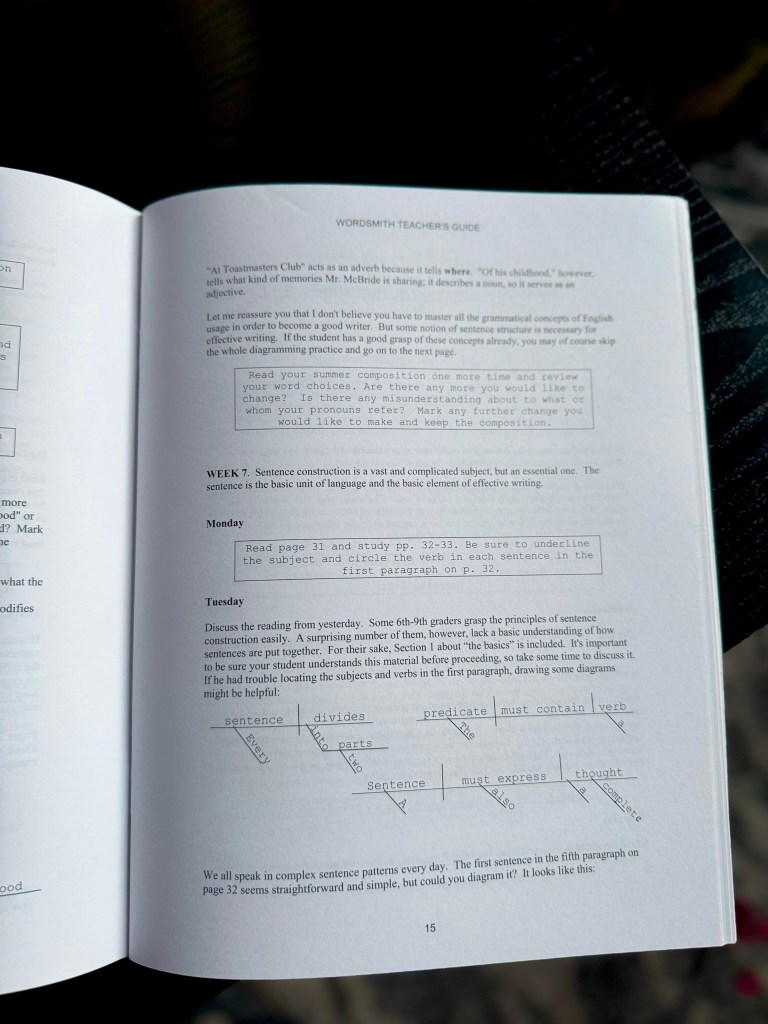
Instead of busywork or vague prompts, it walks kids through sentence structure, word choice, and organization in a way that feels practical and achievable.
The emphasis is on clarity and communication, not perfection.
A Writing Program That Builds Skills Gradually
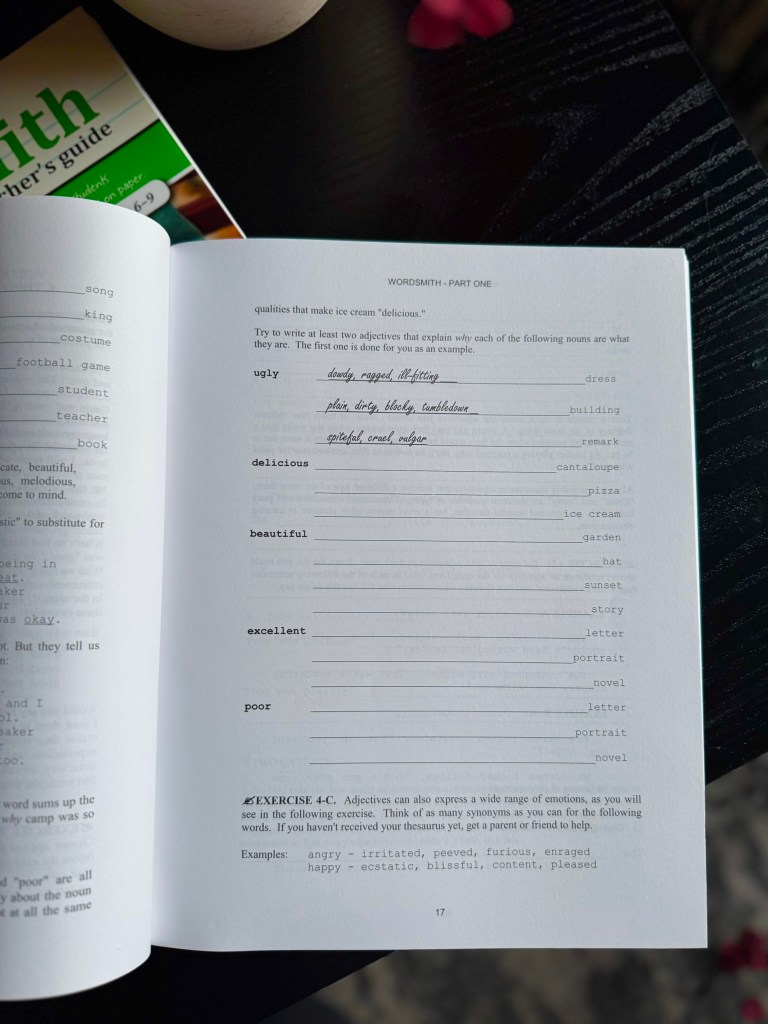
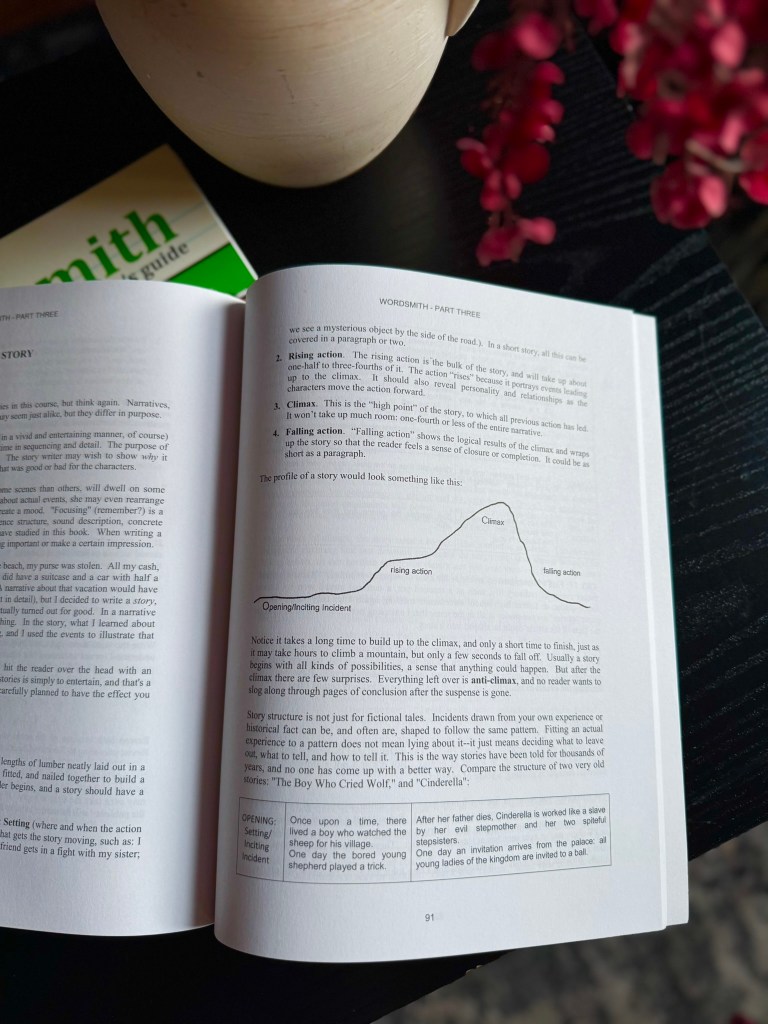
One of the biggest strengths of Wordsmith is how it builds skills step by step. Students aren’t pushed into long essays without support.
Instead, lessons show them how to strengthen sentences, expand ideas, and revise their work so it reads more clearly and confidently.
The writing assignments feel purposeful, which helps even reluctant writers stay engaged without feeling pressured.
What Makes Wordsmith Easy to Teach at Home
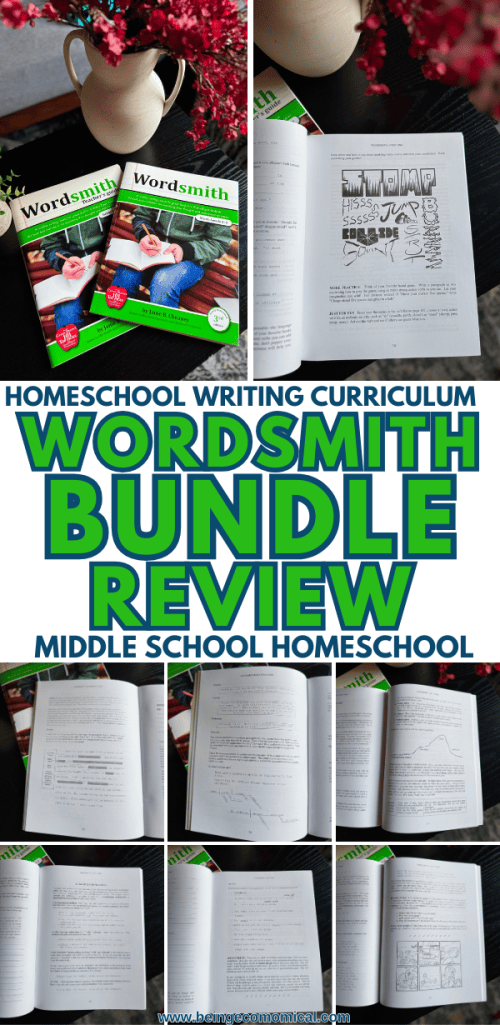
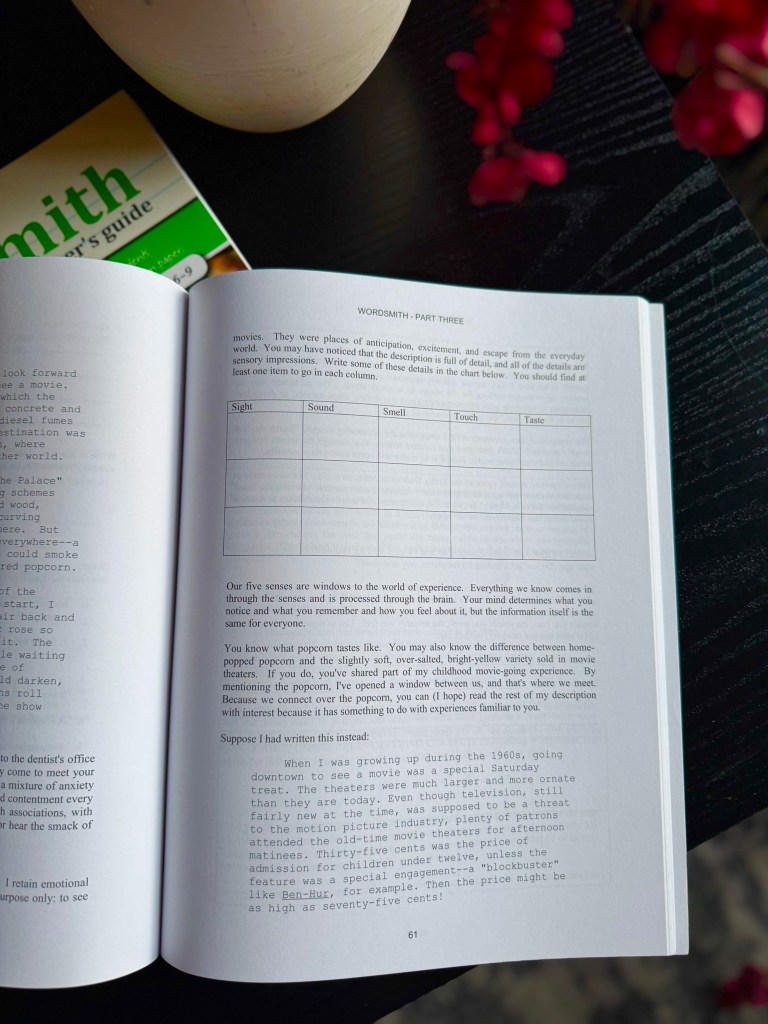
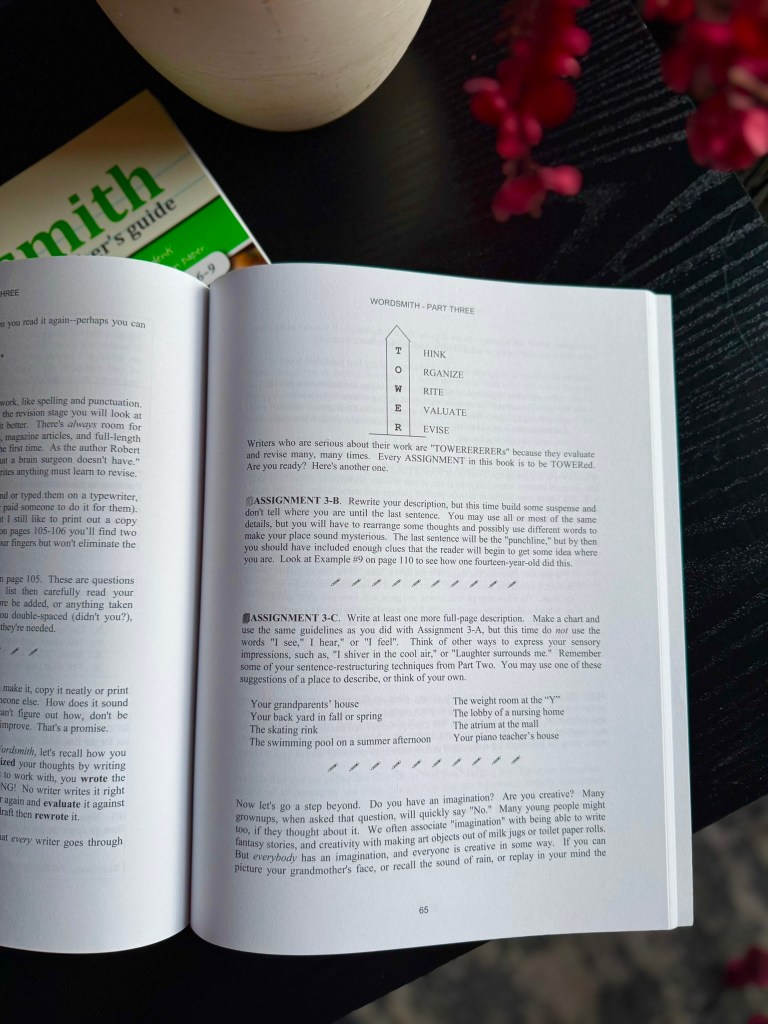
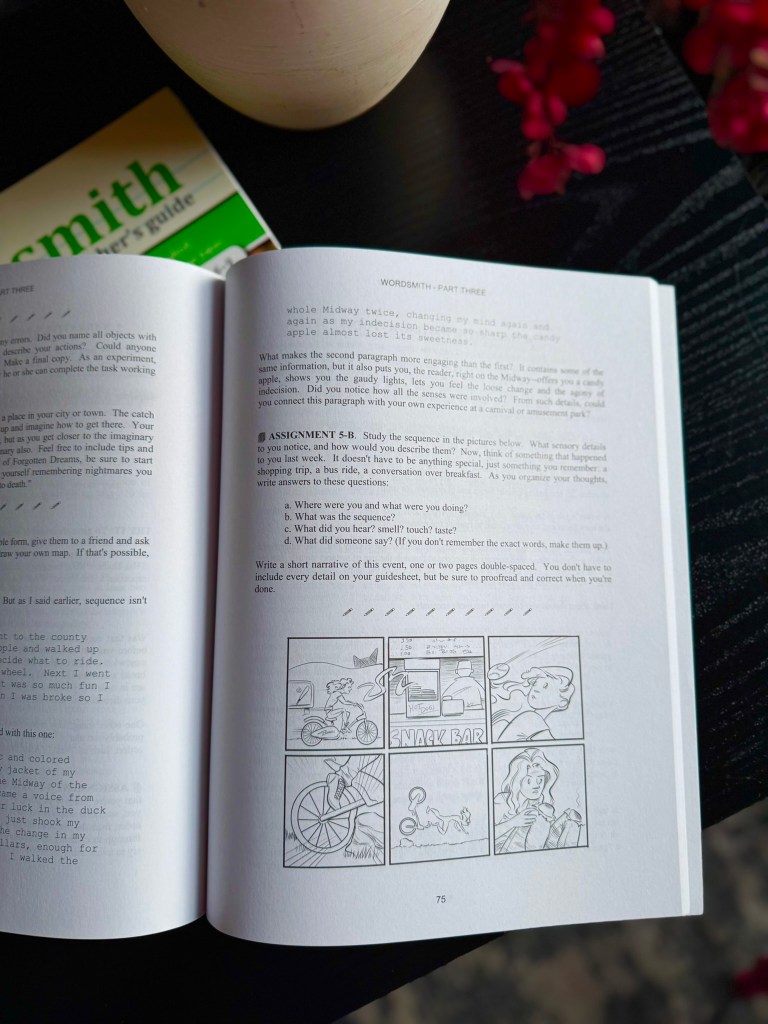
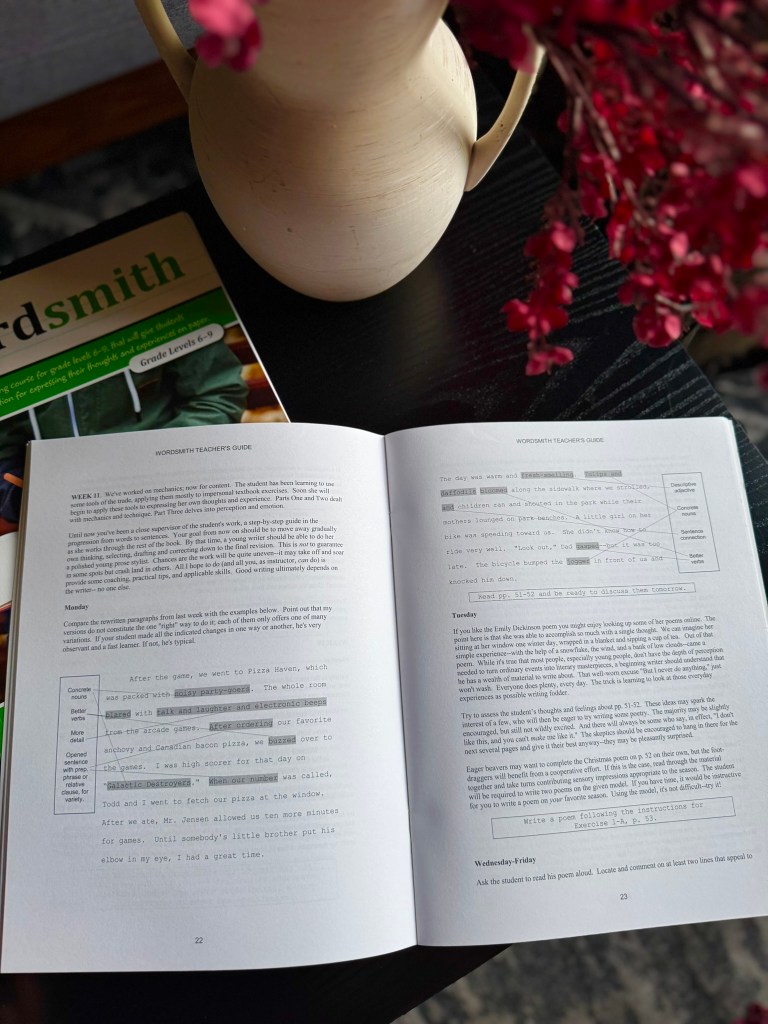
The bundle includes both a student book and a teacher guide, which makes teaching writing much less stressful.
The teacher guide explains what to look for in your child’s work, how to guide revisions, and what solid writing should sound like at this level.
You’re not left guessing or overcorrecting, which saves time and mental energy.
Who the Wordsmith Bundle Works Best For
Wordsmith is especially helpful for students who can explain ideas clearly out loud but struggle to get those thoughts onto paper.
It’s also a great fit for kids who already enjoy writing but need more structure to strengthen their skills. Whether your child is hesitant or confident, the program meets them where they are and helps them grow steadily.
Why the Teacher Manual Makes a Difference
One of the most helpful parts of the Wordsmith Bundle is the teacher manual. It walks you through what each lesson is aiming to teach, what strong writing should look like at this stage, and how to guide revisions without overcorrecting.
Instead of guessing or second-guessing yourself, you have clear guidance and answer keys that make teaching writing feel doable and calm—even if writing isn’t your favorite subject to teach.
Is the Wordsmith Bundle Worth Using for Middle School?
If you’re looking for a middle school writing curriculum that’s clear, effective, and realistic to teach, the Wordsmith Bundle is a solid choice.
It builds real writing skills, respects your child’s learning pace, and fits smoothly into a homeschool routine without adding unnecessary stress.
-
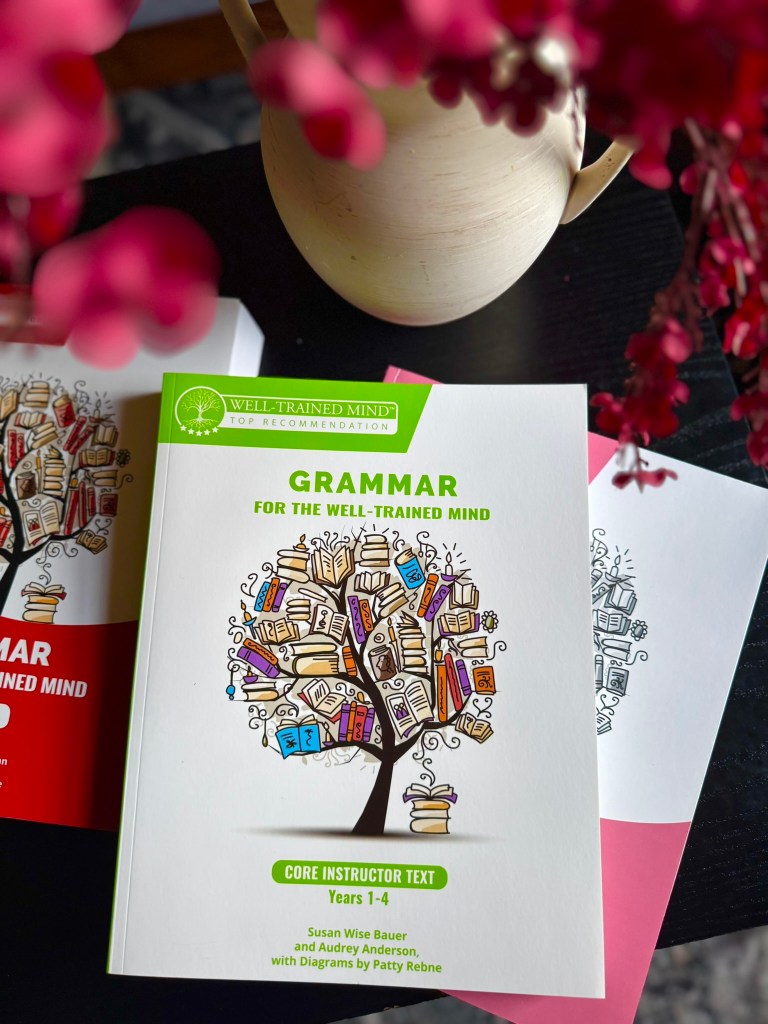
Grammar for the Well-Trained Mind Review (Honest Homeschool Mom Take)
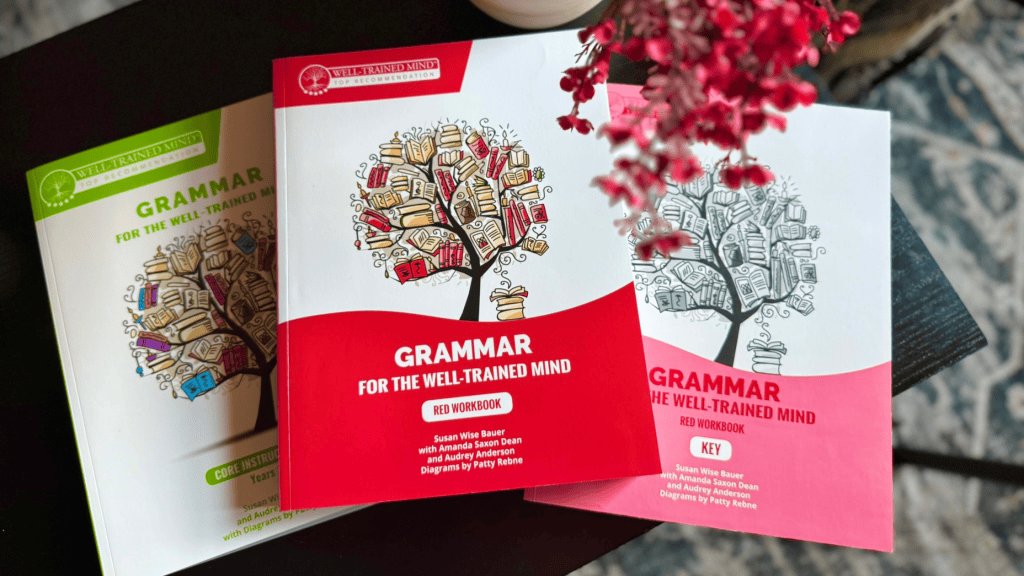
If grammar has ever felt like one of those homeschool subjects you know matters—but secretly dread teaching—this review is for you.
I’ve tried my fair share of grammar programs over the years, and many of them fall into one of two categories:
either too babyish or so dry and confusing that everyone checks out halfway through the lesson.That’s exactly why Grammar for the Well-Trained Mind stands out—and why it’s become one of those resources I genuinely believe every serious homeschool needs at some point.
Whether you’re homeschooling a middle schooler, preparing for high school writing, or simply want a grammar program that actually sticks, here’s my honest, mom-to-mom review.
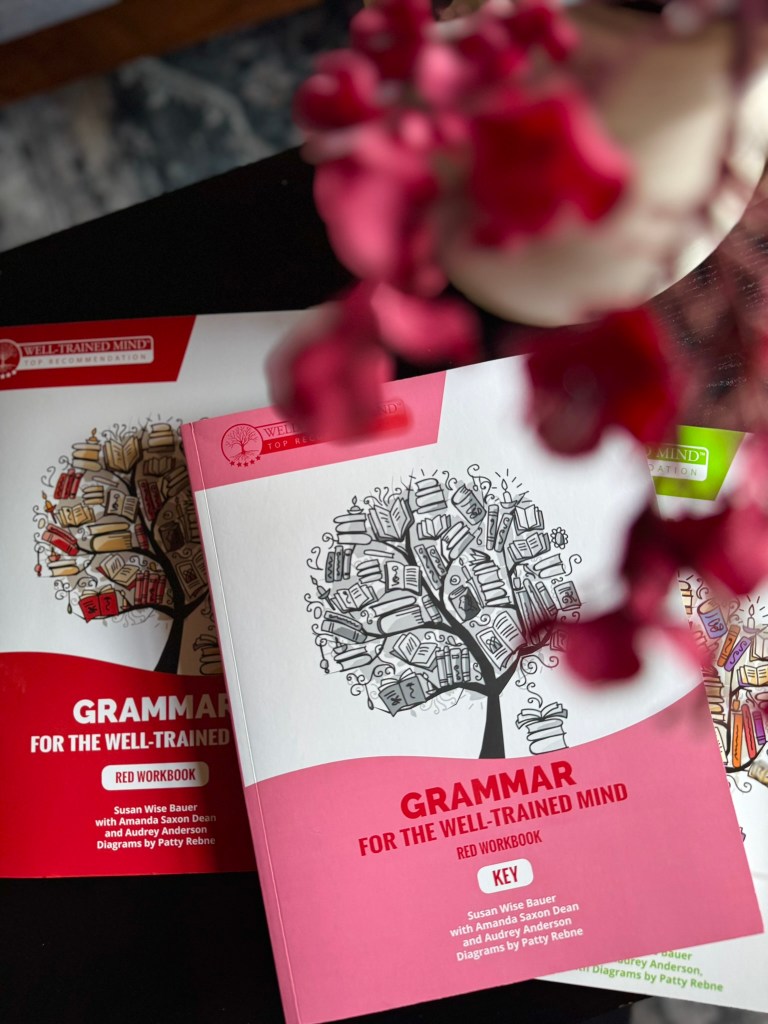
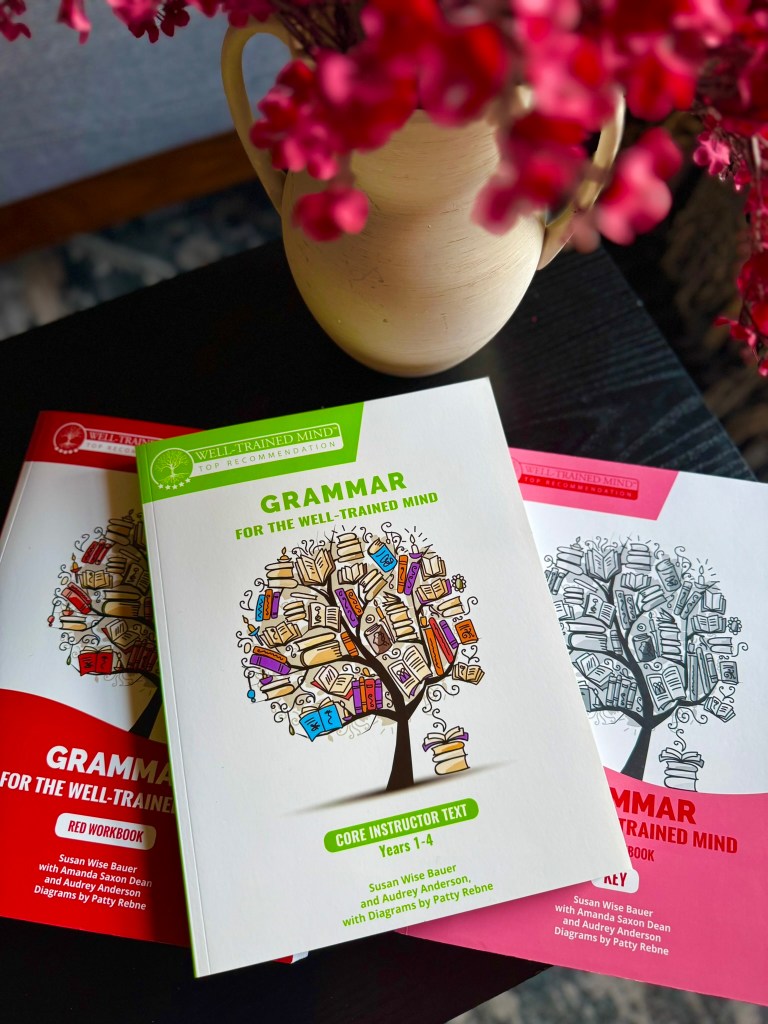
What Is Grammar for the Well-Trained Mind?
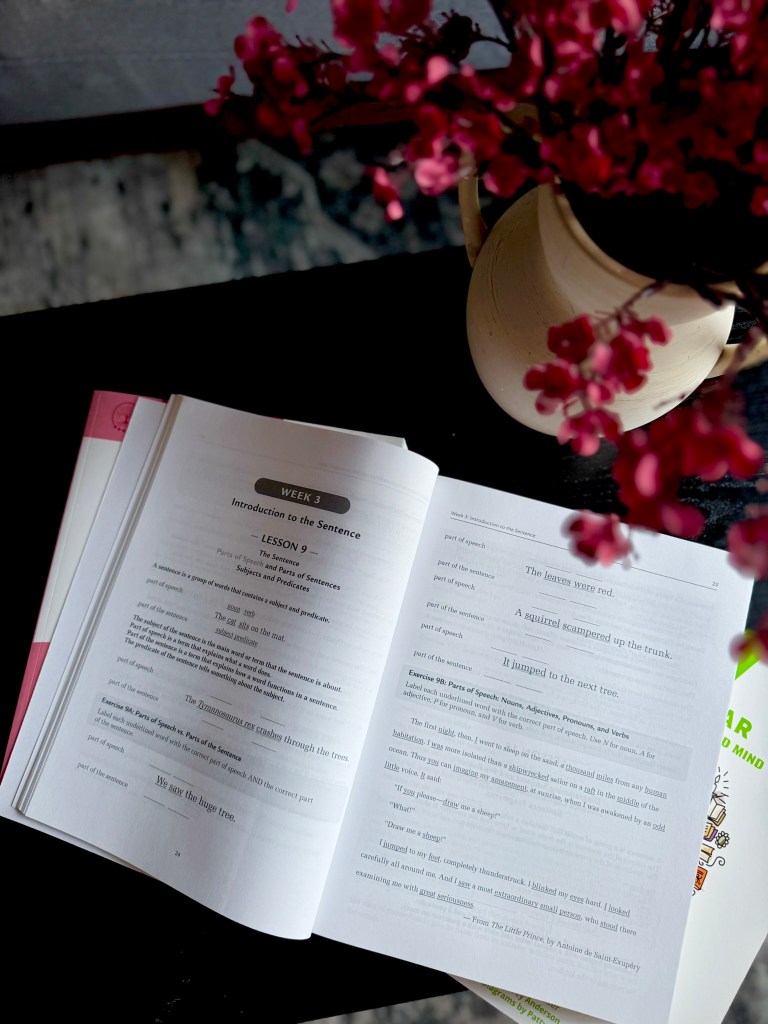
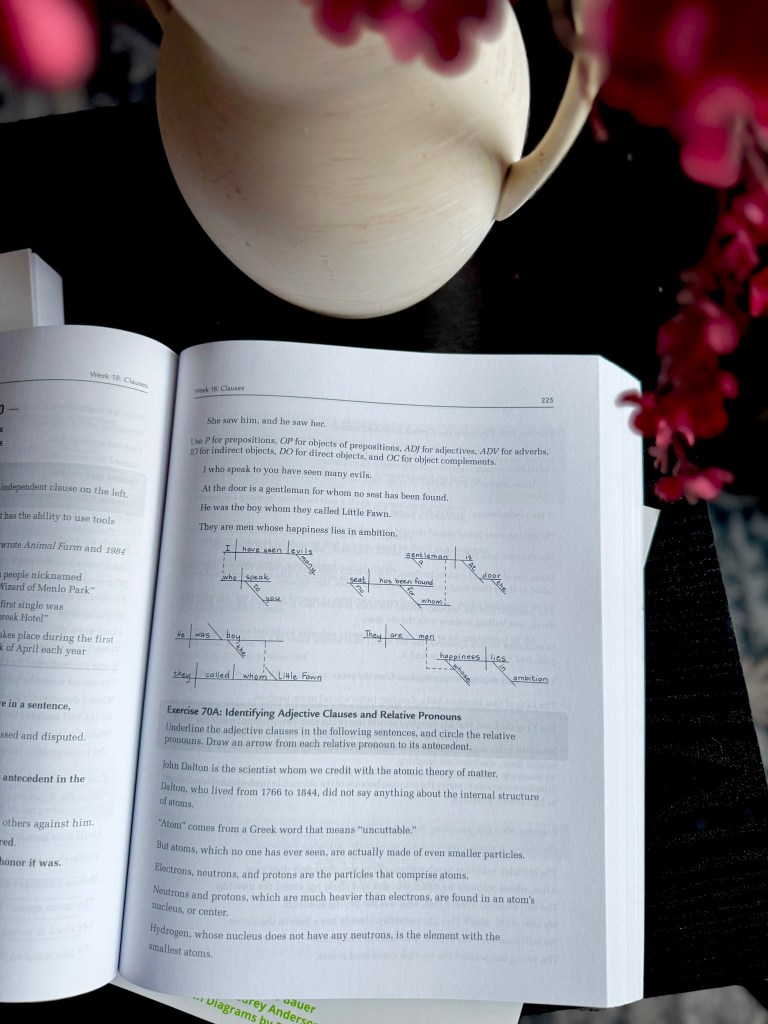
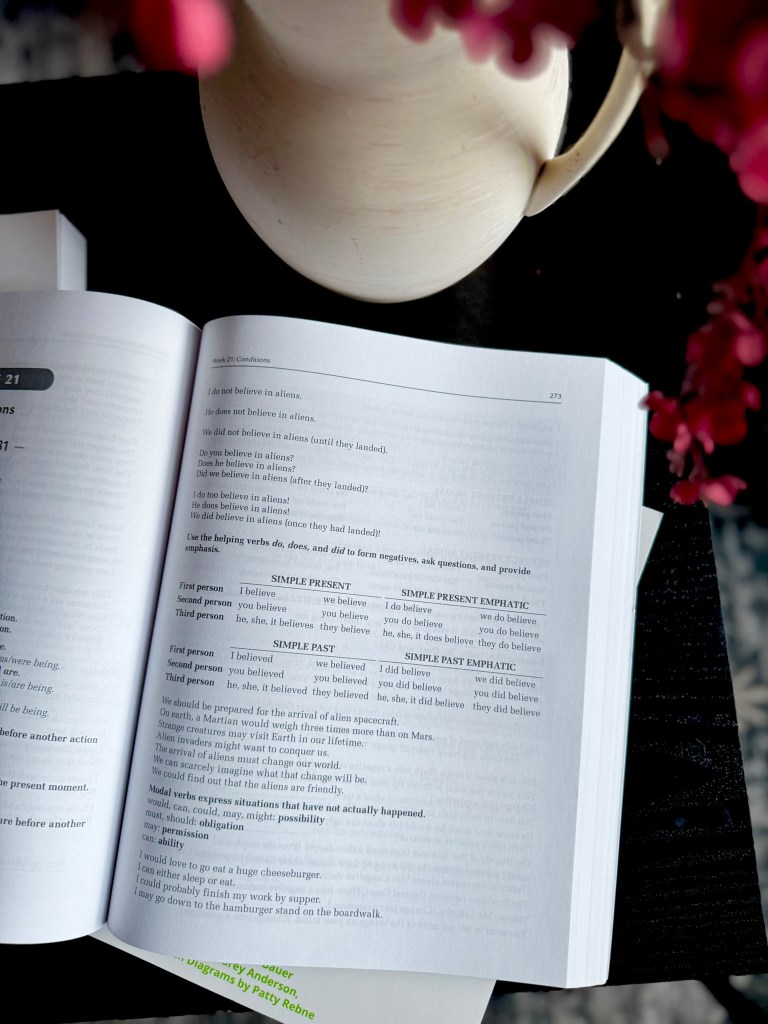
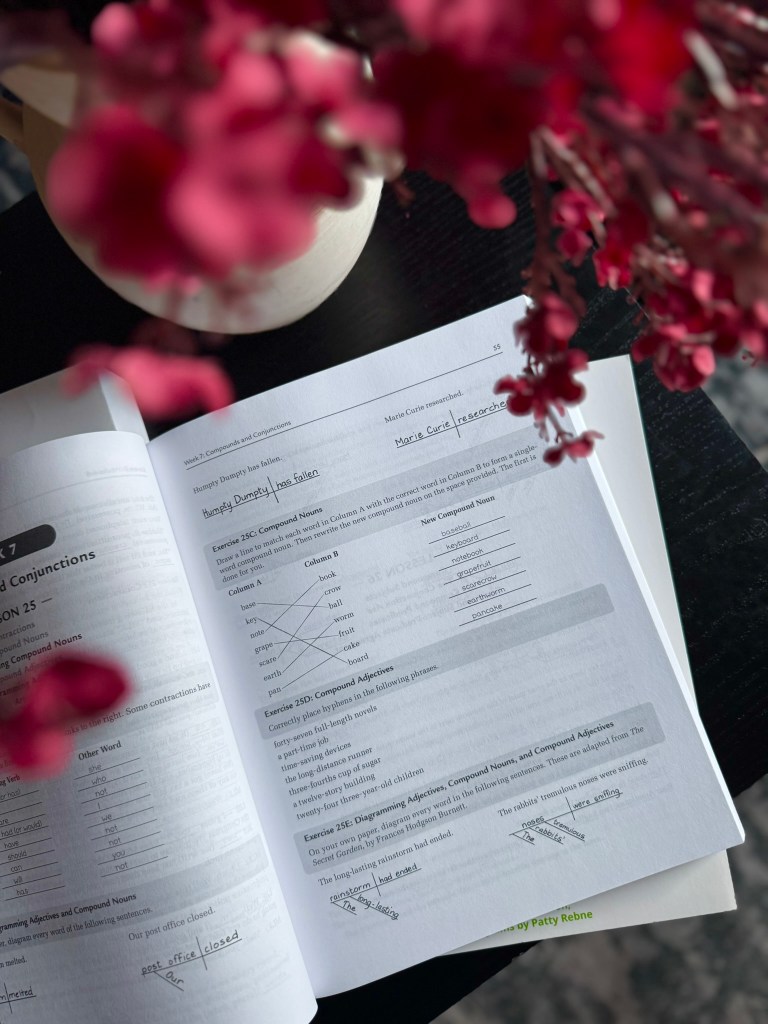
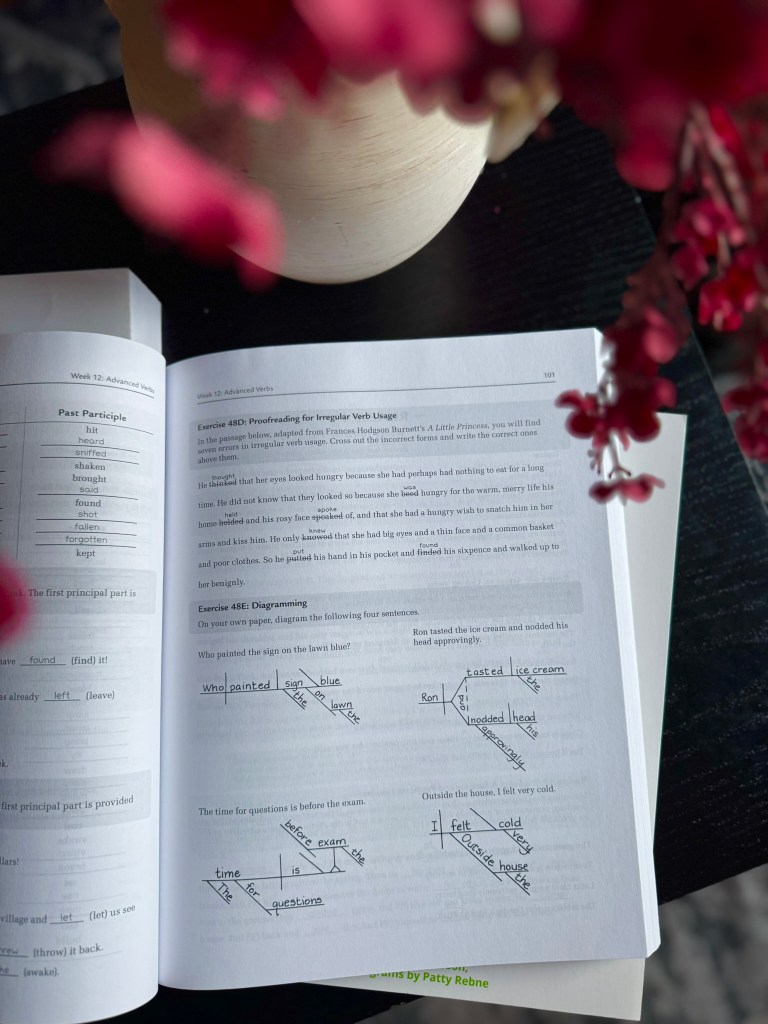
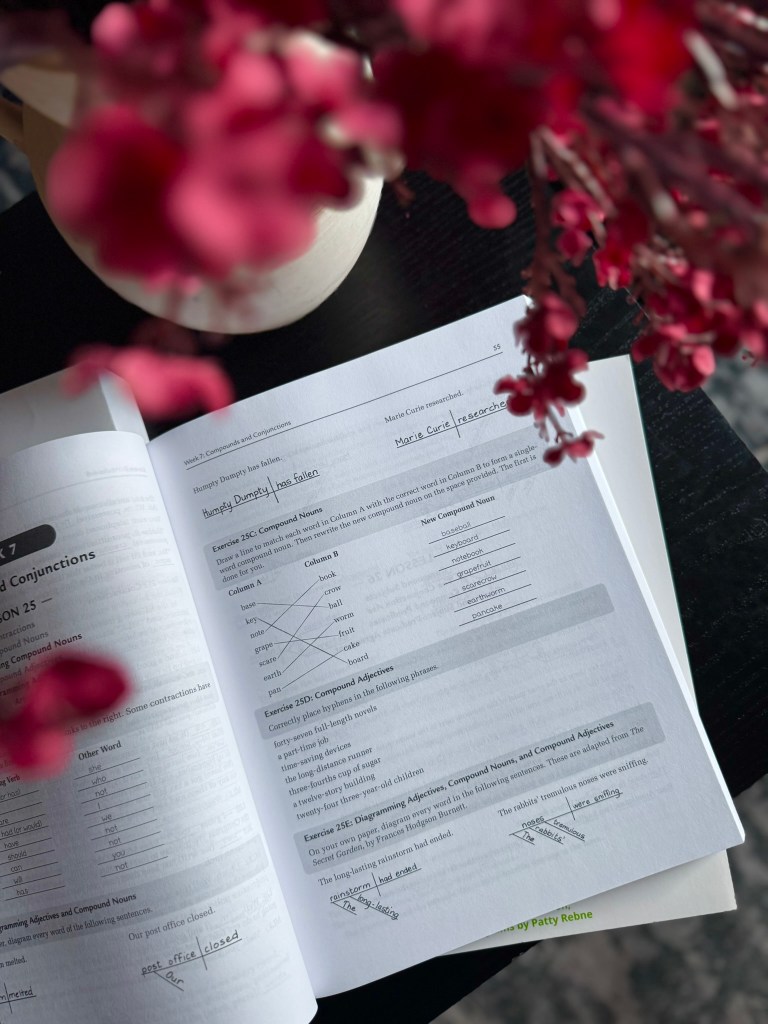
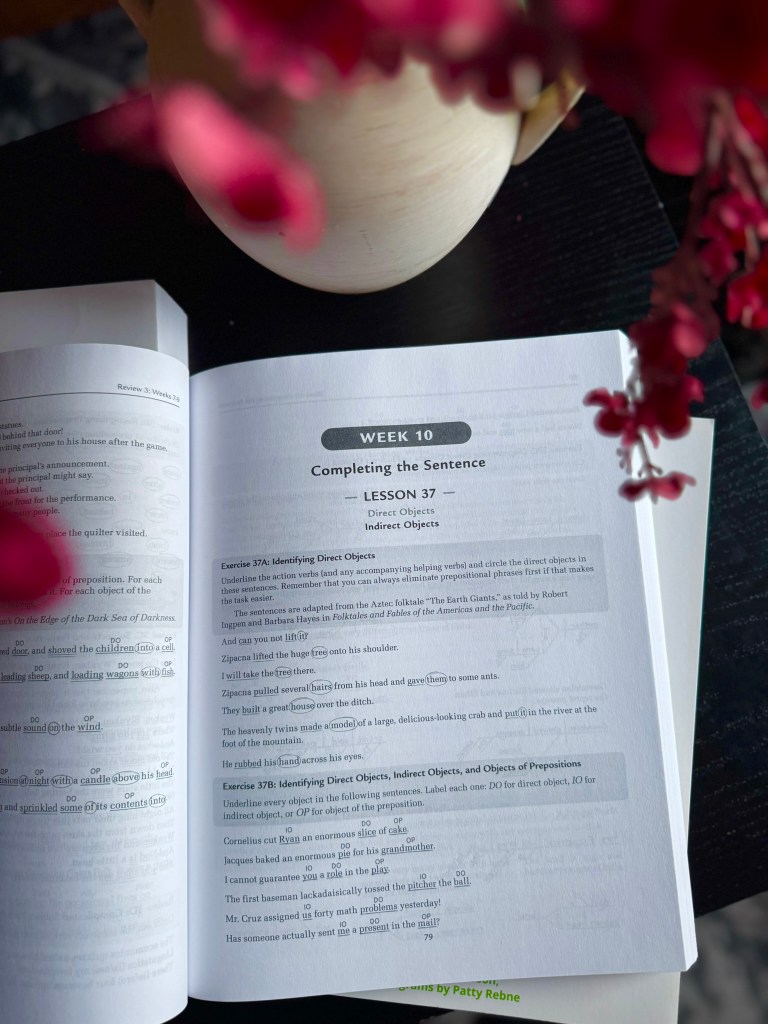
Grammar for the Well-Trained Mind is a classical, mastery-based grammar program designed to teach students how English actually works—not just how to circle answers on a worksheet.
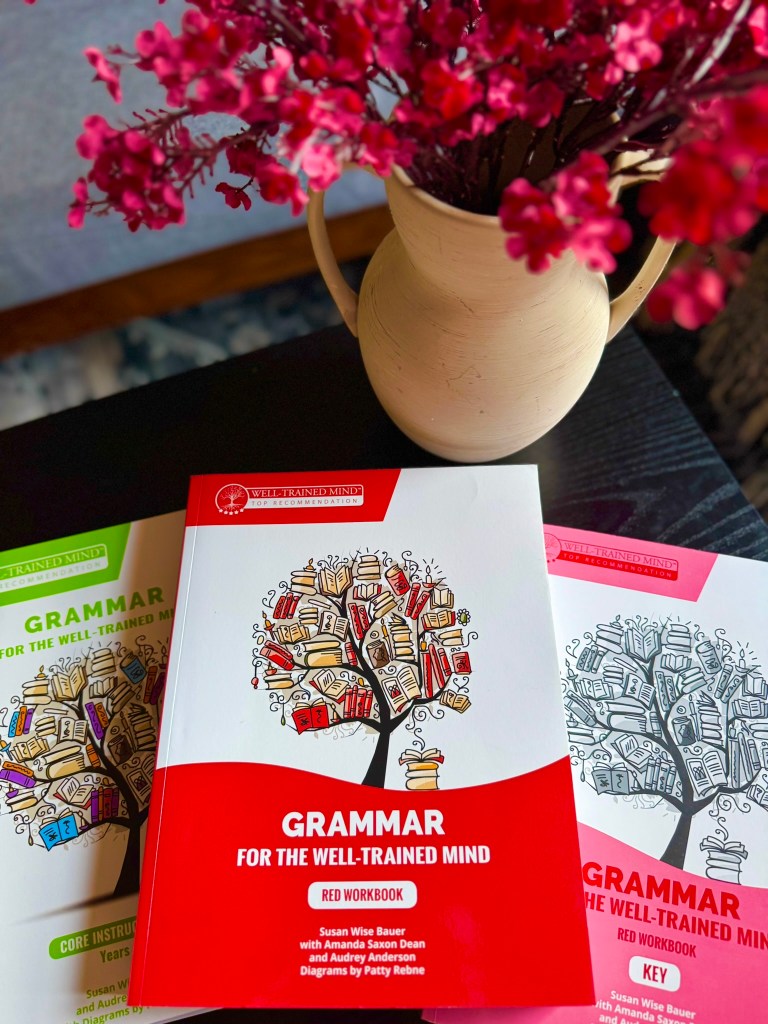
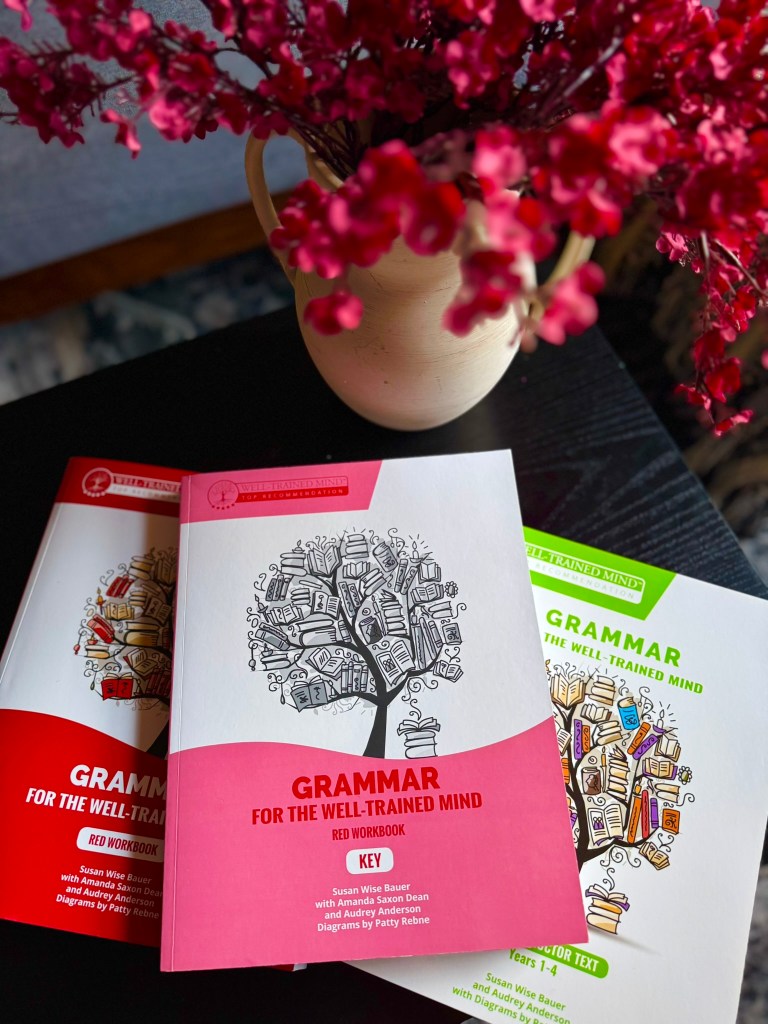
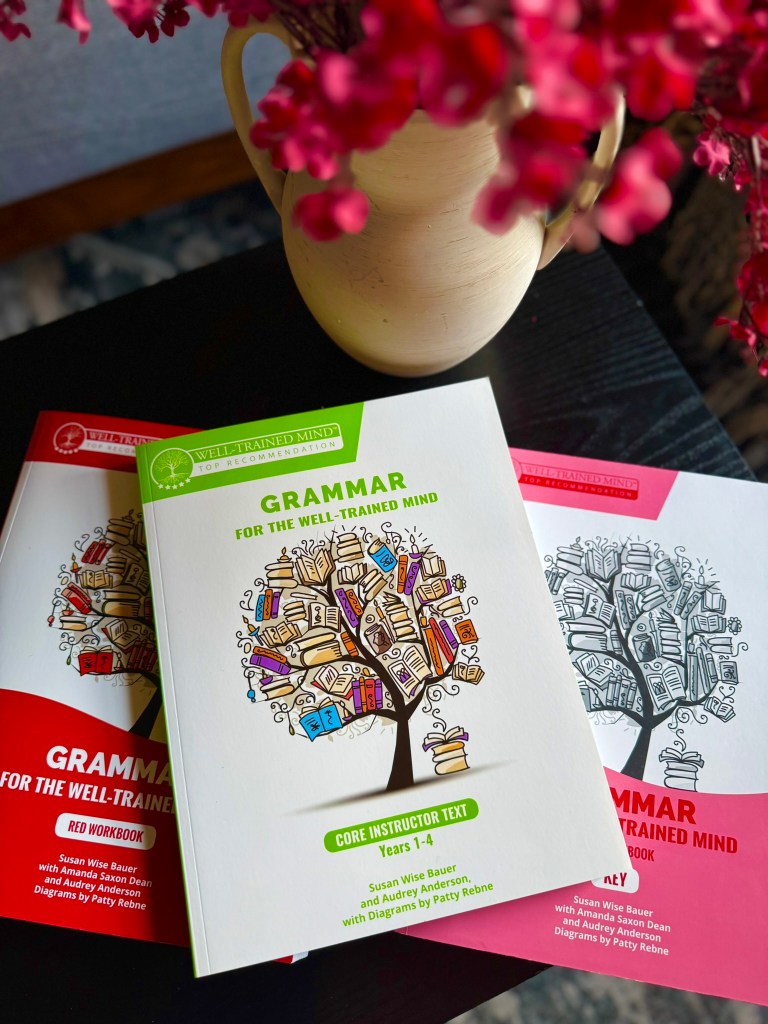
Instead of racing through grammar topics once and moving on, this curriculum works in cycles. Students revisit the same core grammar concepts year after year, each time going deeper and building more confidence.
The Red workbook (available through Timberdoodle) is one level in that cycle and is typically used for middle school and up, depending on your child.
This isn’t fluff grammar. It’s real grammar—the kind that strengthens writing, reading comprehension, and even logical thinking.
Related Posts:
Why This Grammar Program Works So Well for Homeschool Families
1. It’s Mastery-Based (Not Just Busywork)
One of my biggest frustrations with grammar programs is how quickly kids forget everything they “learned.”
This curriculum solves that problem.
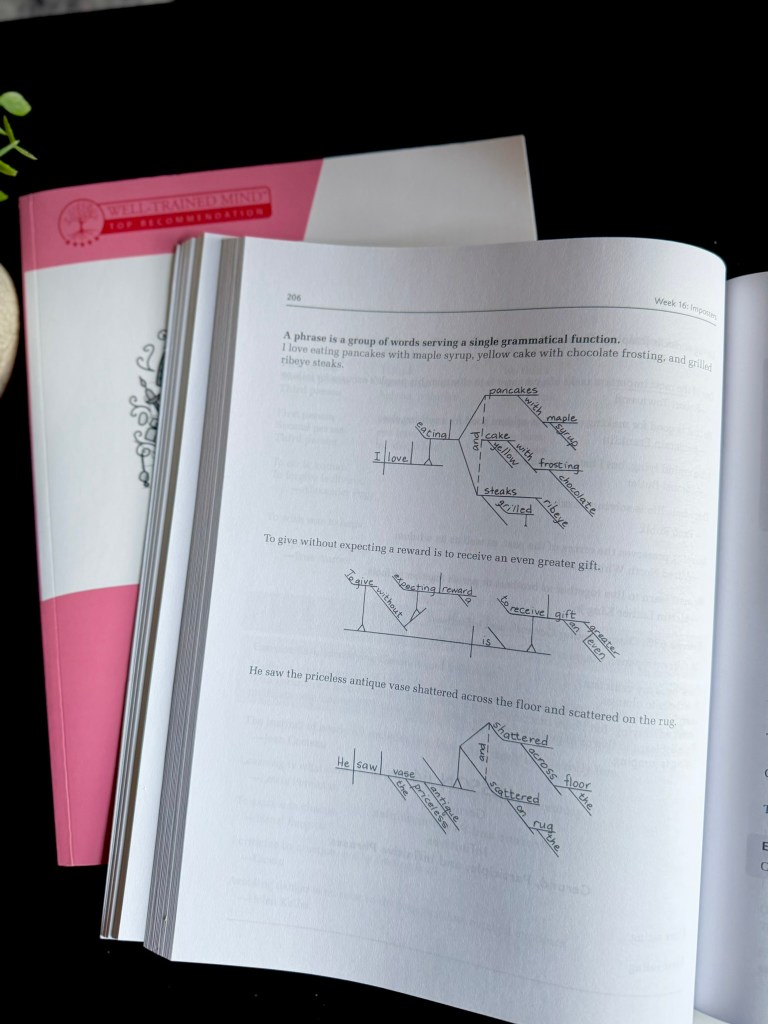
Instead of introducing a concept once and never touching it again, Grammar for the Well-Trained Mind intentionally revisits:
- parts of speech
- sentence structure
- punctuation
- clauses and phrases
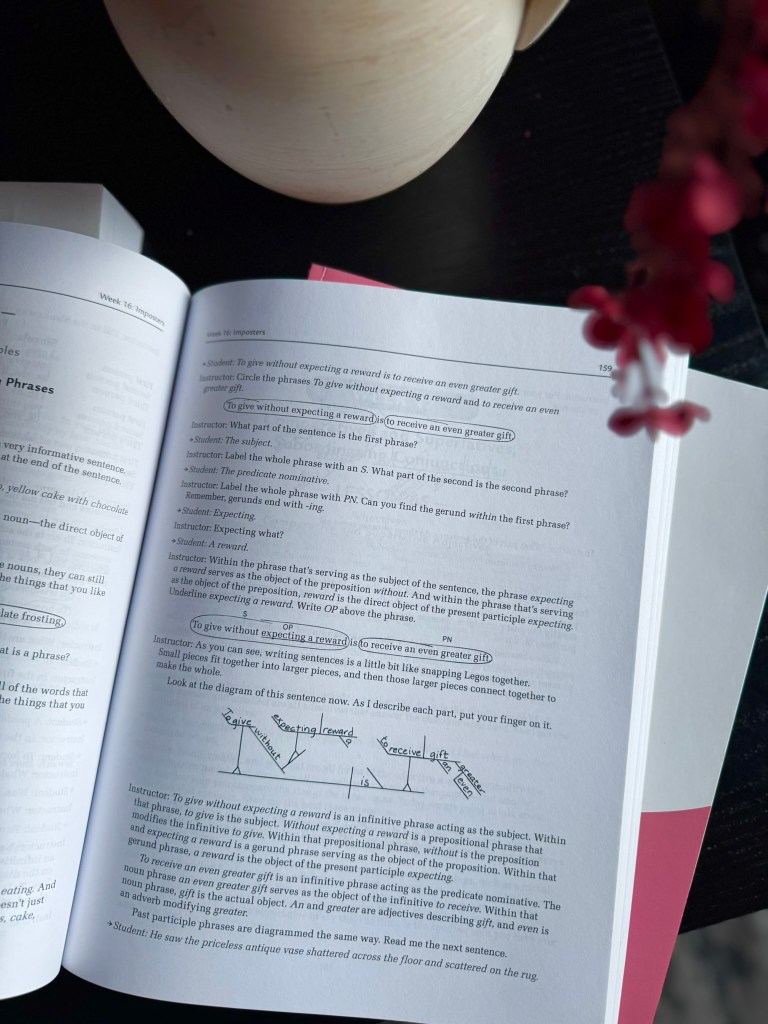
- sentence diagramming
Each time, the work gets more complex—but never overwhelming. The repetition is purposeful, and it actually helps the rules stick.
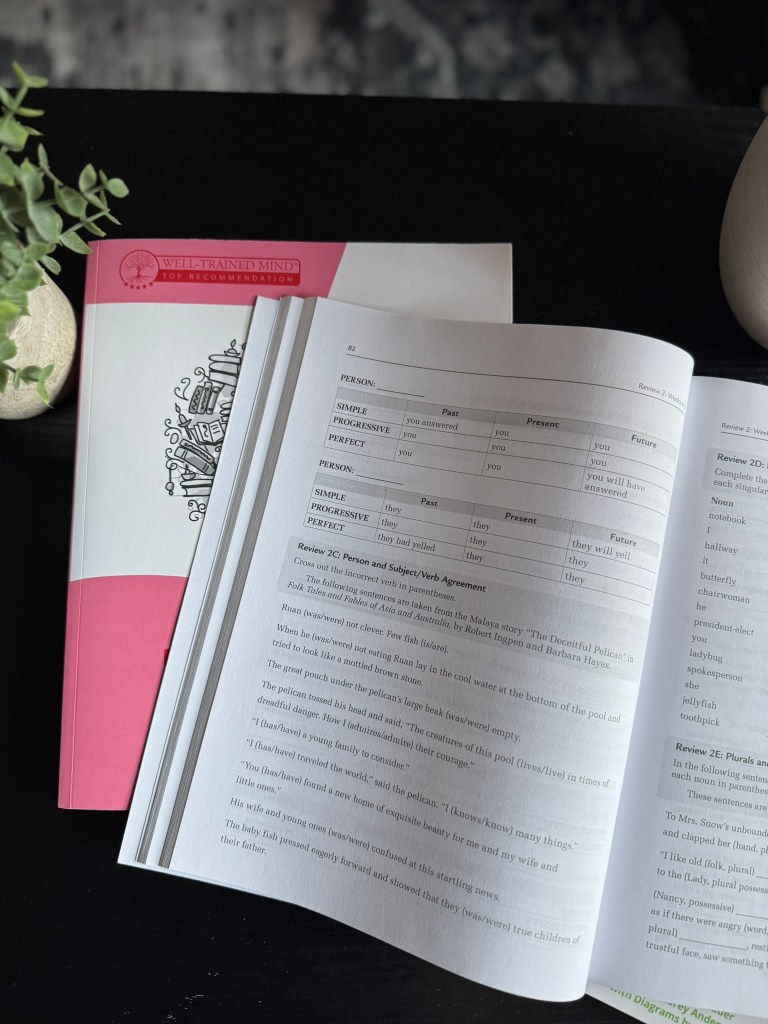
2. It’s Scripted (Which Busy Moms Will Appreciate)
Let’s be honest—most of us don’t have time to prepare grammar lessons.
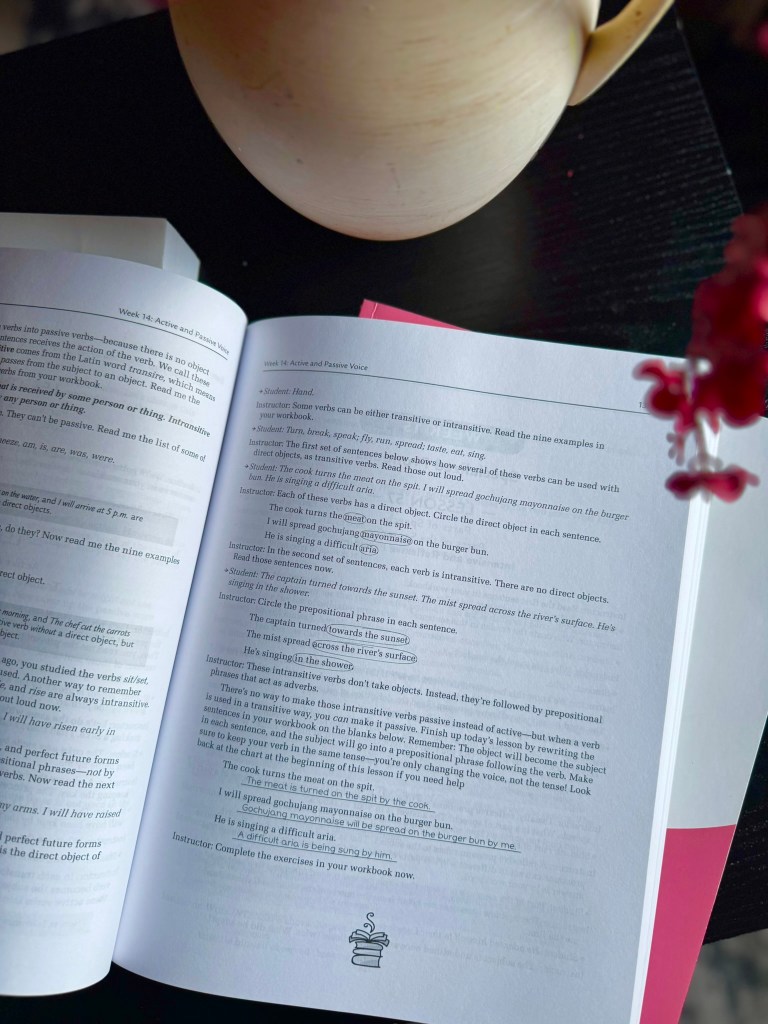
What I love about this program is that it comes with a clear instructor text that tells you:
- what to say
- what to ask
- how to explain each concept
You don’t need a background in English or teaching. You just open the book and go. That alone makes this program worth it for busy homeschool moms juggling multiple kids and subjects.
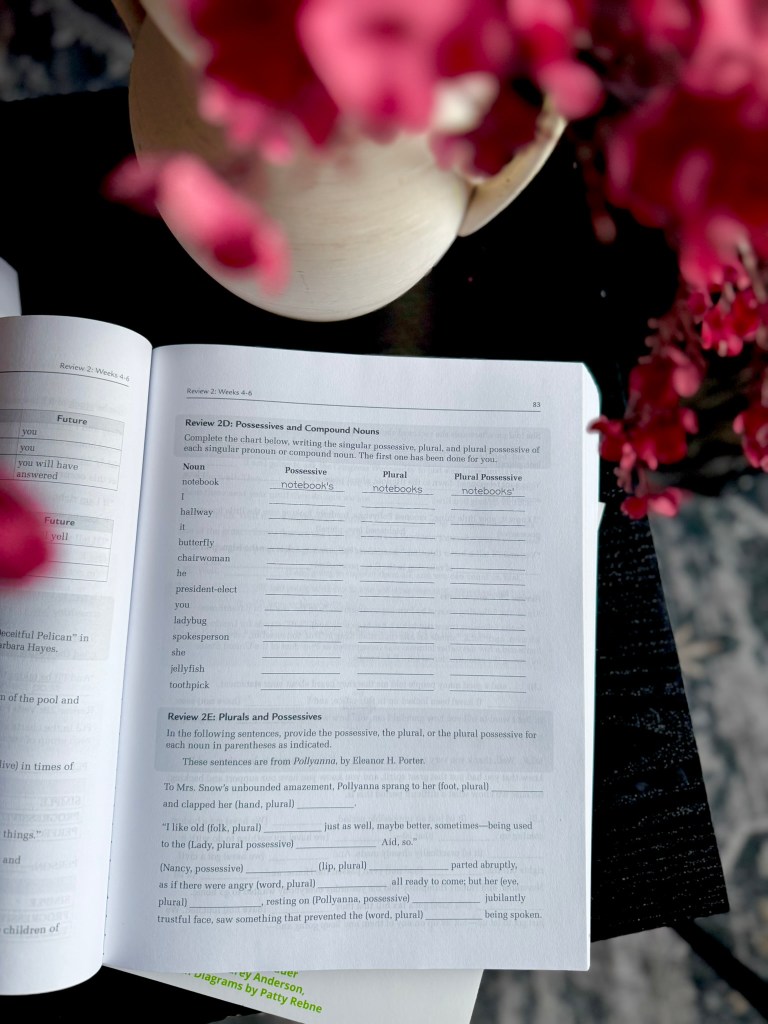
3. It Grows With Your Child
This isn’t a one-and-done grammar workbook.
Because the program is cyclical, it works beautifully for:
- advanced students who need depth
- kids who need extra repetition
- families homeschooling multiple ages
You’re not buying something your child will outgrow in a few months. You’re investing in a grammar foundation that supports them well into high school and beyond.
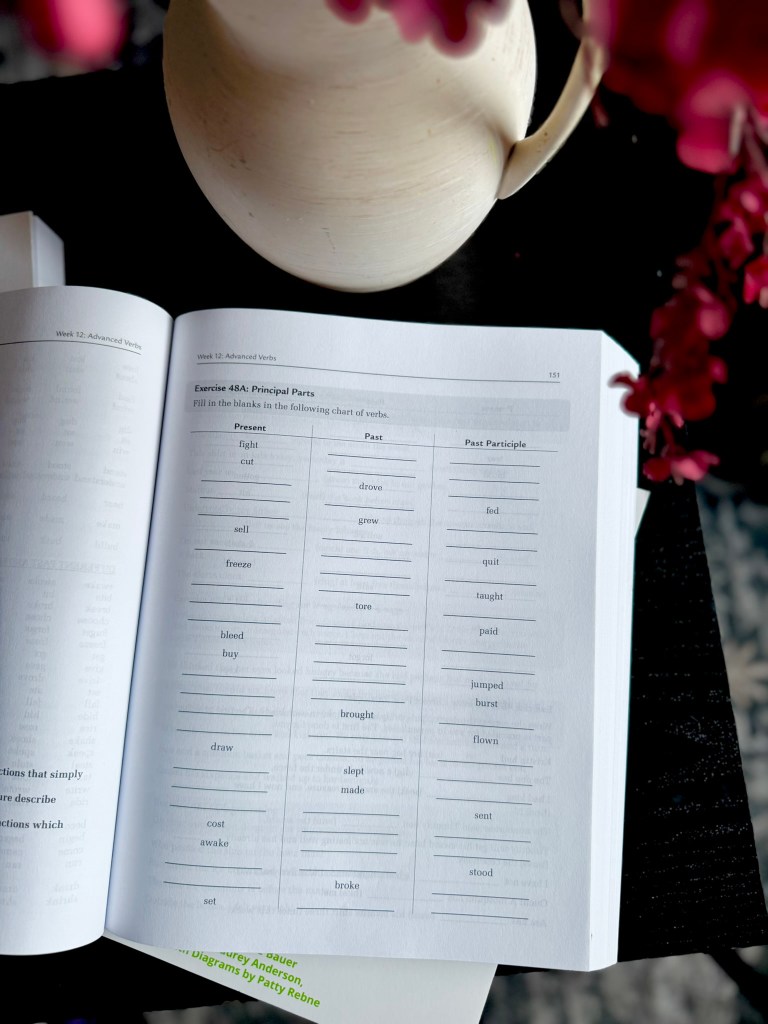
What My Kids Actually Gained From Using It
Here’s the real test—what changed?
Instead of guessing or memorizing rules temporarily, my kids learned how to:
- identify sentence parts confidently
- explain why something is correct
- understand how grammar affects writing
- approach complex sentences without fear
Grammar stopped being a chore and started feeling like a skill they owned—and that’s huge.
Who Grammar for the Well-Trained Mind Is Best For
This program is an especially great fit if you:
- homeschool middle school or high school students
- want strong grammar to support writing
- prefer classical or structured learning
- want something thorough but not flashy
- value long-term mastery over quick wins
It pairs beautifully with writing curricula, literature studies, and even logic programs—but it also stands strong on its own.
Is It Open-and-Go?
Yes—with one small note.
The student workbook is straightforward and easy to use, but the real magic happens when you use it alongside the instructor text. That’s what makes it feel open-and-go and keeps lessons efficient.
If you’ve ever felt unsure how to teach grammar correctly, this program removes that pressure completely
Pros and Cons (Quick Mom Breakdown)
Pros
- Mastery-based and thorough
- Excellent long-term grammar foundation
- Scripted teaching support
- Works across multiple grade levels
- Strengthens writing indirectly
Cons
- Not flashy or game-based
- Best used with instructor guidance
- More rigorous than “light” grammar programs
If you’re looking for something gentle and fun, this might feel intense. But if you want real results, it delivers.
Final Verdict: Is Grammar for the Well-Trained Mind Worth It?
Absolutely—especially if grammar has ever felt like a weak spot in your homeschool.
This is the kind of curriculum that:
- builds confidence
- supports strong writing
- grows with your child
- saves you time as a teacher
It’s not trendy. It’s not cutesy. It’s solid, intentional, and effective—and that’s exactly why I recommend it.
If you’re building a homeschool that values depth, structure, and long-term skills, Grammar for the Well-Trained Mind is one of those resources you’ll never regret owning.
-
Floats McGoats Review: A Logic Board Game Homeschool Moms Actually Use
If you’re always looking for homeschool resources that feel meaningful — not noisy, not disposable, and not busywork — Floats McGoats is one of those quiet wins that sneaks up on you.
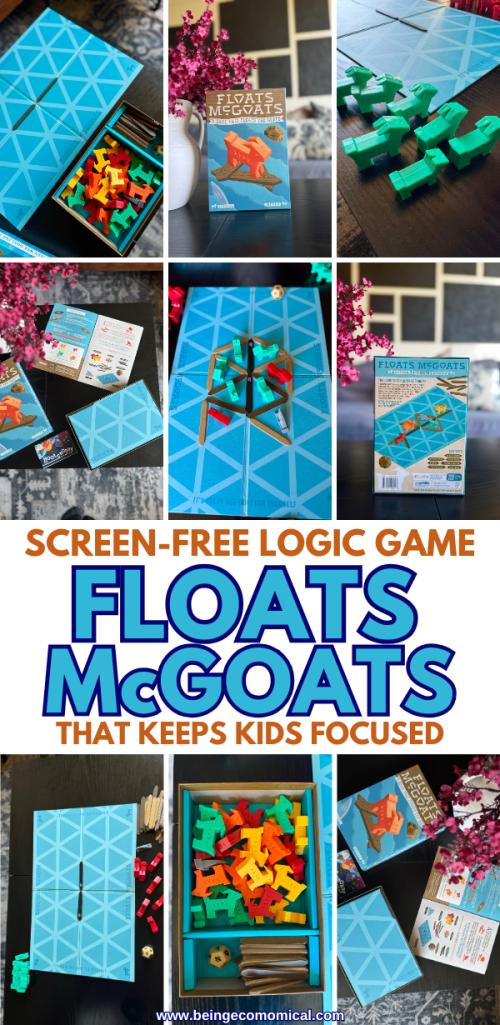
This is the kind of logic board game that doesn’t announce itself loudly, but once it’s in your homeschool, you realize how often you reach for it.
It’s thoughtful, hands-on, and genuinely strengthens the kind of thinking skills our kids need long-term.

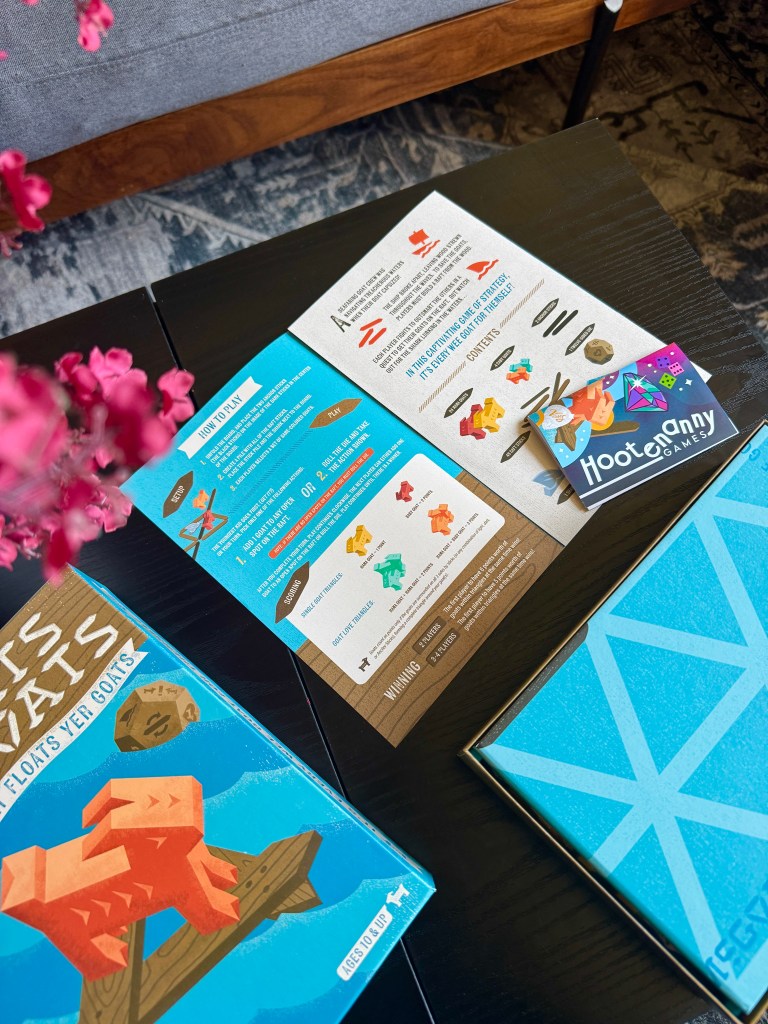
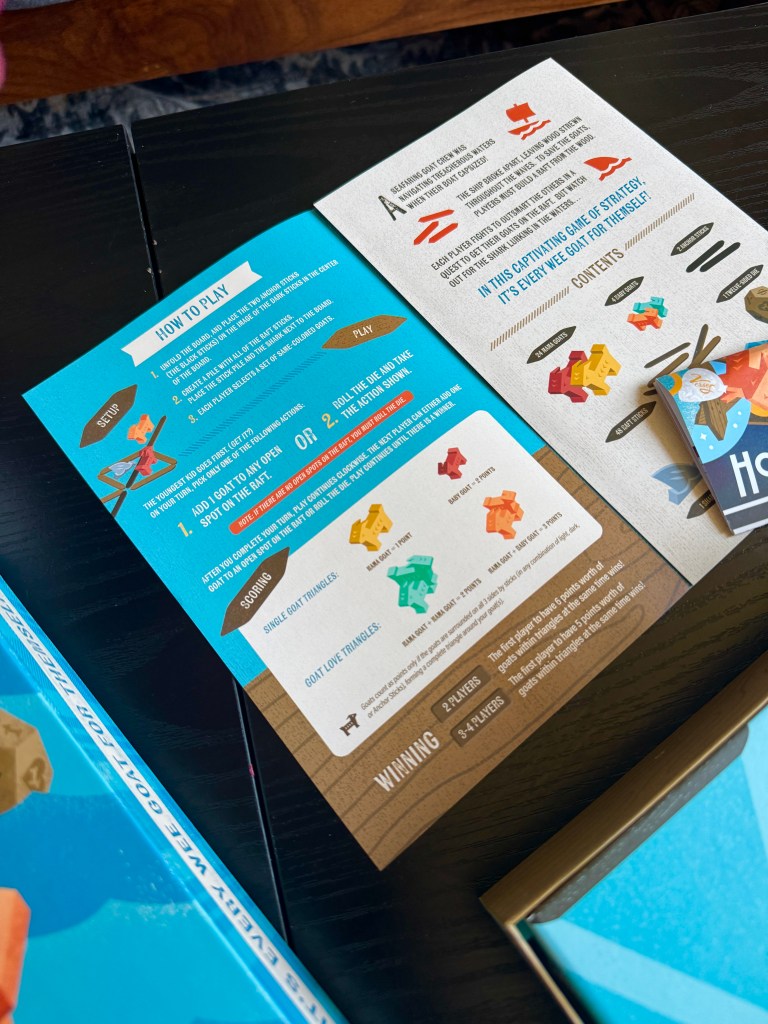
What Is Floats McGoats? (And Why It’s More Than a Game)
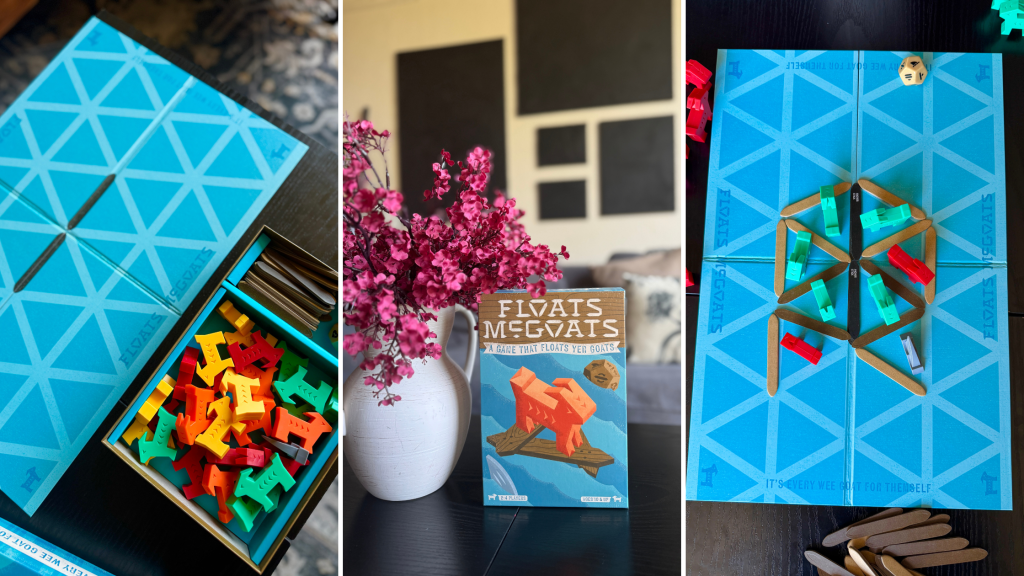
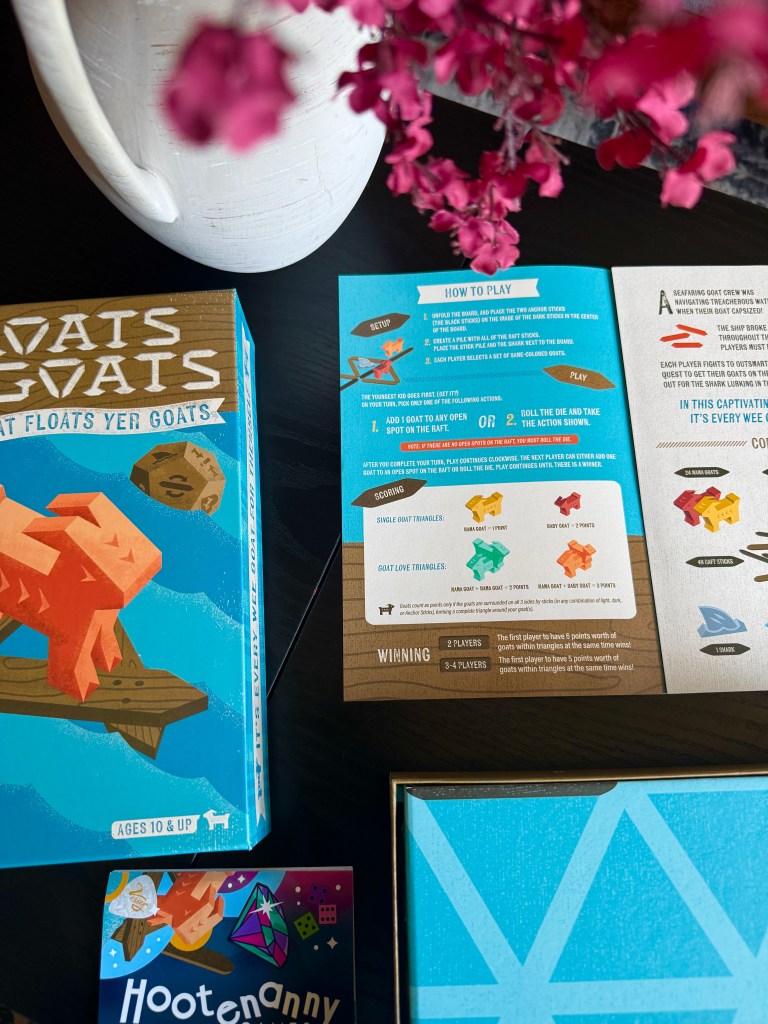
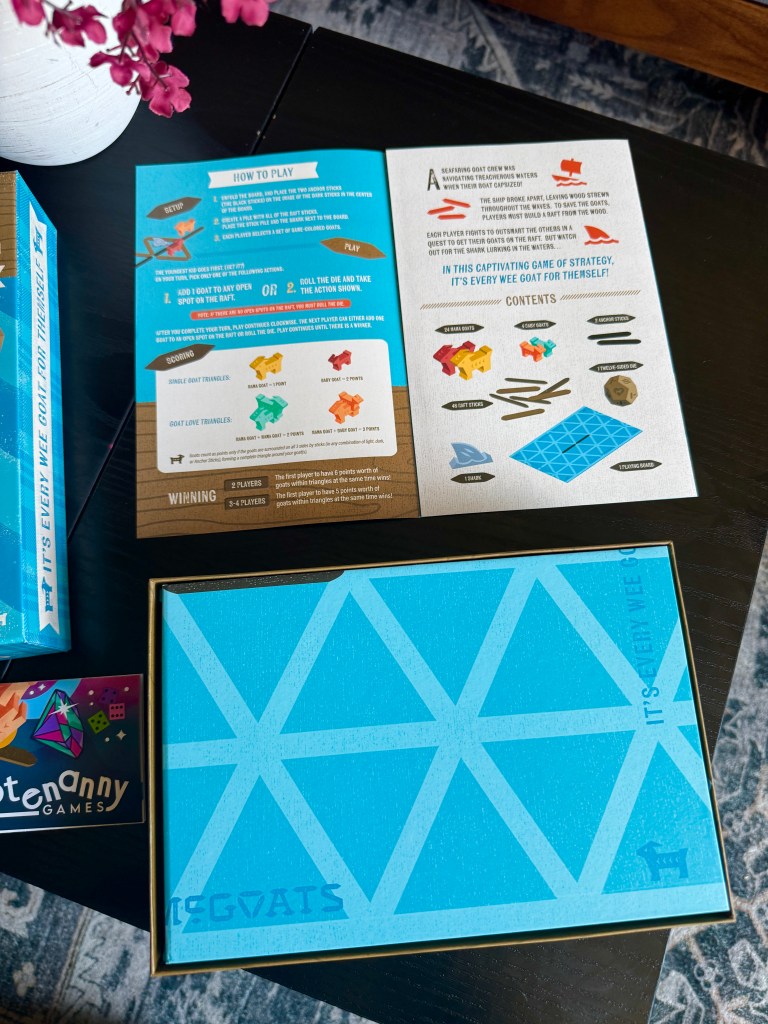
Floats McGoats is a logic puzzle board game designed to challenge kids to help a group of goats safely cross water using floating platforms. Each challenge card presents a unique setup, and there’s only one correct solution.
What looks simple at first quickly turns into real problem-solving. Kids have to think ahead, consider multiple possibilities, and learn from trial and error.
There’s no guessing your way through — the solution requires reasoning, patience, and focus.
From a homeschool perspective, this is gold.

Related Posts:
How Floats McGoats Builds Critical Thinking Skills
One of the reasons this game works so well in a homeschool setting is that it targets how kids think, not just what they know.
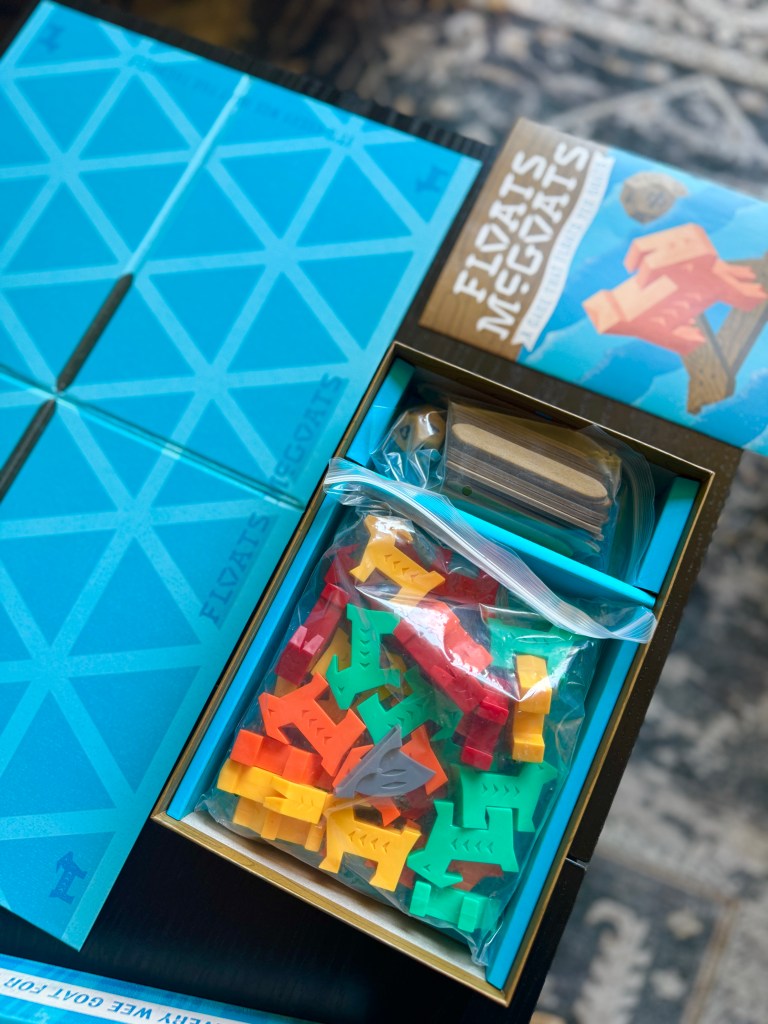


As kids work through the puzzles, they’re developing:
- Logical reasoning
- Spatial awareness
- Sequential thinking
- Perseverance when something doesn’t work right away
These are the same skills that show up later in math, science, engineering, and even coding — but here, they’re built through play instead of worksheets.
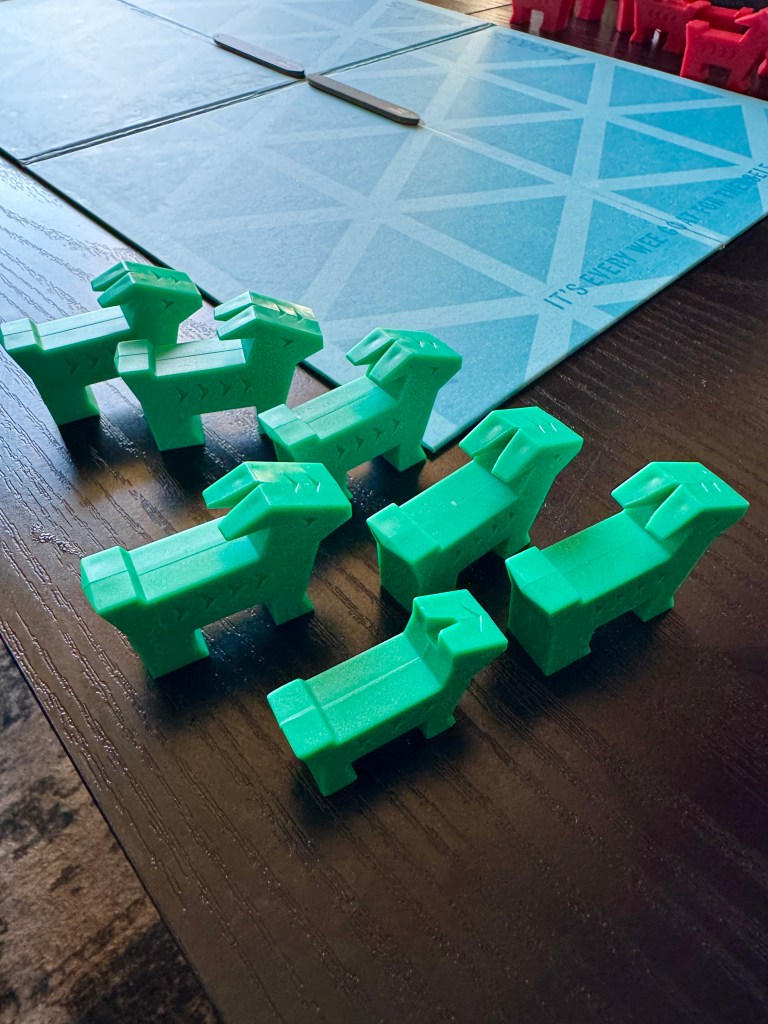


Why Homeschool Moms Love Floats McGoats
What I really appreciate about Floats McGoats is how naturally it fits into our day. There’s no prep, no explanation marathon, and no constant supervision needed. I can set it out during independent work time, and my child stays engaged without me hovering nearby.
It’s also refreshingly calm. The design is inviting without being overstimulating, which makes it perfect for kids who need help slowing down and focusing. On days when attention is low or energy is scattered, this game gently pulls them back in.
Another huge plus is longevity. The challenge cards increase in difficulty, so it grows with your child instead of being mastered in a week and forgotten. When something gets used again and again, it earns its place — and this one does.
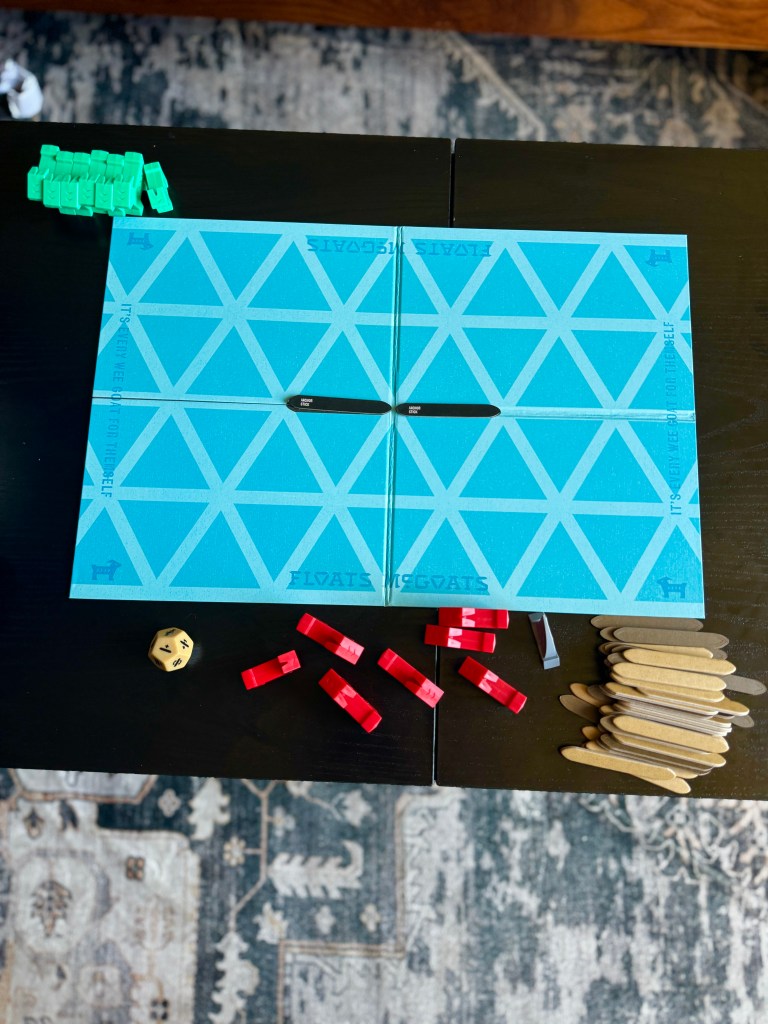
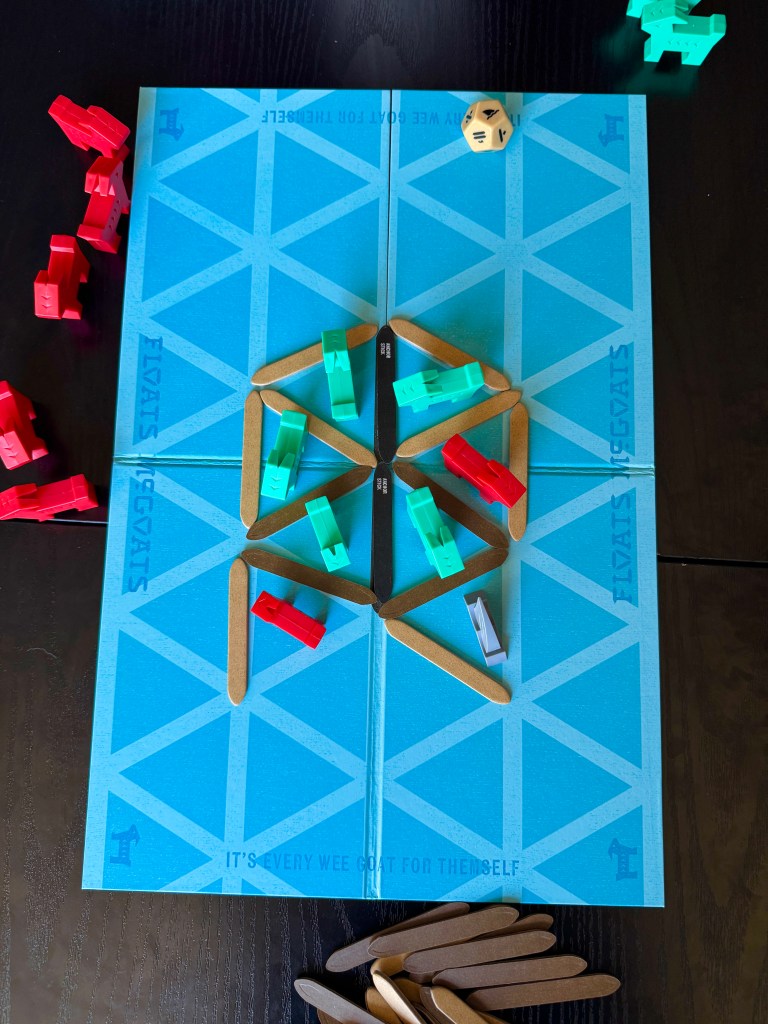

How We Use Floats McGoats in Our Homeschool Routine
In our homeschool, Floats McGoats works beautifully as:
- A logic and critical thinking supplement
- A screen-free quiet-time activity
- A transition tool between heavier subjects
- An independent learning option while I work with another child
It’s especially helpful on those in-between days when you still want learning to happen, but without pushing too hard.

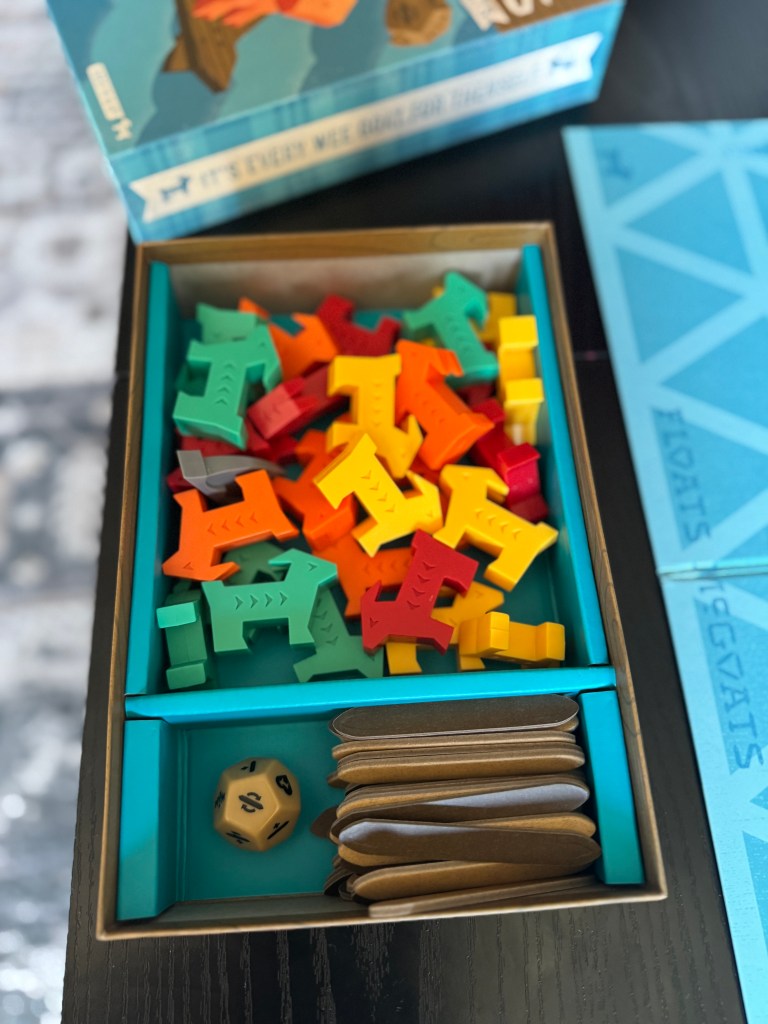
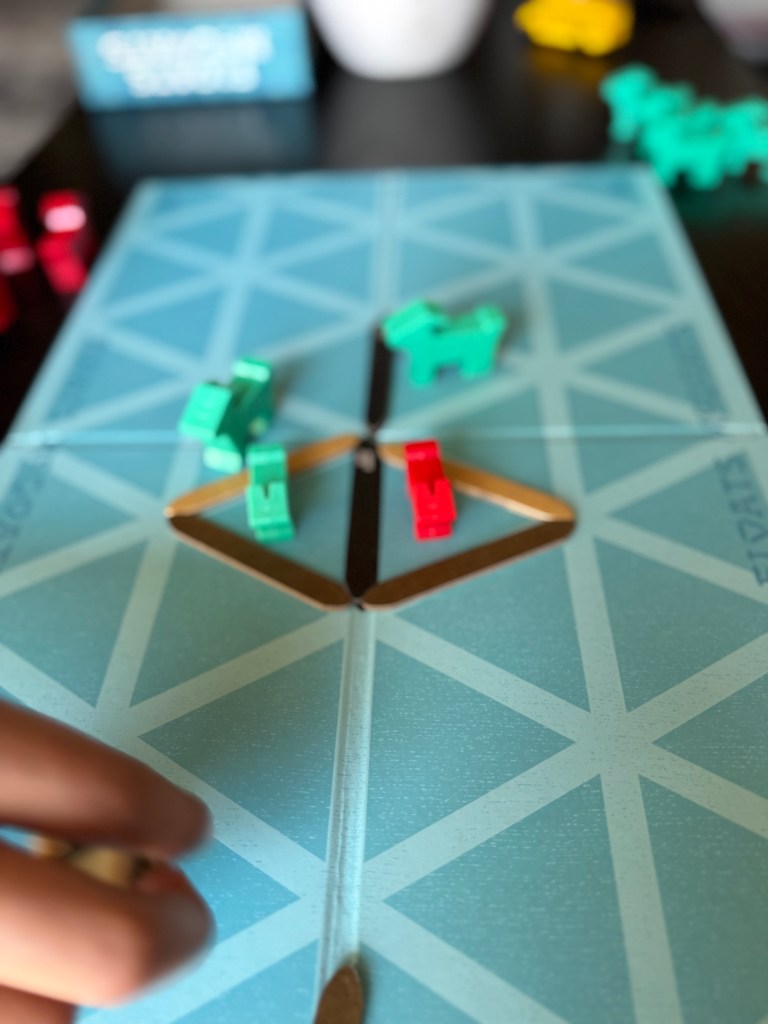
Is Floats McGoats Worth It for Your Homeschool?
If you value screen-free learning, independent problem-solving, and hands-on logic games, then yes — Floats McGoats is absolutely worth adding to your homeschool lineup.
It fits seamlessly into the kind of intentional learning approach Timberdoodle is known for: materials that are well-designed, purposeful, and genuinely supportive of how kids learn best.
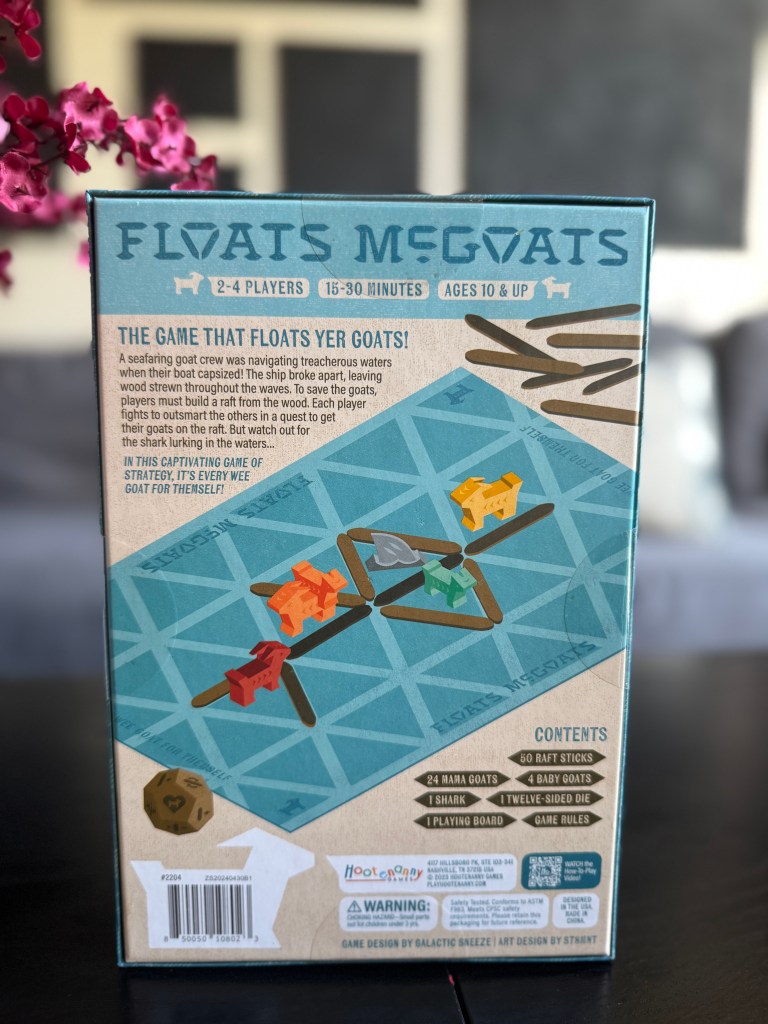
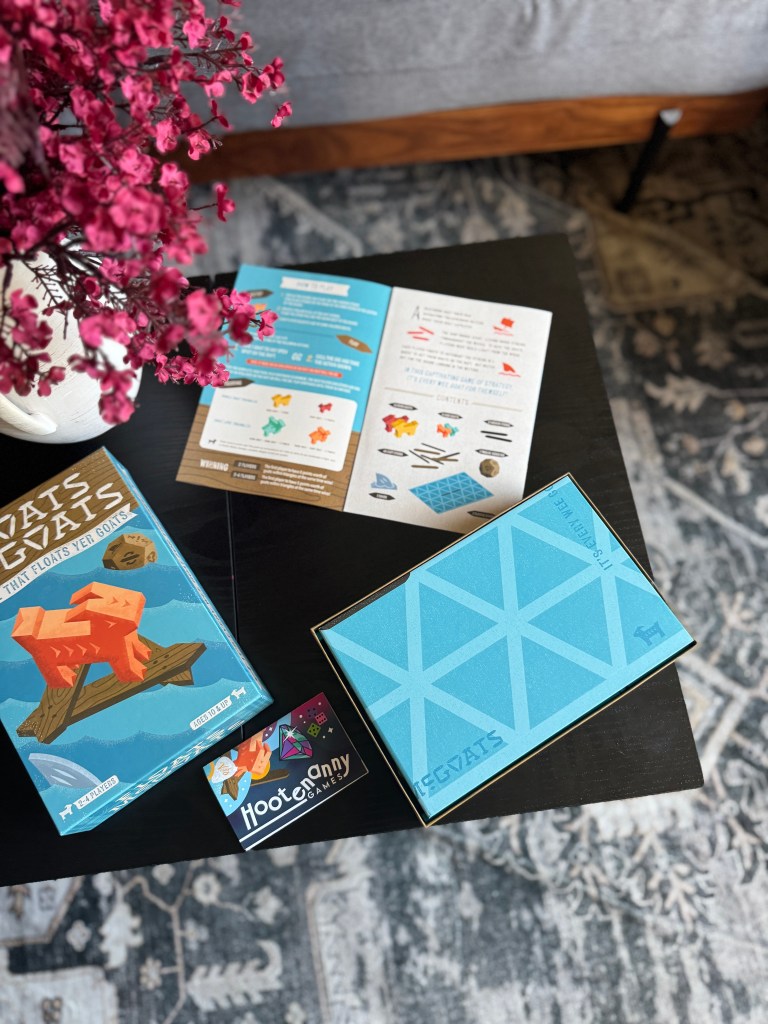
Final Mom-to-Mom Thoughts
Floats McGoats is the kind of homeschool purchase you don’t second-guess.
Your child is learning how to think critically, work through challenges, and trust their problem-solving abilities — all while feeling like they’re just playing a game.
If you’re building a homeschool focused on independence, deep thinking, and calm learning moments, this one deserves a spot on your shelf.





-
Subscribe
Subscribed
Have a WordPress.com account? Log in now.

